TracCloudGuideGlobalBarcode: Difference between revisions
From Redrock Wiki
No edit summary |
No edit summary |
||
| Line 5: | Line 5: | ||
</div> | </div> | ||
<big><b>General Kiosk Login Options / Barcode Scanners</b></big><br><br> | <big><b>General Kiosk Login Options / Barcode Scanners</b></big><br><br> | ||
Barcode Scanners and Magnetic Strip Reads can be utilized in Trac Cloud to allow students to scan their Barcode, ID, etc, to login for their visit. This article goes over some common barcode scanner examples, your barcode scanner may or may not match the formatted described below. | Barcode Scanners and Magnetic Strip Reads can be utilized in Trac Cloud to allow students (or staff for work visits) to scan their Barcode, ID, etc, to login for their visit. This article goes over some common barcode scanner examples, your barcode scanner may or may not match the formatted described below. | ||
<br><br> | <br><br> | ||
If it doesn’t match, or you simply aren’t 100% sure, reach out [mailto:helpdesk@go-redrock.com helpdesk@go-redrock.com] and we’d be happy to assist. | If it doesn’t match, or you simply aren’t 100% sure, reach out [mailto:helpdesk@go-redrock.com helpdesk@go-redrock.com] and we’d be happy to assist. | ||
| Line 13: | Line 13: | ||
<br><br> | <br><br> | ||
<b><i>Program your card scanner to modify the scanned ID</b></i><br> | <b><i>Program your card scanner to modify the scanned ID</b></i><br> | ||
It may be easier to convert IDs on the scanner side of this process rather than TracCloud. If this option is available and the end result matches what is found in | It may be easier to convert IDs on the scanner side of this process rather than TracCloud. If this option is available and the end result matches what is found in users' identification fields, then no changes are needed in TracCloud. | ||
<br><br> | <br><br> | ||
<b><i>Program TracCloud to modify the scanned ID</b></i><br> | <b><i>Program TracCloud to modify the scanned ID</b></i><br> | ||
| Line 19: | Line 19: | ||
<br> | <br> | ||
<i>Other > Other Options > Preferences > General KIOSK Login Options</i> | <i>Other > Other Options > Preferences > General KIOSK Login Options</i> | ||
[[File: | [[File:6009807.png|800px]] | ||
<br><br> | <br><br> | ||
* <b>Barcode Detection Formula</b> | * <b>Barcode Detection Formula</b> | ||
::If the format of the entered text matches this formula, the Barcode Adjust logic will be used. The asterisk is a wildcard, so in the example above, we’re saying “if the value entered on the log listing starts with a semi-colon and ends with a question mark, it’s a barcode scan, and we should apply the Barcode Adjust script.” The barcode field will only be used on login if the barcode detection formula recognizes the input as a barcode. Conversely, if the barcode detection formula recognizes an input as a barcode, only the barcode field will be checked.<br><br> | ::If the format of the entered text matches this formula, the Barcode Adjust logic will be used. The asterisk is a wildcard, so in the example above, we’re saying “if the value entered on the kiosk/log listing starts with a semi-colon and ends with a question mark, it’s a barcode scan, and we should apply the Barcode Adjust script.” The barcode field will only be used on login if the barcode detection formula recognizes the input as a barcode. Conversely, if the barcode detection formula recognizes an input as a barcode, only the barcode field will be checked.<br><br> | ||
* <b>Barcode Adjust</b> | * <b>Barcode Adjust</b> | ||
::Transforms the text from the barcode scanner into something that matches the student barcode | ::Transforms the text from the barcode scanner into something that matches the student barcode or staff username/other ID.<br><br> | ||
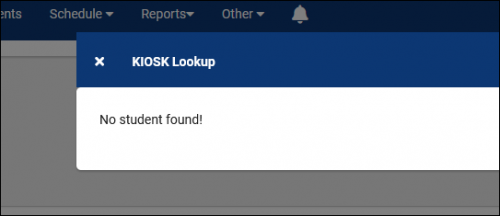
* <b>KIOSK No student found message</b> | * <b>KIOSK No student found message</b> | ||
| Line 35: | Line 35: | ||
==Configuring your Barcode Scanner== | ==Configuring your Barcode Scanner== | ||
Start by scanning a | Start by scanning a user’s ID into a document on your computer. This will show you what the formatting of the ID will be, then you can start deciding what adjustments need to be made.<br><br> | ||
For the examples below, the | For the examples below, the user’s ID is 1931. | ||
<hr> | <hr> | ||
{| class="wikitable" | {| class="wikitable" | ||
Revision as of 14:07, 12 April 2024
General Kiosk Login Options / Barcode Scanners
Barcode Scanners and Magnetic Strip Reads can be utilized in Trac Cloud to allow students (or staff for work visits) to scan their Barcode, ID, etc, to login for their visit. This article goes over some common barcode scanner examples, your barcode scanner may or may not match the formatted described below.
If it doesn’t match, or you simply aren’t 100% sure, reach out helpdesk@go-redrock.com and we’d be happy to assist.
What scanners are compatible with TracCloud?
Scanners are input devices, just like keyboards. Any scanner should work fine, but may require some editing to convert the data into something usable.
Program your card scanner to modify the scanned ID
It may be easier to convert IDs on the scanner side of this process rather than TracCloud. If this option is available and the end result matches what is found in users' identification fields, then no changes are needed in TracCloud.
Program TracCloud to modify the scanned ID
If reprogramming the scanner isn’t an option or you would rather leave it as-is, you can have TracCloud handle the conversion for you.
Other > Other Options > Preferences > General KIOSK Login Options

- Barcode Detection Formula
- If the format of the entered text matches this formula, the Barcode Adjust logic will be used. The asterisk is a wildcard, so in the example above, we’re saying “if the value entered on the kiosk/log listing starts with a semi-colon and ends with a question mark, it’s a barcode scan, and we should apply the Barcode Adjust script.” The barcode field will only be used on login if the barcode detection formula recognizes the input as a barcode. Conversely, if the barcode detection formula recognizes an input as a barcode, only the barcode field will be checked.
- If the format of the entered text matches this formula, the Barcode Adjust logic will be used. The asterisk is a wildcard, so in the example above, we’re saying “if the value entered on the kiosk/log listing starts with a semi-colon and ends with a question mark, it’s a barcode scan, and we should apply the Barcode Adjust script.” The barcode field will only be used on login if the barcode detection formula recognizes the input as a barcode. Conversely, if the barcode detection formula recognizes an input as a barcode, only the barcode field will be checked.
- Barcode Adjust
- Transforms the text from the barcode scanner into something that matches the student barcode or staff username/other ID.
- Transforms the text from the barcode scanner into something that matches the student barcode or staff username/other ID.
- KIOSK No student found message
- The message displayed when a student isn’t found.

- Auto log out of a single center
- If checked, the "Log out of center" prompt on Kiosks or the Log Listing will automatically continue if that is the only option available. This should be enabled if you plan on utilizing a touchless kiosk environment where students scan their ID and are not expected to fill out any additional information.
- If checked, the "Log out of center" prompt on Kiosks or the Log Listing will automatically continue if that is the only option available. This should be enabled if you plan on utilizing a touchless kiosk environment where students scan their ID and are not expected to fill out any additional information.
Configuring your Barcode Scanner
Start by scanning a user’s ID into a document on your computer. This will show you what the formatting of the ID will be, then you can start deciding what adjustments need to be made.
For the examples below, the user’s ID is 1931.
| Barcode Scanner Contents | Barcode Detection Formula | Barcode Adjust |
|---|---|---|
| ABCDEF1931 | {#scan#}='ABCDEF*' | {#WORD:{#scan#}:2:'ABCDEF'#} |
In this example, we want to remove a static string of characters from the left side.
The Detection Formula recognized a barcode scan because it starts with the string of characters we want to remove. The Adjust script says “Get the second word in the string, delimited by “ABCDEF.” The result is “ABCDEF1931” turning into just “1931.”
| ;1931000000? | {#scan#}=';*?' | {#SUBSTR:{#scan#}:1:4#} |
In this scan, we’re unable to use any character as a delimiter, so we need to count out the characters we actually need with a Substring script.
The Adjust script is taking the scan, starting at character 1 and taking the following 4 characters. This is 0-based, so “0” would be the semicolon in the example scan.
| ;ROBERTCENTER000001931? | {#scan#}=';*?' | {#trim:{#WORD:{#scan#}:2:'CENTER'#}:'?'#} |
There are several factors to consider for this example, so we'll combine our Trim and Word functions to grab what we need. The Adjust script is taking the scan, getting the second half delimited by the word "Center" and the Trim function is cutting out the last question mark. We're left with 000001931, a valid ID.
| 1931 | N/A | N/A |
No changes needed.