TracCloud: Student Lists
From Redrock Wiki
(Redirected from TracCloud: Student Lists)
Lists are used to group an arbitrary selection of students together. These lists can be used for a variety of reasons, from simply viewing a set of students, to sending mass emails, running reports, or even limiting a permission group’s student listing access to only a certain population of students. If you want to make a student stand out on the log listing or student listing, assigning them to a watch list is a great way to accomplish this. There are three types of lists in TracCloud, detailed below.
Static List
- Static lists are managed manually. If an individual student or a set of students need to be added or removed from a list, they will need to be added/removed by a user with the appropriate permissions. Max appointment rules can also be configured to add students to lists automatically, more information on these rules here.
- Static lists are managed manually. If an individual student or a set of students need to be added or removed from a list, they will need to be added/removed by a user with the appropriate permissions. Max appointment rules can also be configured to add students to lists automatically, more information on these rules here.
Dynamic List
- Dynamic lists are updated automatically based on a student search. For example, you can search for all students with a major of X and a class of Y, and a dynamic list created based on that search will keep itself up to date as that search result changes overtime. You can even base a dynamic list on a student search for other custom lists.
- Dynamic lists are updated automatically based on a student search. For example, you can search for all students with a major of X and a class of Y, and a dynamic list created based on that search will keep itself up to date as that search result changes overtime. You can even base a dynamic list on a student search for other custom lists.
Watch Lists
- A watch list can be based on any custom list, static or dynamic, and adds an indicator next to the student's name in a few different locations to make them stand out compared to students not on a watch list. These otherwise share the same functionality as the custom list they're linked to.
- A watch list can be based on any custom list, static or dynamic, and adds an indicator next to the student's name in a few different locations to make them stand out compared to students not on a watch list. These otherwise share the same functionality as the custom list they're linked to.
In order for a user to view or edit a student list, the list must be assigned to their permission group. It's also worth keeping in mind that only SysAdmins are allowed to create lists in the first place.
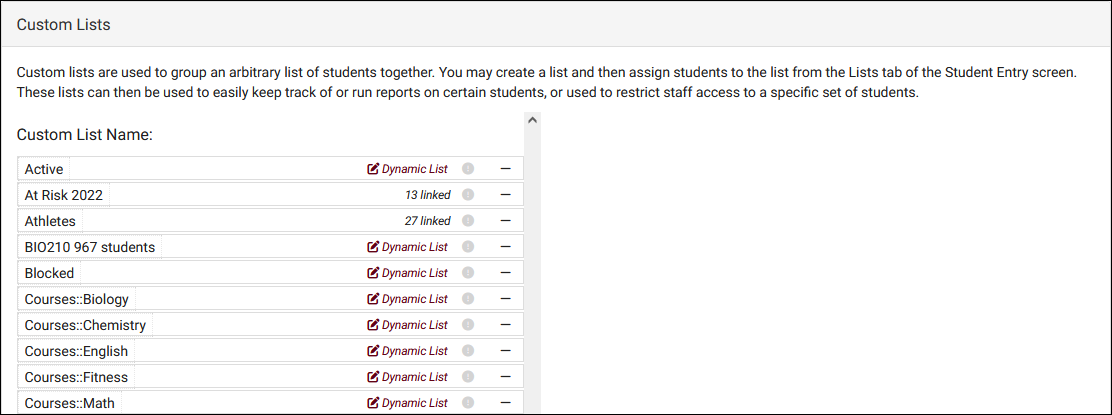
Within your global preferences, you will find the "Custom Lists" menu. This allows you to view the custom lists that have been created in your Trac System, which can be renamed, deactivated ("!" button), or deleted if needed. Deactivated lists no longer appear on the student list/reports, but can be reactivated later if needed. A new custom list can be created by clicking the + icon, only static lists can be created from this menu. For existing dynamic lists, you can view or edit the query by clicking the button.
Other > Other Options > Preferences > Custom Lists
Managing lists directly from the student listing is also possible and provides you the ability to create dynamic lists as well, which allow you to have an always-up-to-date list of students for any purpose.
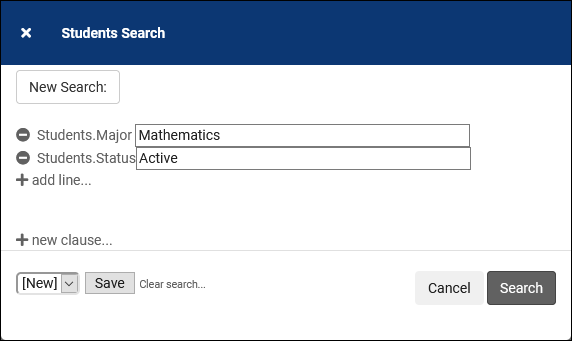
Before creating a list, you will almost always start with a search. This can be any search, from entering a student's name in the search bar, to power searches, and even utilizing the "Show These Students" options using the registrations or visits listing as a source. As an example, the power search in the screenshot below would show all students with a Major of “Mathematics” and a status of “Active."
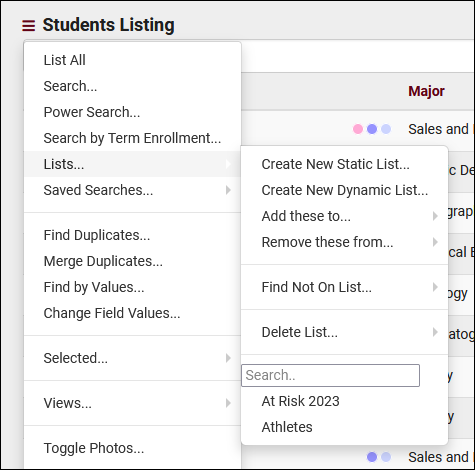
After you've reached the search results page, click on the hamburger icon > Lists, where you will find the following options.
- Create New Static List
- This will create a new static list and assign all students from your current search to itself. This list will not be updated automatically going forward. You will be prompted to enter a name for the list on selection.
- This will create a new static list and assign all students from your current search to itself. This list will not be updated automatically going forward. You will be prompted to enter a name for the list on selection.
- Create New Dynamic List
- This will create a new dynamic list based on your last search (e.g., Major and Status), and will keep itself up to date going forward based on that search. If a student changes majors, they will be removed, if a new student is imported with this major, they will be added, etc. You will be prompted to enter a name for the list on selection.
- This will create a new dynamic list based on your last search (e.g., Major and Status), and will keep itself up to date going forward based on that search. If a student changes majors, they will be removed, if a new student is imported with this major, they will be added, etc. You will be prompted to enter a name for the list on selection.
- Add these to...
- This allows you to quickly add your current selection of students to an existing static list.
- This allows you to quickly add your current selection of students to an existing static list.
- Remove these from...
- This allows you to quickly remove your current selection of students from an existing static list.
- This allows you to quickly remove your current selection of students from an existing static list.
- Find Not On List...
- This will further filter your selection of students by those who are not on another list (static or dynamic).
- This will further filter your selection of students by those who are not on another list (static or dynamic).
- Delete List...
- This allows you to quickly delete a list from your system.
- This allows you to quickly delete a list from your system.
Beneath these options you will also see all other lists that you have access to. Clicking a list will immediately display those students.
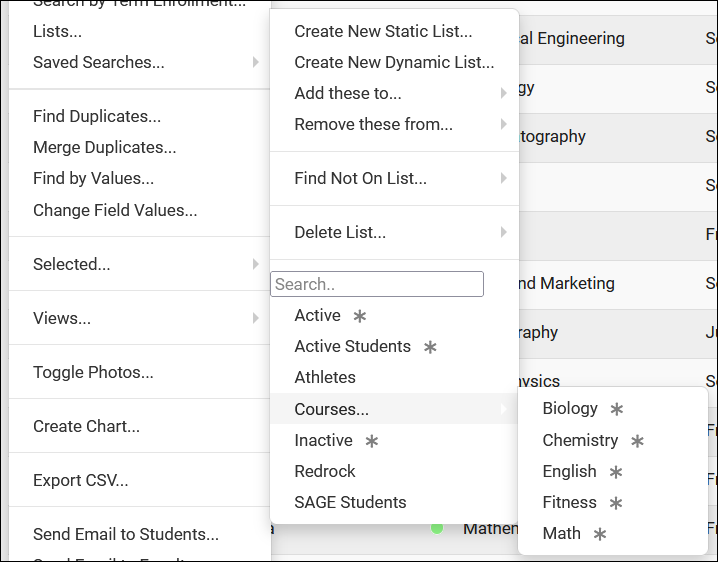
Lists can be grouped into categories for further organization. The name of your list should be in the format of Category::List Name. See example below.
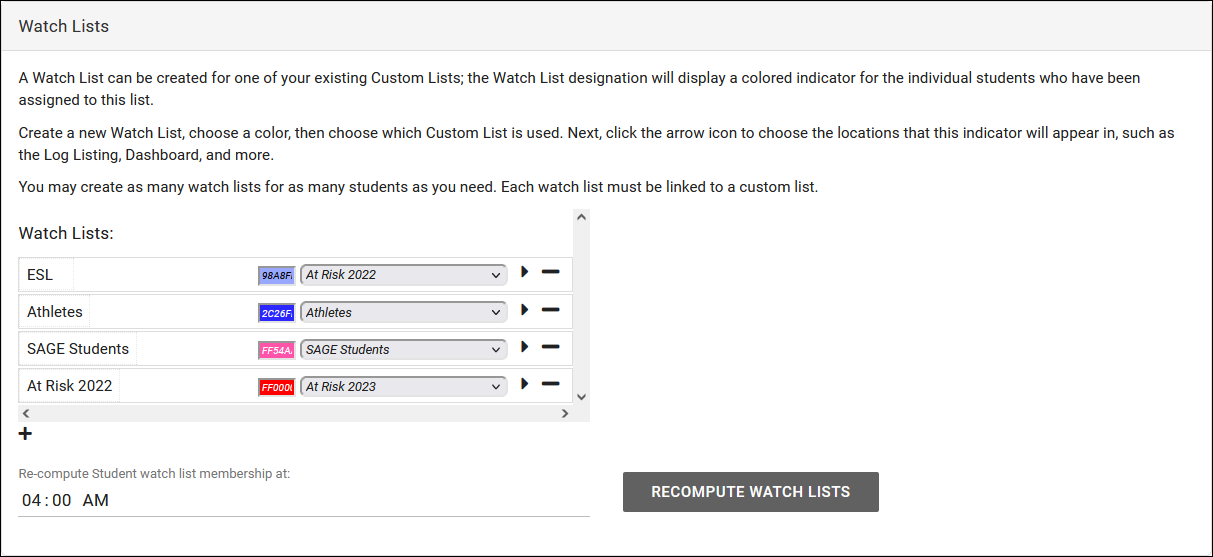
To create a new watch list indicator, head over to your global preferences, select "Watch Lists," and click the + icon. This will add a new watch list, clicking on the name lets you rename it, selecting the colored box lets you change the indicator color, and the box next to that determines which custom list this watch list is assigned to. After you’ve given it a name, color, and list, select the right-arrow to control where these indicators appear. Watch list indicator icons refresh daily at 4am, which can be changed here as well if needed.
Other > Other Options > Preferences > Watch Lists
Watch List Indicator Locations
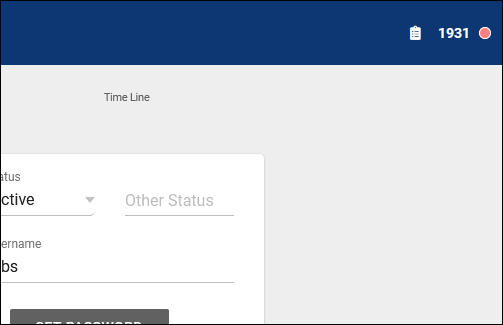
The watch list indicator can be configured to display in various locations throughout the Trac System. Hovering over the indicator also provides the list name.
- Display on Log In/Out
- Displays in the upper-right corner of the login/logout process on the log listing.
- Display on Entry
- Display on Listing
- Displays the indicator on the student listing.

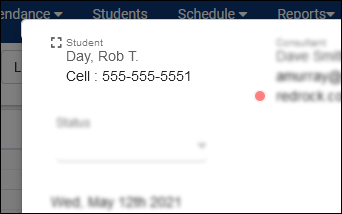
- Display on Appointment
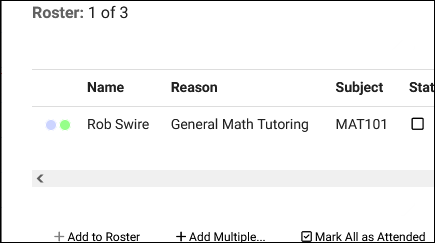
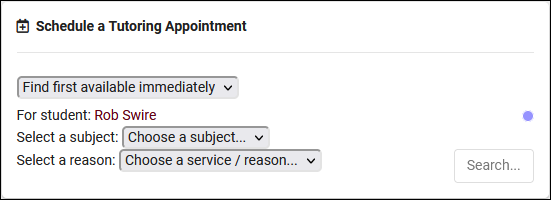
- This makes the indicator visible during availability searches as a staff member, within appointment entry windows, and in group rosters.
- Display on Dashboard
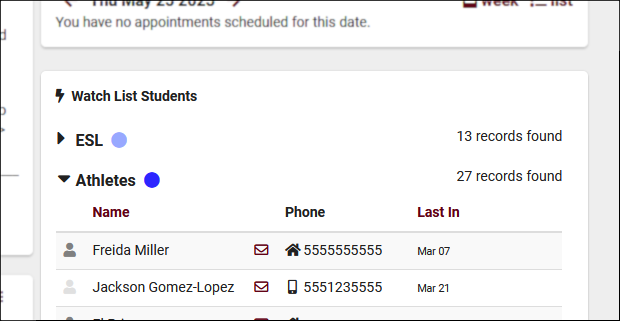
- This will allow the list to be visible from the staff dashboard, within the “Watch List Students” box. Requires "Show the Watch Lists on Main Menu" to be enabled in the staff member's linked permission group.
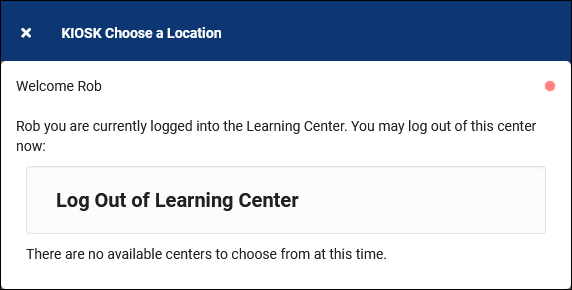
- Display on KIOSK login/out
- Displays in the upper-right corner of the login/logout process on the kiosk.

See Also
