TracCloud: Email Templates
From Redrock Wiki
(Redirected from TracCloud: Email Templates)
Email templates allow you to configure pre-written emails that can be easily accessed and modified when needed. These could be used for standard messages that would be frequently sent to students. Maybe a Getting Started guide, a Birthday greeting, or the contents of a notification.
An Automation folder will exist by default, this is used for Notification emails specifically. Additional folders can be manually created as needed.
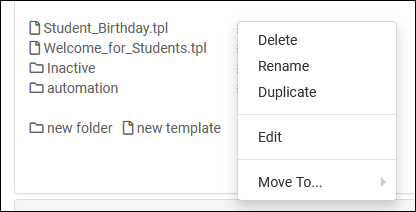
To create new Email Template, click on New Template. Templates can also be organized into different folders if preferred.
- Delete
- Delete the selected template. This cannot be undone, only delete the template if you’re absolutely sure you won’t be using it anymore.
- Delete the selected template. This cannot be undone, only delete the template if you’re absolutely sure you won’t be using it anymore.
- Rename
- Rename the template.
- Rename the template.
- Duplicate
- Duplicates the template, allowing you to make changes to separate version without affecting the original.
- Duplicates the template, allowing you to make changes to separate version without affecting the original.
- Move to…
- Allows you to move the template into a different folder.
- Allows you to move the template into a different folder.
- Edit
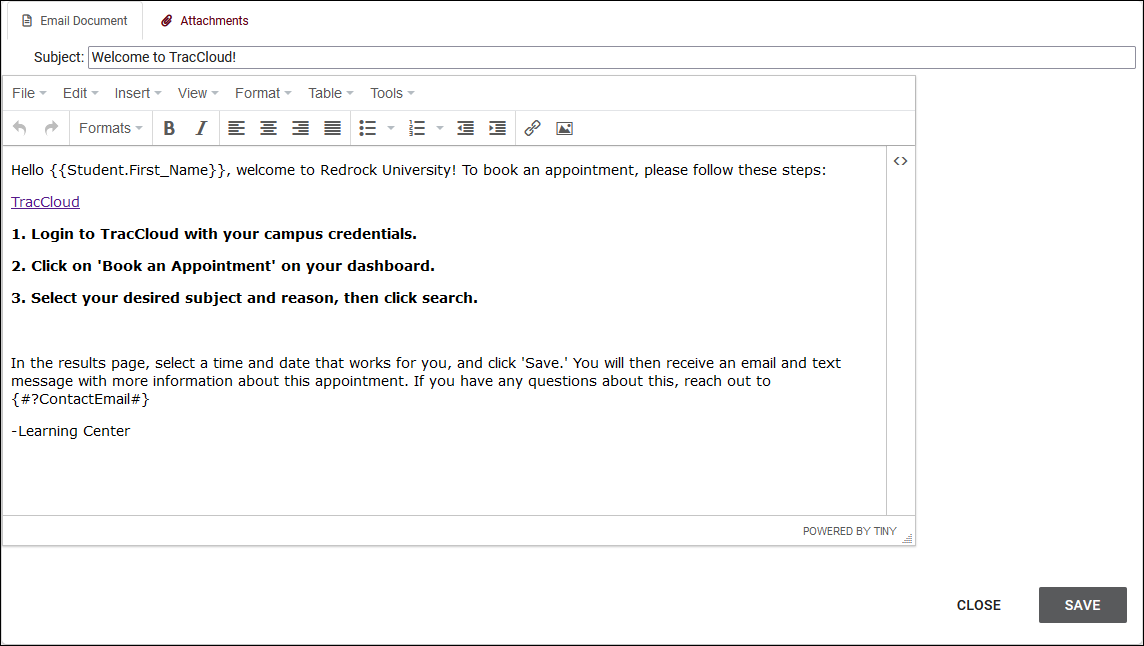
- Takes you to the template editor, as seen below.
- Takes you to the template editor, as seen below.
When creating your template, you can write out your text, adjust formatting with the tools along the top, and even attach files.
Additional tags can also be used for different purposes.
- {#?FIELD#}
- This allows you to prompt a piece of text to be replaced when the template is used. As an example, let’s say your campus closes on certain days each month, but it’s not consistent enough to include in the template. In this case, let’s use a tag like this: {#?ClosureDates#}
- The actual text can say whatever you’d like, as long as it’s within {#?____#}.

- When the email is being sent, a prompt will appear requesting that the field contents are specified.

- Clicking “Replace Tags” replaces the tags in the email body with the text we entered. We can then make further modifications to the email as needed.

- Twig
- Twig tags are also supported, allowing you to pull student information automatically. For example, you could start your email template with “Hello, {{Student.First_Name}}!” which will become “Hello, Dave!” when the email is sent to a student named “Dave.” A list of available Twig tags can be found by clicking the <> button on the right-side of the text editor. More information on these tags can be found in our Twig Guide.
Using an Email Template
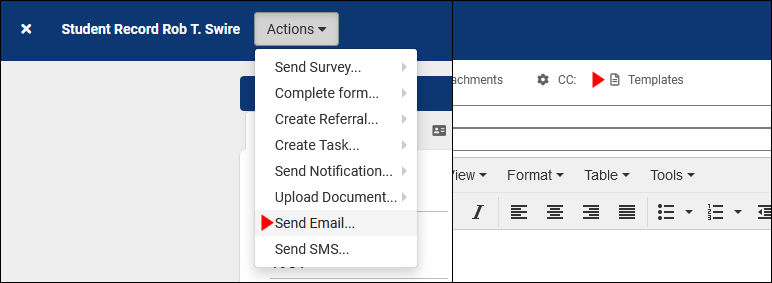
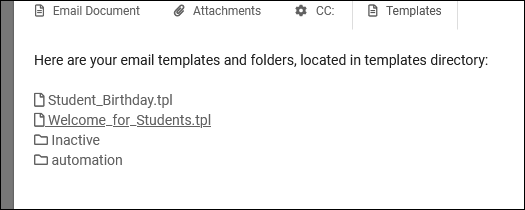
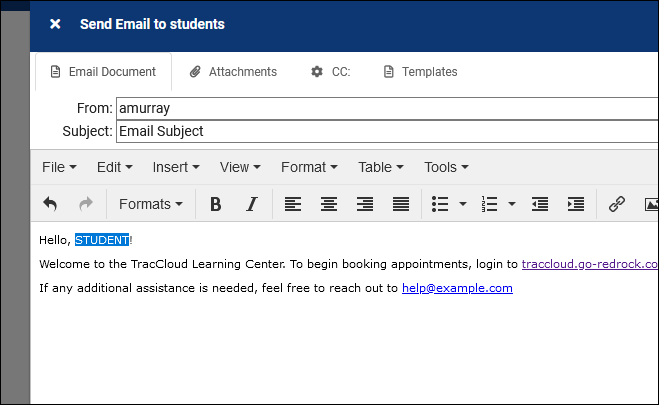
Once you have your email template ready, you can find it within the “Templates” tab when sending emails to students.
Select the template you want to use, make any needed adjustments (such as the student’s name in this example), then send the email.
See Also
- Notification Types - Uses email templates to generate emails.

