TracCloud: Staff and Consultants
From Redrock Wiki
(Redirected from TracCloud: Staff and Consultants)
This tab is where you will find your staff/consultants that have been assigned to this profile. From this view, we can see the staff names, the centers and group they’re assigned to, and what type of staff member they are (consultant or regular staff).
For a complete list of staff rather than just those assigned to this profile, go to Other ➜ Listings ➜ Staff.

Creating a Staff Account
To create a new staff member, click on the hamburger button, then select “New Staff Member.”


- First/Last Name
- The staff member's name. This will display on the staff schedule and in reports. This can also display to students if alias is disabled.
- Username
- This is the username that this staff member will use to login (or for SSO authentication). Coordinate with your IT and/or Redrock Software to determine what your username format should be (e.g., ID number, email address, etc).
- Other ID
- This is the alternate ID of this staff member, can be used for searches or staff work visits.
- Hired / Terminated & Reason
- Hired/Termination dates as well as the reason for termination can be recorded for reference if needed. This does not affect their access in TracCloud.
- Staff Bio Confirmed & Confirmed Date / Time
- When and if this staff member has completed the confirm bio prompt. More information on Confirm Bio can be found here.
- Pronouns
- This staff member's preferred pronouns, this information can be shared with students via Twig tags in emails or in Staff Bio on Search Availability.
- Sort Code on KIOSK Login / Scheduler (A-Z)
- During visit login/logout or on the staff schedule, where a list of consultants are shown, the results will be sorted alphabetically by last name. You can enter text in this field to override this. For example, Hans Zimmer would typically be at the very end of the list, but if you enter "AAA" in this field, they would be displayed towards the very top instead. The opposite is also true, you can enter "ZZZ" for Dave Anderson to push him towards the bottom of the list.
- Staff BIO
- A written bio of this staff account. Can be displayed to students, more information.
- Inactive
- We don’t recommend deleting records in TracCloud, as this will also disconnect them from related records (Visits, Appointments, etc). Instead, we recommend deactivating the account by checking this box. This will hide them from view and prevent them from logging into TracCloud, but the record and related data remains available if needed, for historical reporting or later reactivation.
- Title or Position
- This staff member's position title for reference if needed. This does not affect TracCloud functionality.
- Supervisor
- This person's assigned supervisor will be able to view their mentorship communications and asynchronous appointments from the dashboard.
- User Level
- The user level determines some baseline rules for what this staff member can and can’t access. More information.
- Default Center
- This is the primary center the staff member is assigned to. Also determines which profile's "Staff & Consultants" list they appear in.
- Permission Group
- The permission group that this staff is assigned to. More information.
- Linked Centers
- This is where you can assign staff members to different centers in TracCloud. A center must be assigned here for a consultant to have availabilities in or be assigned to visits for that center.
- Notes
- An optional field for any notes that you may want to record relating to this staff member.
- Consultant
- If this checkbox is selected, this staff member will be made an available option on the schedule and allows them to be linked to visits. Additional consultant-specific options also become available, as detailed below.
- Alias
- An alternate name that will appear when searching for appointments. Requires the “Display consultant alias on availability search” option to be enabled in your Profile Scheduling Prefs.
- Online Link
- If remote appointments are held via online conferencing platforms (Zoom, Webex, etc), each of your consultants can have a unique invite link defined in their profile. When a URL is placed here, and their availability is set the online meeting type, the URL entered in this field will appear in the available location choices.
- Fund
- This is used as the consultant's assigned fund, if applicable. More information on funds and payroll features in general can be found here.
- Pay Code
- This consultant’s pay code will determine their pay rate when running payroll reports. More information.
- Max Hours
- Can be used to limit the number of hours this staff member can be booked in a certain range of days, even if they have open availabilities on their calendar. This requires setting up a corresponding max appointment rule, more information here.
- Location
- The Location option assigned here will display as an option when creating availabilities on this consultant’s schedule.
- Do not show on schedule
- If checked, this consultant will not show up on the schedule.
- Course List of Specialties
- The course list selected here determines which subjects this consultant can assist with. More information on creating and managing course lists can be found here.
- Block these Students
- Any students selected here will not be allowed to find this consultant's availabilities or book appointments with them.
- Accommodations
- These are the skills/accommodations that this consultant can assist with. For example, if accommodations are used to specify a preferred language, you could select the languages this consultant can assist with here.
- KIOSK
- If the “KIOSK” checkbox is selected, the account is heavily restricted and many fields are removed. Kiosk accounts can login and select a Kiosk to open, and nothing else. Normal staff members can open kiosks as well, but this can be useful if you need to create a generic account to share with other people to open kiosks in your center.
- Mentor
- Designates this staff account as a "Mentor" account. Click here to learn more about this feature.
Contact & Other Data
This tab contains contact information, address, and custom fields for staff. The icon indicates whether or not they're opted into text alerts.

Certifications & Work Plans
This menu allows you to view and manage this consultant’s certifications (e.g., CLRA, ACTP, etc). New certifications can be created by selecting the hamburger menu ➜ New Certification, which will take you to an empty form to fill out. More information on Work Plans can be found in its own article here.

You can additionally import certifications from the ACTP Tutor Trainer Tracker using the button at the bottom of the screenshot above.

Reason Specialties
This tab allows you to specify which reasons this consultant is assigned to. If a student or staff searches for availabilities with a reason that the consultant isn't assigned to, they won't appear in the search results, similar to section specialties (course lists).

Timeline
The staff timeline functions similarly to the student timeline, showing a history of their related records. Visits, appointments, tasks, document uploads, etc.

Staff Listing
To view a list of all staff accounts in TracCloud across all profiles, go to Other ➜ Listings ➜ Staff.

Staff records can be duplicated by clicking the button. This will copy group, user level, default center, linked centers, consultant status, course list (generic course lists only, per-consultant course lists will not be copied), reason specialties, and accommodations to a new staff record and prompt you to replace unique information such as name, address, etc.

Hamburger Menu
Every listing page in TracCloud features a hamburger menu with utilities to search for or interact with your list of records. Some of these options are specific to to certain listings and record types, others are shared. The following list includes definitions for the hamburger menu options available on this listing and how they can be utilized.

- List All
- This option will show all records on the current listing. Some listings have an additional toggle for only showing active records, such as the student and registration listing, which will override a List All search if checked.
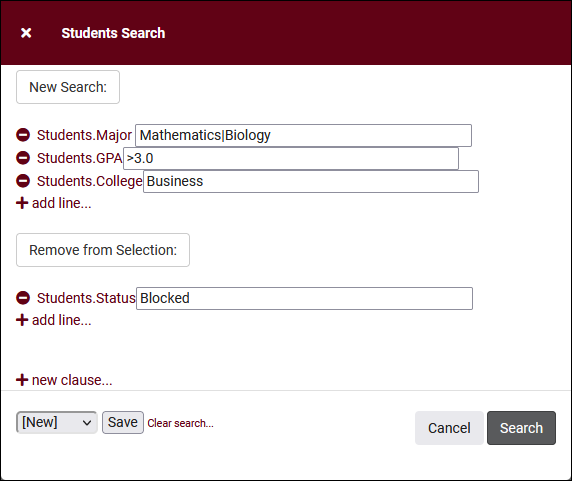
- Power Search
- This option provides a simple but powerful search utility to find the records you need. String together multiple searches, adding or removing results for each. Use Search Symbols to include ranges of data, and Save Searches for later use if needed. The search term 'blankornull' can be used to find all records with a value of nothing ("") or null ().

- Saved Searches
- See Saved Searches for more information.
- Selected...
- The Selection Tool offers several options to filter and manage your records. More information on this feature can be found in its own dedicated article here.
- Change Field Values
- This utility allows you to make modifications in to your records in bulk. Similar to the Merge Duplicates utility, we highly recommend coordinating with Redrock Support directly on this setting.
- Views
- See Views for more information.
- Batch Create Certifications/Work Visits & Batch Activate/Deactivate
- Allows you to create these Staff-specific records in bulk, or change the activation status of many staff members at once.
- Export CSV
- Export current listing contents to a CSV file.
- Send Email
- Allows you to send an email directly to a list of users.
- Allows you to print the contents of the current listing, by extension this also allows you to export the current list as a PDF file.
- Create Task
- Allows you to send a task to the current student list. More information.
- New <Record>
- Allows you to create a new record based on your selected listing.