| When you login to the Trac System, you’re presented with your main menu window in the center of the screen where you have a handful of tabs available, including the welcome message and a few utilities. We can add an additional custom tab here, to provide more information on a topic that doesn't necessarily need to be included in the welcome message. Each user type of your Trac System (Users, Faculty, Consultants, and Students) can have a unique custom tab alongside the standard welcome message.

Creating a Custom Tab
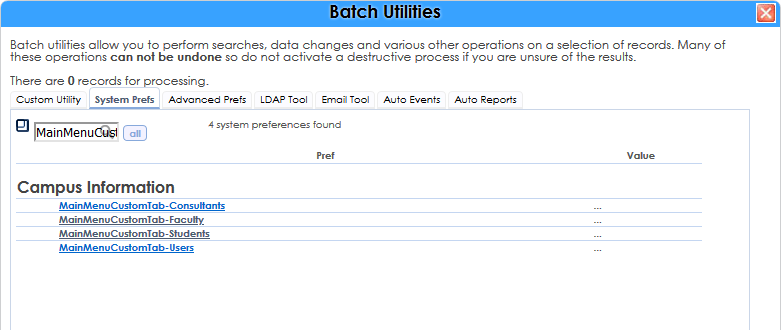
To create a custom tab, go to Trac Navigation > Trac Man icon > Utilities and Prefs > System Prefs > Search for “MainMenuCustom”. Select the preference corresponding to the user group you want to create it for.

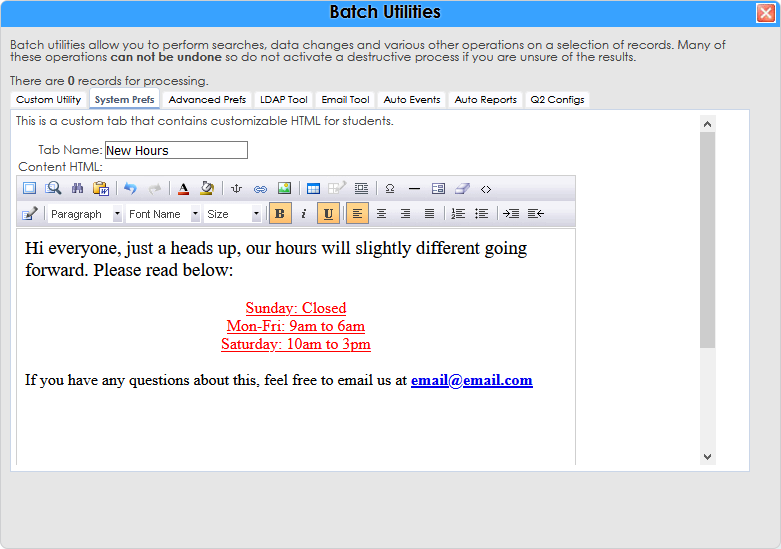
Once open, you’ll be given access to a WYSIWYG text editor. You can embed images, modify fonts, add hyperlinks, or add some light HTML elements.
The name of the tab can be modified in the box above the text editor.

Once you’ve written your custom tab contents, click save, and you’re all set. That user group will now see that tab on their home screen.
The Result
If you're a SysAdmin and you want to see how the message looks for your faculty, consultants, or students. You can use the Login as User utility to login to any account in the Trac System to see it from their point of view. More information on this process can be found here.

|