Logo
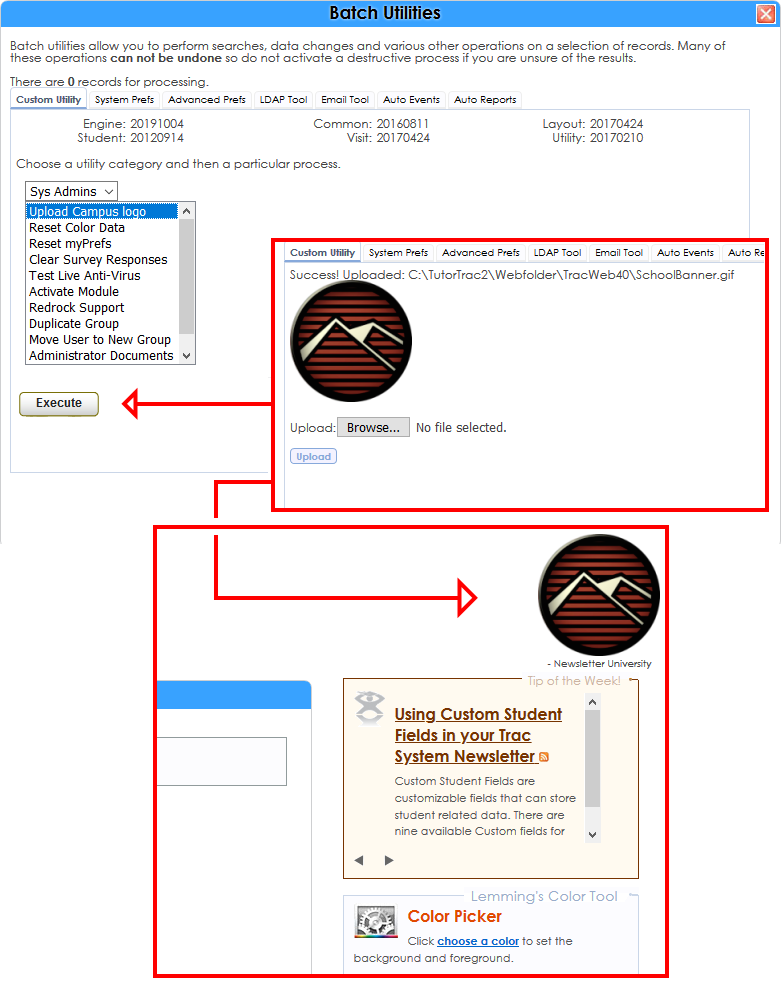
The easiest way to upload your school logo is by going to Trac Navigation > Trac Man icon > Utilities and Prefs > Custom Utility > Sys Admins > Upload Campus Logo. Click "Execute", and upload your logo.
You can also manually upload a logo by placing an image named “SchoolBanner” using the .gif file format in "C:\*Trac\Webfolder\TracWeb40\". If your Trac System is installed on a mac, the location is likely "HD:Applications:Trac:Webfolder:TracWeb40" instead.
The recommended logo size is 350x75, the one in the screenshot below is 122x122 for reference.

School Name
Your campus name appears just below the logo in the top-right corner of the Trac System. To change this, go to Trac Navigation > Trac Man icon > Utilities and Prefs > Advanced Prefs > "CampusName". Type your school’s name into the data box, then click save.
The other name below the logo is your center profile name. This is found in Trac Navigation > Search Glass icon > Center Profiles > [Your Center] > Center Profile Name.

Trac System Colors
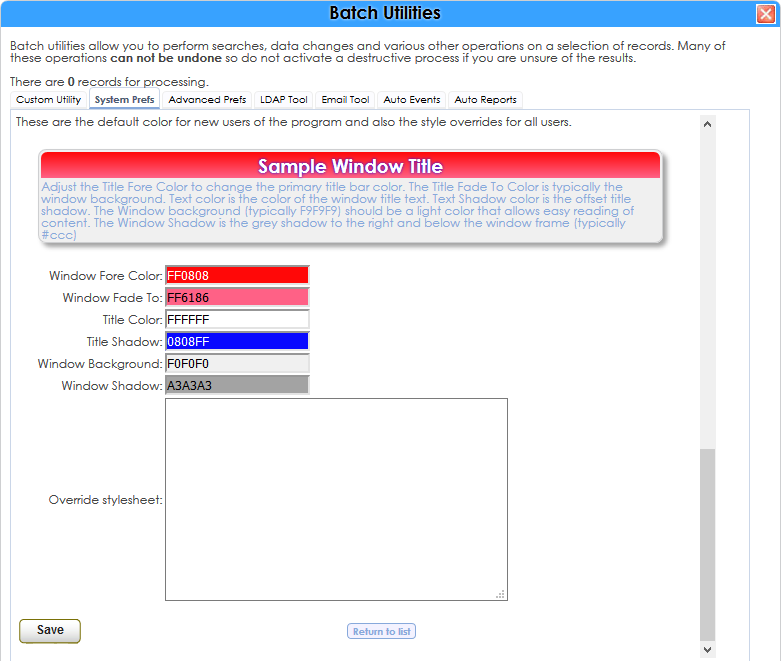
This menu allows you to modify the colors of your Trac System. Title-bars, window backgrounds, text, and more. It also shows you a preview of the changes so you know exactly what it will look like.
Trac Navigation > Trac Man icon > Utilities and Prefs > System Prefs > "CampusColorData"

|