TracCloud: Recording Visits: Difference between revisions
From Redrock Wiki
No edit summary |
No edit summary |
||
| Line 1: | Line 1: | ||
{{TracCloudGuideTabs}} | {{TracCloudGuideTabs}} | ||
<div class="tcWidgetPage"> | <div class="tcWidgetPage"> | ||
<div class=" | <div class="categoryWide"> | ||
{{TracCloudGuideBasicsTOC}} | {{TracCloudGuideBasicsTOC}} | ||
</div> | </div> | ||
Revision as of 23:04, 15 May 2024
Getting Started / Basics
Recording Visits
Student Visits allow you to record when your students met with consultants. There are several options available for creating these visits, including real-time options like the Log Listing or Kiosk, used by staff and students respectively. Quick Visits can be used to create visits from scratch, and Batch Visits provides several tools for recording visits in bulk. There are even automated options for online appointments or when a staff mark appointments as attended manually.
This article will be going over the different options available and how you can utilize them for your system. This portion of our guide will not be covering work visits, for more information on those, take a look at our payroll tracking article.
The Log Listing can be used by staff members to log students into or out of your center, or to review who is currently logged in with on-going visits. If wait time is being tracked, this page would also be used to manage visit statuses and coordinate which consultants will be assigned to their visits.
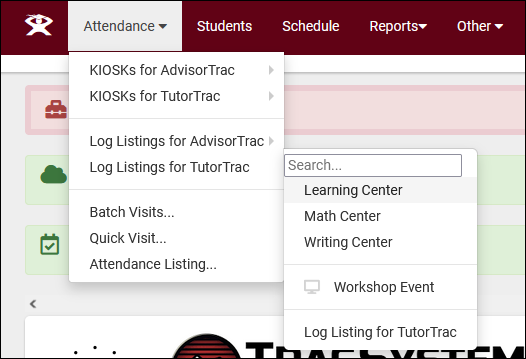
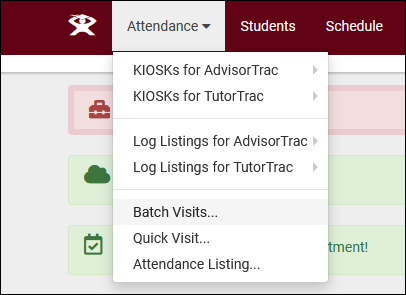
The Log Listing can be accessed by going to the Attendance tab in your navigation bar, as seen in the screenshot below. The available choices are split up into 3 groups.
- Center Log Listing
- When you create a new center, both a kiosk and a log listing will be made available by default, unless specifically disabled in the center OR if your system only allows custom kiosks to be used. Students who are logged in on these log listings will have their visits assigned to the selected center.
- Custom Kiosks
- In addition to the default center kiosks, you can also create custom kiosks, which are already linked to a specific center/consultant/reason/etc. These are frequently used for workshops or SI events, but they can be utilized for any visit tracking where a field needs to be predefined.
- Log Listing for [Profile]
- This option operates similarly to standard center kiosks/log listings, except it includes all centers that your permission group has access to. When logging a student in on this type of log listing, the first question you will be asked is what center you want to log the student into.
After you’ve reached the log listing page, you can view the students who are currently logged in. The button can be used to sort the log listing by other fields. To log another student in, begin typing their ID, name, or scan their barcode into the box in the center of your screen.
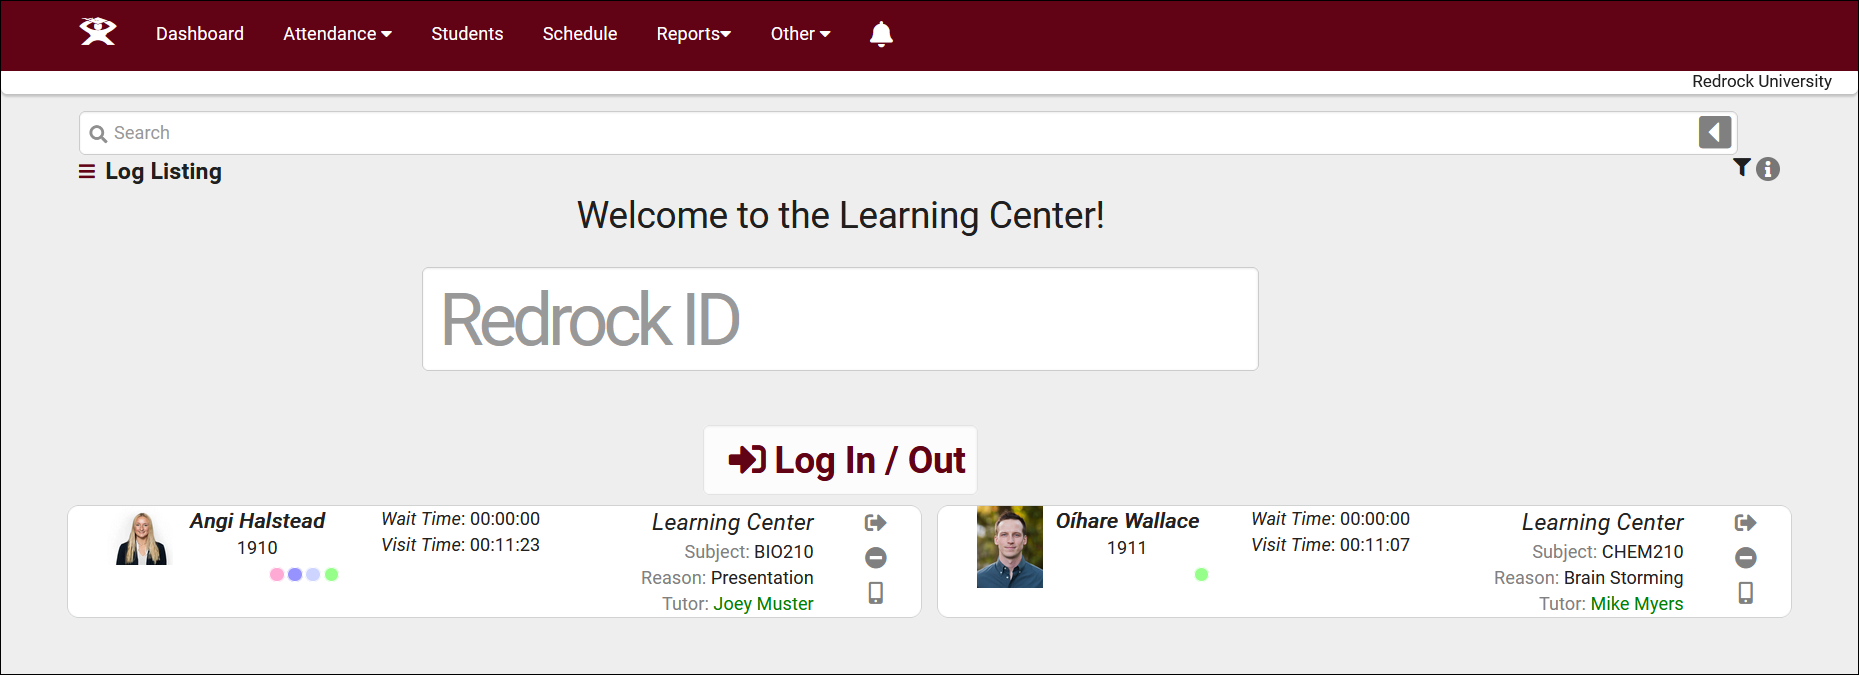
After pressing enter or clicking on Log In / Out, you will be prompted to choose a consultant, subject, and/or reason for the visit depending on which fields are enabled in your profile. Additionally, custom questions can be configured to appear here as well. If the student is logging in at the same time as their scheduled appointment, the subject/reason/consultant will be selected automatically to match that appointment.
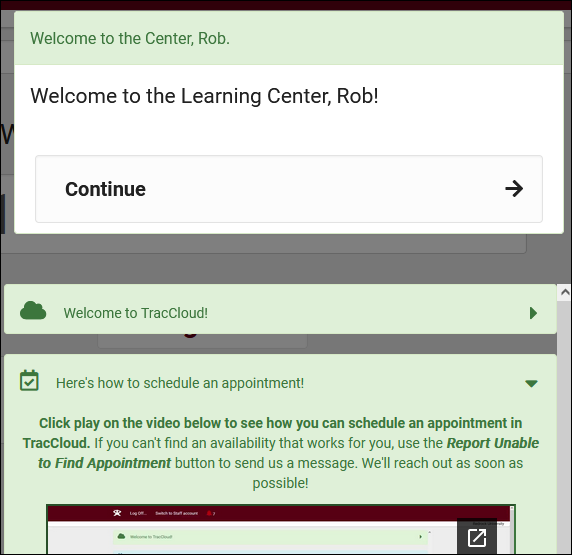
The following page displays a welcome message as configured in your profile preferences, and can show any announcements that have been designated as "Show on KIOSK."
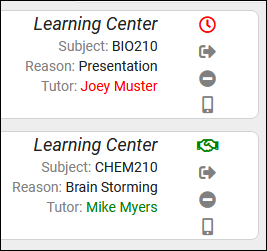
After completing the log process, the student will be added to the log list with any information they entered. The information visible here is determined by your profile preferences.
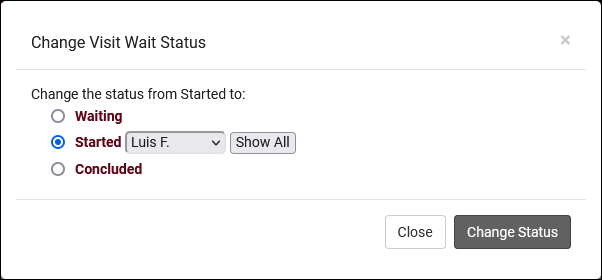
If your profile has been configured to track wait time, you will additionally see a icon on this page. This is used to manage the status of the visit, either "Waiting" or "Started." After you click on this icon and change the status to "Started: [Consultant]," the icon will change to . If this icon does not appear, you will need to add "Wait Status Button" in your profile preferences. Setting the status to "Concluded" would log the student out. The "Show All" button can be used to override the linked advisor filtering on the consultant list (if enabled for your system).
To log the student out, click the icon from the list or enter their ID/Name/Barcode in the center box again. After pressing enter or Log In / Out, you will see a confirmation prompt to confirm that you want to log the student out.
After a visit has been concluded, it will be removed from the log listing and kiosk, and you will be able to find it in the student's history or on the attendance listing.
The Kiosk is used by students to log themselves into or out of your center. This page generally operates similarly to the log listing, but with much stricter permissions and fewer visit management utilities, as we're expecting students to be interacting with this page directly.
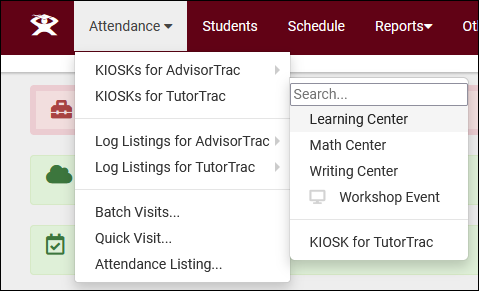
Kiosks can be accessed by going to the Attendance tab in your navigation bar, as seen in the screenshot below. The available choices are split up into 3 groups, just like the log listings.
- Center Kiosk
- When you create a new center, both a kiosk and a log listing will be made available by default, unless specifically disabled in the center OR if your system only allows custom kiosks to be used. Students who are logged in on these kiosks will have their visits assigned to the selected center.
- Custom Kiosks
- In addition to the default center kiosks, you can also create custom kiosks, which are already linked to a specific center/consultant/reason/etc. These are frequently used for workshops or SI events, but they can be utilized for any visit tracking where a field needs to be predefined.
- Kiosk for [Profile]
- This option operates similarly to standard center kiosks, except it includes all centers that your permission group has access to. When a student logs in on this type of kiosk, the first question they will be asked is what center they want to log into.
After you've opened a kiosk, you will notice that your navigation bar tools have disappeared, and you have been logged out. Depending on your single sign-on solution, you may be prompted to additionally open a new tab to end your SSO session. Follow the instructions on screen if this is the case.
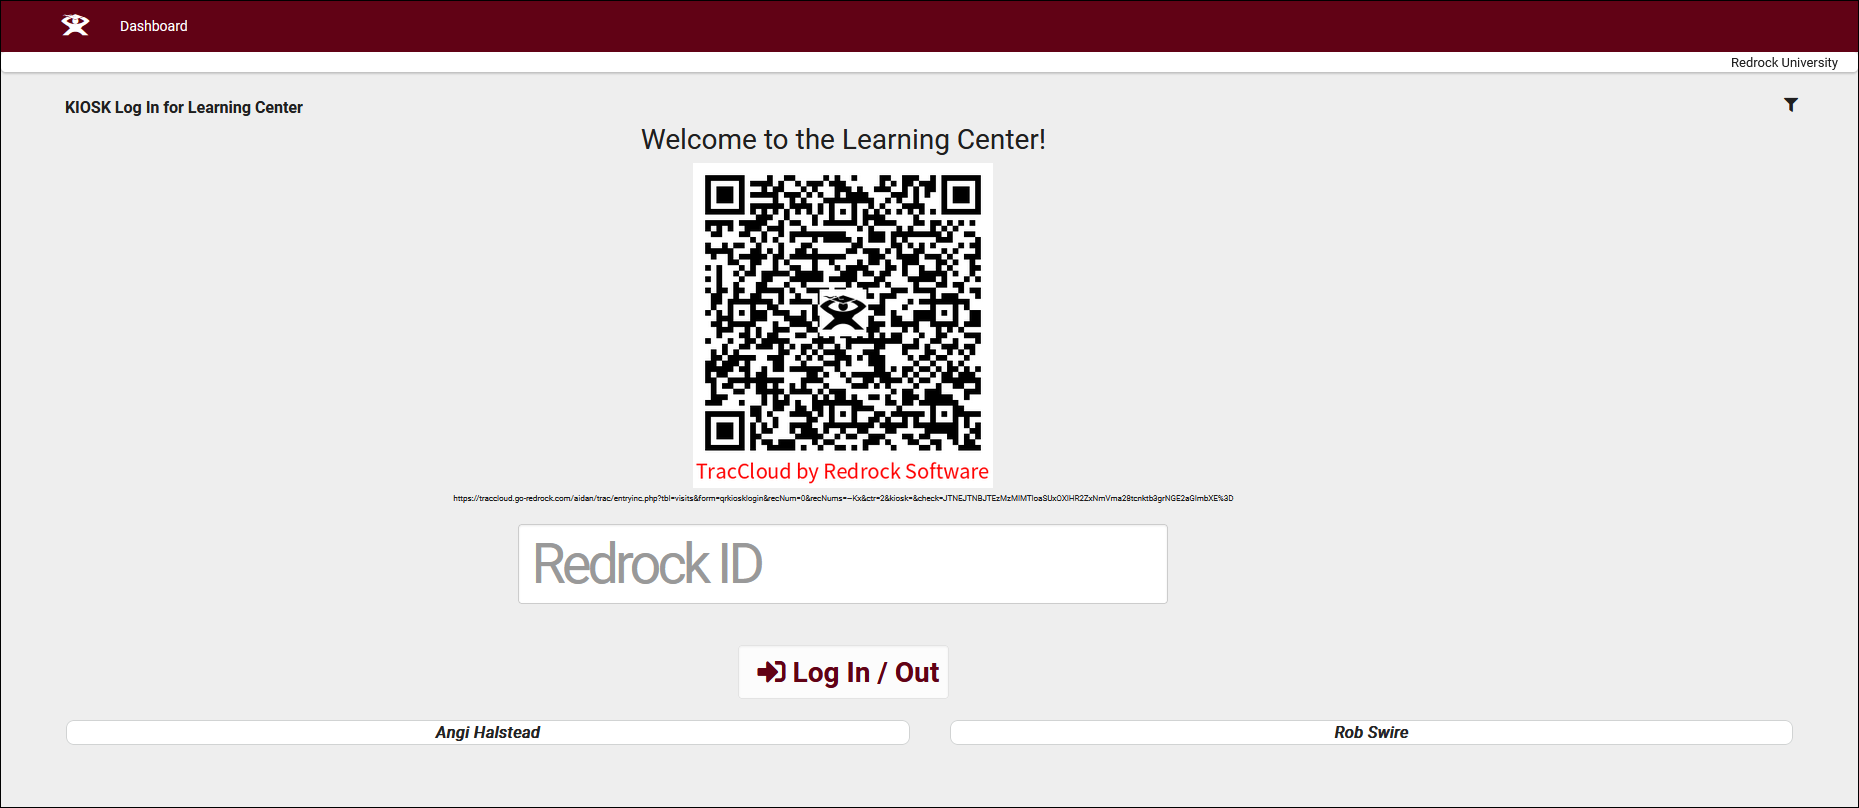
The information shown on the kiosk is also significantly more restricted that the log listing. Our example below shows student names, but hiding all student information is also a common configuration.
A student can login by typing their ID/name, swiping their barcode, or by scanning the QR code in the center of the screen with their phone. After starting the login process, they will be prompted to choose a consultant, subject, and/or reason for the visit depending on which fields are enabled in your profile. Additionally, custom questions can be configured to appear here as well. If the student is logging in at the same time as their scheduled appointment, the subject/reason/consultant will be selected automatically to match that appointment.
The following page displays a welcome message as configured in your profile preferences, and can show any announcements that have been designated as "Show on KIOSK."
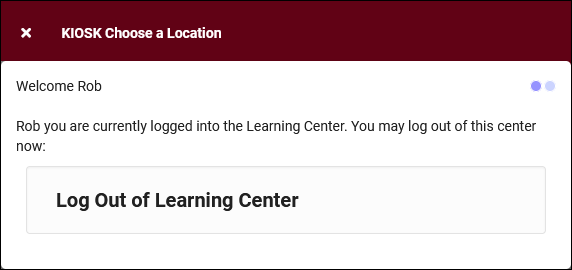
In order for the student to logout, they would need to type their ID, swipe their barcode, or scan the QR code once again. After pressing enter or Log In / Out, they will see a confirmation prompt to confirm that they want to log out.
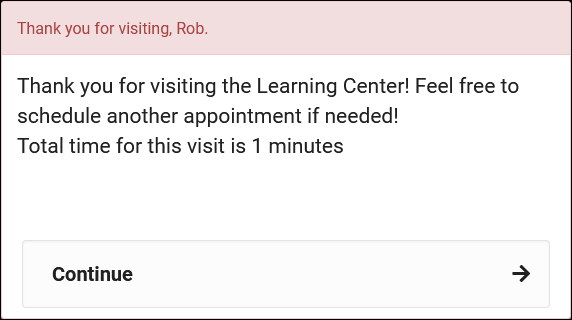
After a visit has been concluded, it will be removed from the log listing and kiosk, and you will be able to find it in the student's history or on the attendance listing.
Quick Visits allow you to create visits from scratch. For example, if a student forgot to login, or a login station wasn’t available at the time. Maybe even if you wanted to record a phone call or email conversation with the student as attendance in your system. This utility can be found by going to Attendance > Quick Visit, as well as a few other locations listed a little further down.

Choosing this option will open a new visit form, allowing you to enter all visit information from scratch. Select your student, consultant, reason, time, and so on. Custom fields can be created and made visible here as well. You can even upload documents to these visit records after saving, or send "visit notes" emails.
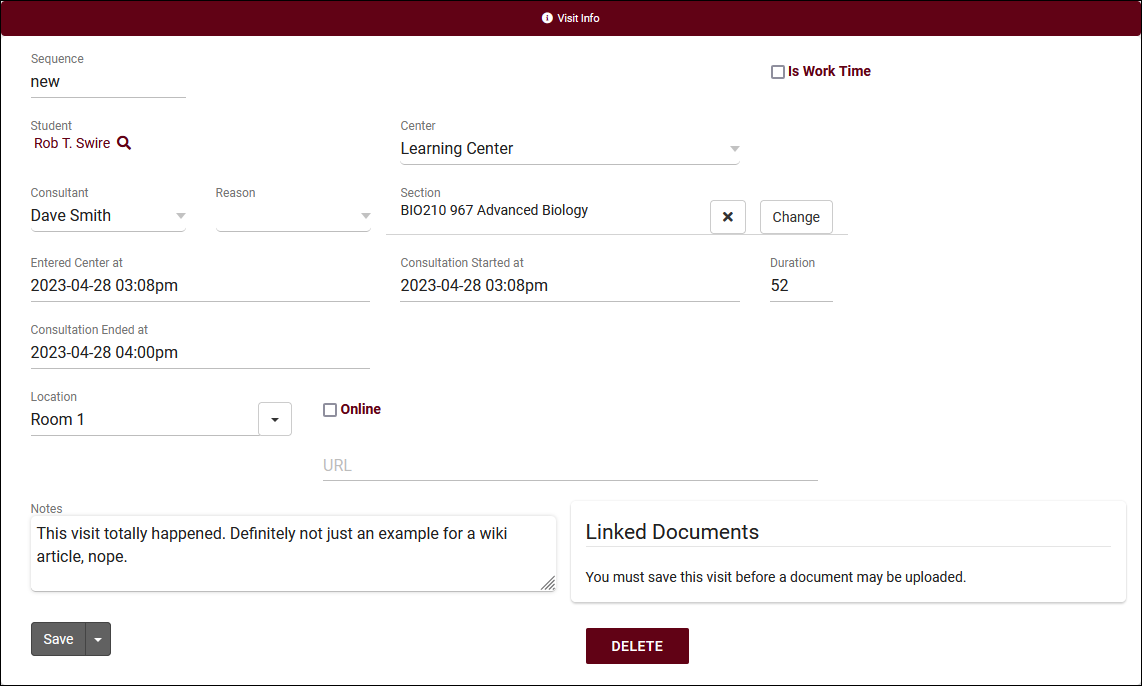
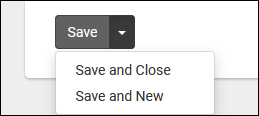
Clicking Save will create the new visit record, leaving the tab open if you need to make further adjustments. Alternate save options can be found under the arrow icon next to the save button. Save and Close will create the record and automatically close the tab in your browser. Save and New will create the record and immediately open a new quick visit form so you can start creating another visit.
In addition to the Quick Visit option under the Attendance menu, you can also create quick visits from a couple other locations. These all operate the same way, but may be easier to access depending on where you are in the system.
From the Attendance Listing, you can find a "New Visit" button within the hamburger menu , and from student records you can find "Create Visit" as the very first option under the "Actions" menu. The latter option will even automatically select the student in the new visit that you create.
The Batch Visit utility is a collection of other visit tracking tools. Some of the most common use cases for these are SI sessions and workshops, but that's not a strict requirement. The visits created here are the same as the visits created from the options above, so you can use these in any scenario where you might find them useful. Batch Visits can be found in Attendance > Batch Visits.
When you begin creating a Batch Visit, you will be asked to choose a center. After making your selection, you will be brought to the following screen. Fill out the visit information that you want to record for your students, then choose what batch visit tracking option works best for you, detailed below. If you have any visit custom fields, they will appear on this screen as well.
Batch Entry
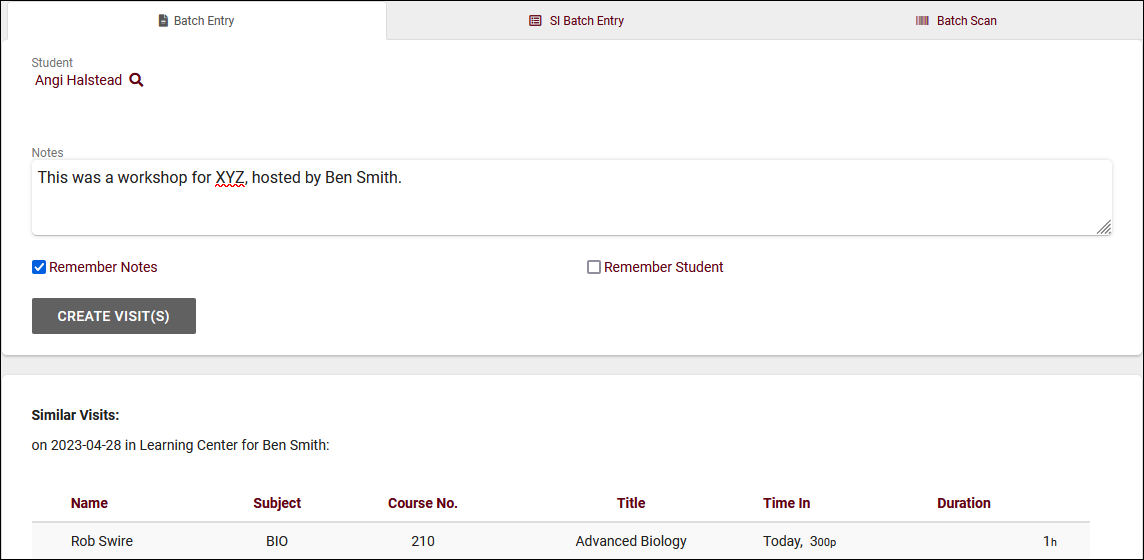
The best way to describe Batch Entry is that it's a faster version of Quick Visit. Keeping the visit information entered at the top of your screen, you can repeatedly select new students, enter new notes as needed, and create their visits one after another without having to reenter the time, consultant, reason, etc.
- Remember Notes
- If this is checked, the notes field will not be cleared after you create each visit. This should be checked if you plan on reusing the same notes for each visit you're about to create.
- If this is checked, the notes field will not be cleared after you create each visit. This should be checked if you plan on reusing the same notes for each visit you're about to create.
- Remember Student
- If this is checked, the student field will not be cleared after you create the visit. This is almost always used when recording visits to a generic student account, such as for prospective students who don't yet exist in the Trac System.
As you save visits, they will be displayed at the bottom of the screen under Similar Visits.
SI Batch Entry
SI Batch Entry shows all students enrolled in the section that you selected, including wildcard selections (like BIO210*). When recording visits with a wildcard section chosen, a matching registration from each selected student's enrollments will automatically be used. Students are separated into two lists, students who have visited for the selected section before, and students who haven't. You can select students from both lists at the same time. After you create a visit for a student, they will be shown with a icon next to their name in the list.
- Remember Notes
- If checked, the notes you enter will not be cleared when creating the visits for your selection of students, allowing you to reuse the note for the next selection (if needed).
- If checked, the notes you enter will not be cleared when creating the visits for your selection of students, allowing you to reuse the note for the next selection (if needed).
- Show Active Students (with Active Registrations) Only
- By default, the list of students can include inactive students/registrations. This checkbox can be used to hide them from the results.
Batch Scan
Batch Scan allows you to create visits for many students at once based on a list of identifiers. ID, Email, Barcode, etc. For example, if you were recording attendance in a spreadsheet, you could copy your identifier column into "scanned data" to quickly create those visits in TracCloud.
- Skip Duplicates
- If checked, duplicate visits will not be created for students, even if they're present more than once in the list.
- If checked, duplicate visits will not be created for students, even if they're present more than once in the list.
- Scan Type
- Use this to specify what the data you're scanning refers to. ID, barcode, etc.
- Use this to specify what the data you're scanning refers to. ID, barcode, etc.
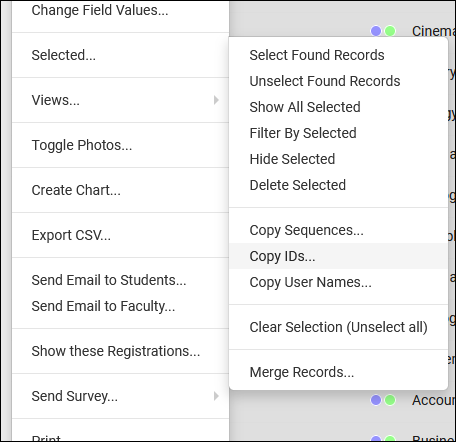
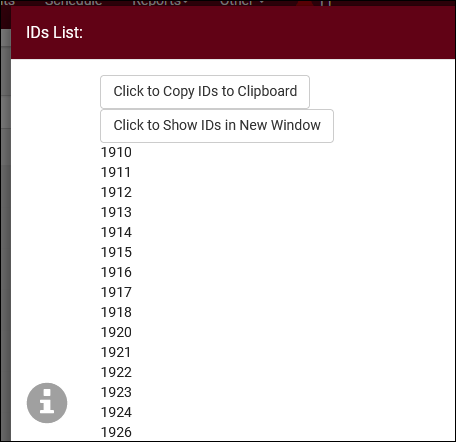
The Student Listing also has the ability to export a list of student IDs (see the 'Selected' menu under the hamburger icon ). Using this, you can easily search for and copy your list of students, and paste that list here to create visits for all of them at once.
Batch Codes
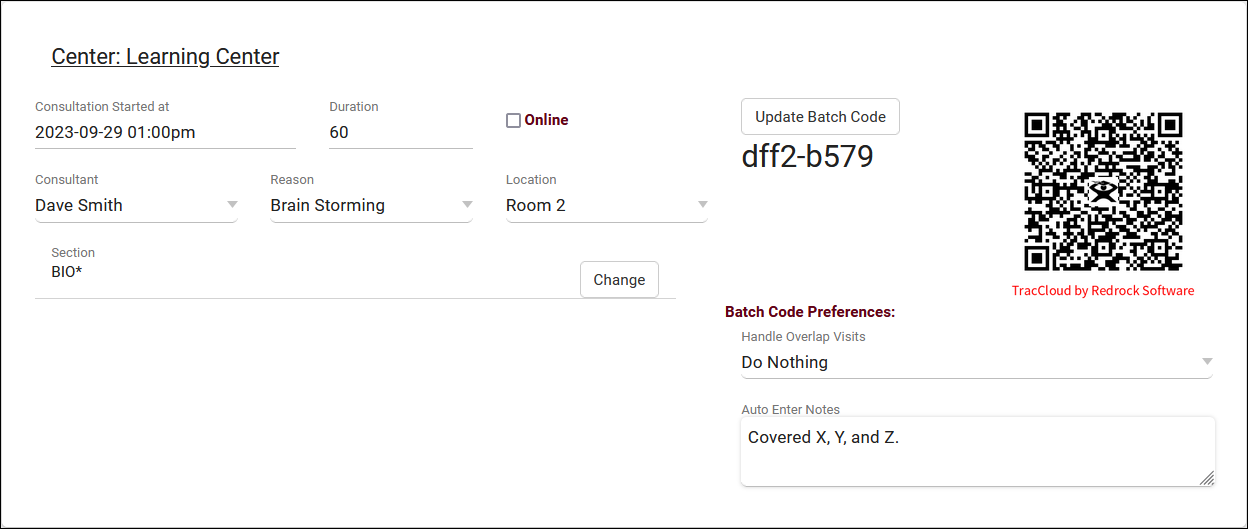
Batch Codes can be created at the top of the batch visit form. Clicking on Generate New Batch Code will provide a QR code which you can use to track attendance for this session. Notes can be applied to visits recorded with this QR code with the Auto Enter Notes field. If you apply any other changes to the visit details, such as duration, reason, etc, you can click Update Batch Code to get a new QR code.
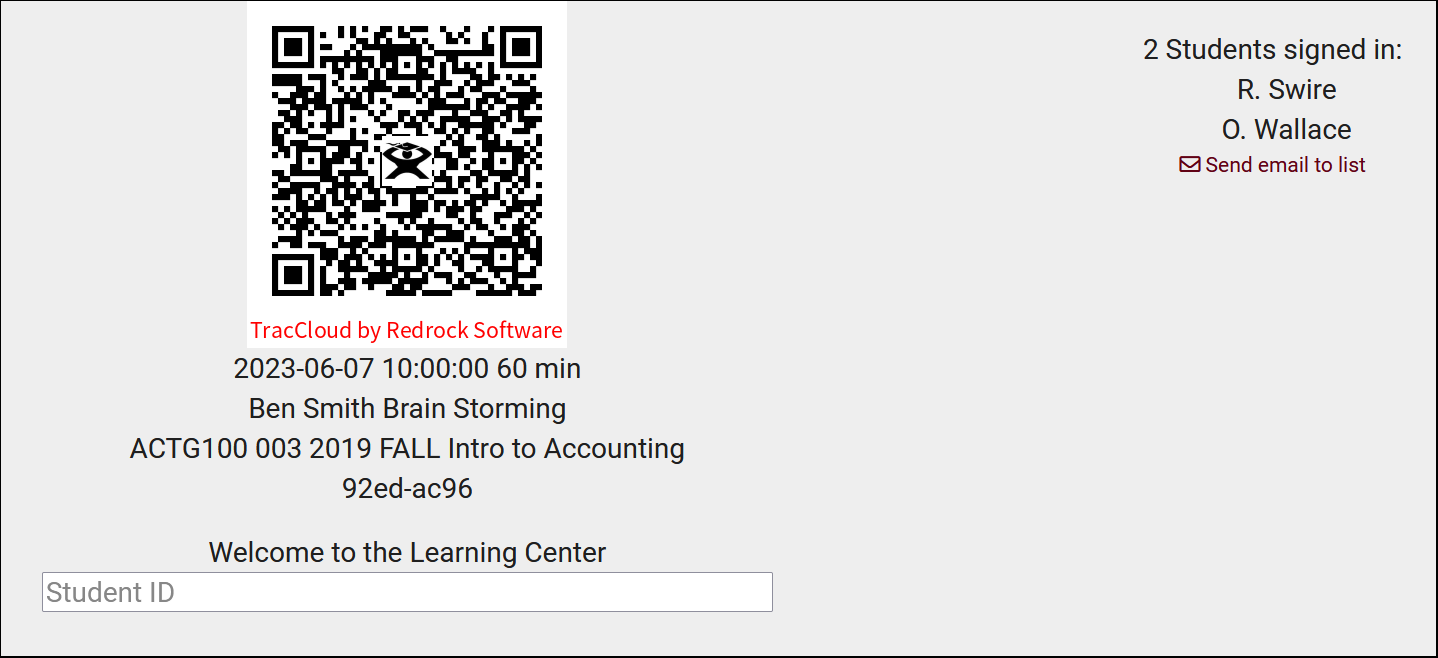
After clicking on the QR code, you will be taken to the following screen. As a staff member, you can enter students IDs in the box to record their attendance, or students can scan the QR code with their phone to be taken to a login screen where they can record their own attendance. Similar to a kiosk, but no logout or additional questions necessary.
Any Batch Codes that you generate can also be found at the initial batch visit creation screen. This allows you to create these codes in advance and quickly access them later. Batch codes can also be deleted from this page if needed.
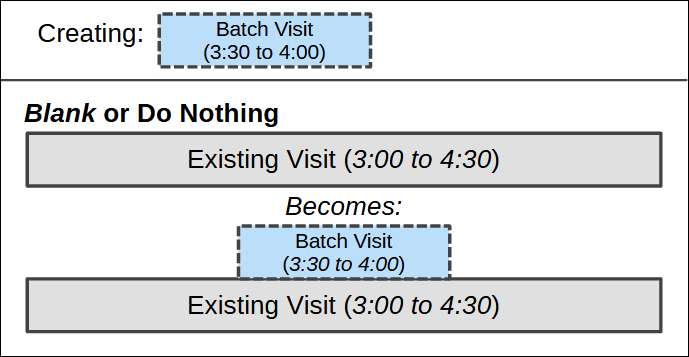
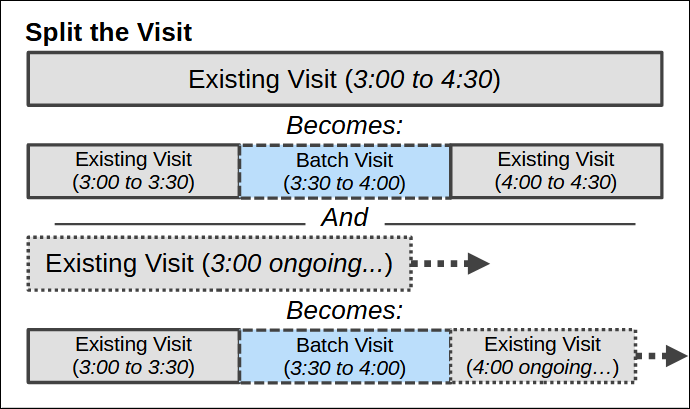
Unique to Batch Codes is the Handle Overlap Visits option. This determines how batch visits deal with conflicting visits for students.
Do Nothing (or leaving the field blank) is the default. In the event of a conflict, TracCloud will not automatically modify any records. It will simply allow both visits to exist at the same time.
Logout Previous will adjust visits that are still ongoing at the time of the batch visit being created. In this case, it will automatically conclude the ongoing visit by setting the end time to the start time of the batch visit.
Lastly, Split the Visit will separate an existing visit to fit alongside the batch visit. If the conflicting visit has already concluded, it will modify/split it into two separate visits to fit the new batch visit. If the conflicting visit is ongoing, it will conclude the visit to end at the start time of the batch visit. This is similar to Logout Previous, except Split the Visit will also start a new ongoing visit at the end time of the batch visit as well so the student can be logged out later.
Drop-in availabilities offer 2 additional visit tracking tools depending on the meeting type (online or in-person). Take a look at our schedule management wiki article for details on creating these availabilities in the first place.
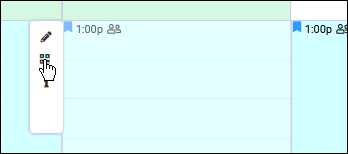
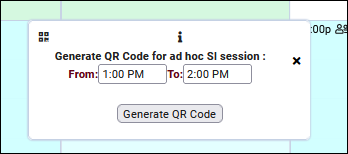
Ad hoc QR codes can be created by hovering over the availability and clicking on the icon. Choose a time for the visits that this QR code will generate, then click on "Generate QR Code."
This will open a new tab where you can enter student IDs to create visits, or allow students to scan the QR code themselves to create their own visits, no logout required.
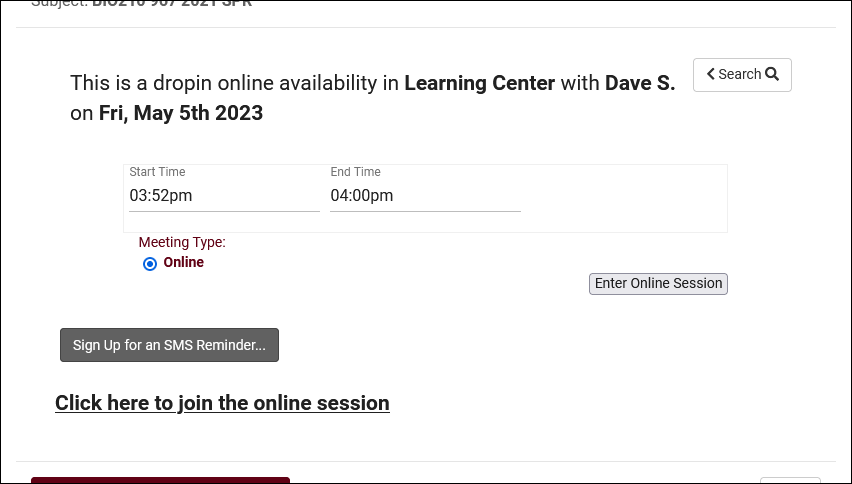
Online drop-ins found in availability search results by students can also be used to automatically create visits. When the student clicks on the "Enter Online Session" button, they will be taken to the online meeting room and TracCloud will immediately create a visit for them matching the remaining duration of the availability time slot.
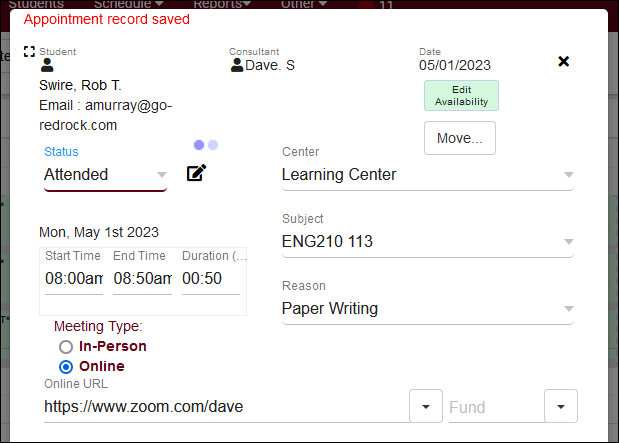
By marking an appointment as "Attended," TracCloud will automatically create a visit to match that appointment. This can be useful if your campus doesn't track visits with log listings/kiosks, or even as an alternative to quick visits if your student forgot to login. After saving, you can make further changes to this new visit record by clicking on the icon.
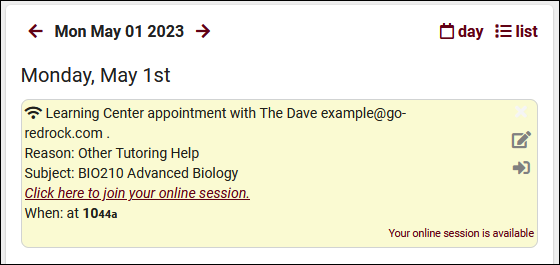
Online visit tracking is unique compared to the other options here, as no manual actions are required to create these visits. When students join an online appointment in TracCloud, their appointment will be marked as attended and a visit will be created to match the appointment details (unless you have specifically disabled this).
You may have noticed that the hyperlink on the dashboard or the {{Appointment.OnlineLink}} twig tag doesn't actually contain the online link you entered for the appointment, but instead a long TracCloud URL. Tracking attendance is the reason for this. When the student clicks on that link, TracCloud knows that they have joined the session and creates a visit record, then quickly redirects them to their Zoom, Webex, etc invite as usual.
See Also
