| The Log Listing is an electronic form of a sign in sheet and simply displays the students currently logged in to your Centers. The Log Listing is only shown to users or consultants with the privileges to view this information. These screenshots represent the view of a user that has sufficient privileges to see this information.
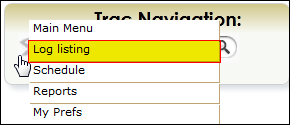
To get to the Log Listing, click on the TracMan Icon on the left side of the Trac Navigation. Click Log Listing to access the electronic sign in sheet.
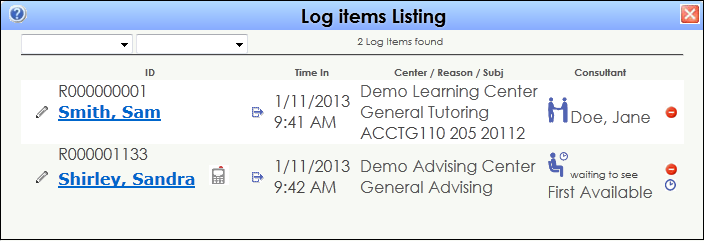
Students sign in when they arrive and sign out when they leave. This allows you to track when and where students are visiting, for how long, and for what reasons.
How to log students in and out
The Log Listing allows users to enter a form of student identification in the Log Student window at the top of the page. This may be a numeric Student ID, Barcode, Username, or Full Name (entered Last, First). Enter the student identification and press the Enter/Return key on your keyboard. Students may even scan the barcodes or swipe the magnetic strip on their Student IDs to log in.

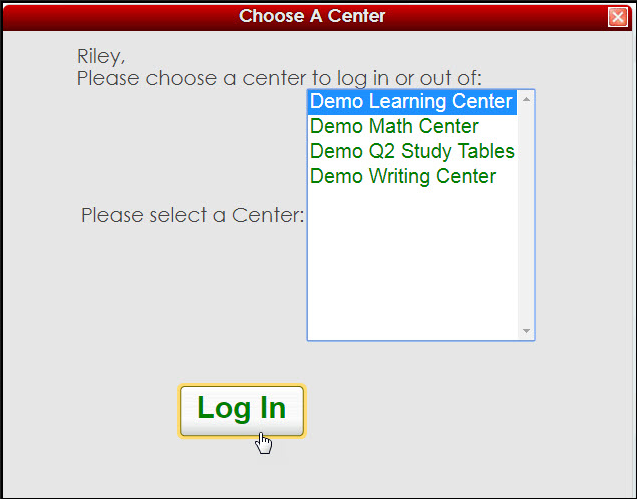
When the Trac system finds your student, they will be asked to select a center. The student can select the appropriate center and click Log In. If only one center choice is available, your Trac system will automatically make the choice and move on to the next screen.
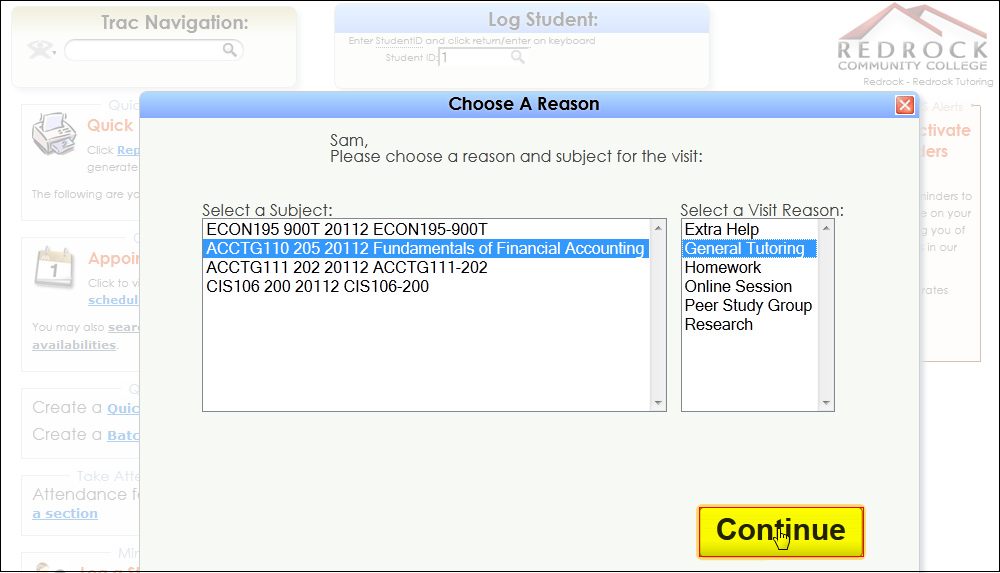
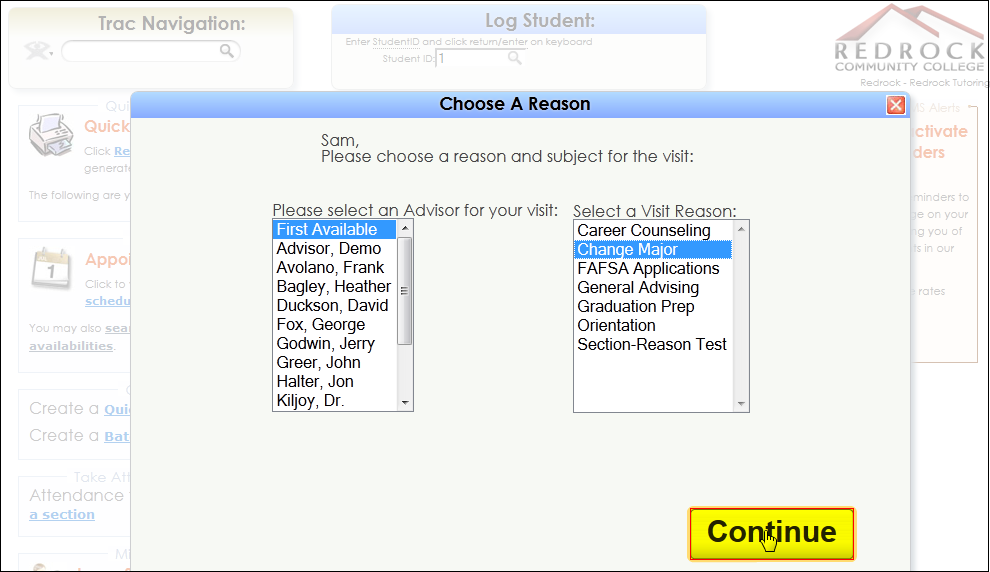
Now typically the student will be asked to select a Subject and a Reason for their visit. The Subject and Reason choices are collected from the Sections and Reasons set up in your Profile. You can find instructions on setting up your Sections and your Reasons in the Set Up Sections and the Set Up Reasons sections in this guide. The student will select from the available Sections and Reasons and click Continue.
Alternatively for AdvisorTrac, Subject choice can be replaced with Consultant Choice, or more specifically a dropdown Menu with a list of Advisors available at your Center. Students who log in will then select an Advisor as well as a Reason for their visit.
The Log Listing now shows the student that is currently signed in for a visit.

For AdvisorTrac:

The Log Listing for AdvisorTrac contains an icon unique to AdvisorTrac. AdvisorTrac utilizes the “Waiting Room” function, which allows Centers to collect Wait Time as well as actual Visit time. The distinction can be made directly on the Log Listing by clicking on the icon of the person watching the clock.

Clicking on this icon will proceed to change the “waiting to see” message to a “being seen by” message, indicating the transition from Wait Time to actual Visit Time.

When the student has completed their visit, they need to sign out to end their session. You have several options available to sign the student to sign out of the visit. You can re-enter a numeric Student ID, Barcode, Username, Full Name (entered Last, First) in the Log Student window, or use a Barcode Scanner to populate the field. There are also several icons on the Log Listing that will begin the Logout process.

You can begin the Logout process by clicking on the Exit icon or the image of student and consultant shaking hands .
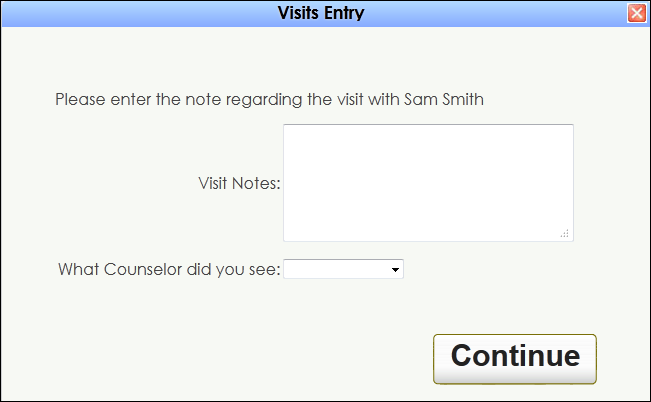
Any of these options will direct a user towards the Visit Entry window. The Visit Entry window that appears during the Logout process may contain Custom Questions used for obtaining additional feedback about a session. Consultants or Students may enter Visit Notes here as well.
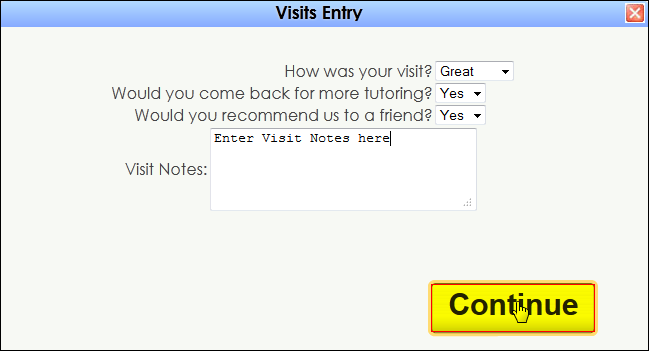
In AdvisorTrac, Advisors typically enter notes
|