TracCloudGuideBasicsResources: Difference between revisions
From Redrock Wiki
m (Protected "TracCloudGuideBasicsResources" ([Edit=Allow only administrators] (indefinite) [Move=Allow only administrators] (indefinite))) |
No edit summary |
||
| Line 97: | Line 97: | ||
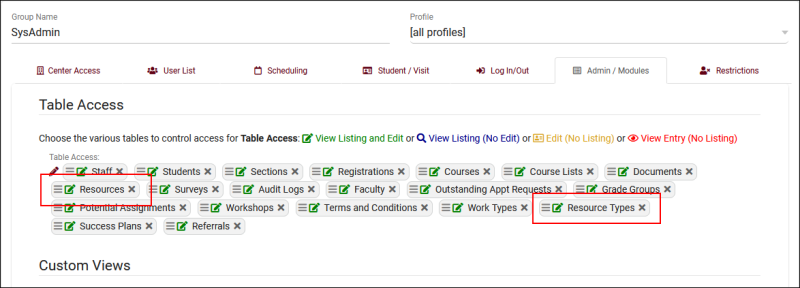
<span style="color:grey"><i>Other > Other Options > Groups > [Your Group] > Admin/Modules</i></span><br> | <span style="color:grey"><i>Other > Other Options > Groups > [Your Group] > Admin/Modules</i></span><br> | ||
[[File: | [[File:1292806.png|800px]]<br><br> | ||
* <b>Table Access</b> provides access to the <i>Other > Resources</i> view of resources. You can also assign <b>Resource Types</b> here to allow this group to view and edit these as well. | * <b>Table Access</b> provides access to the <i>Other > Resources</i> view of resources. You can also assign <b>Resource Types</b> here to allow this group to view and edit these as well. | ||
Revision as of 09:08, 14 July 2023
Profile Preferences
Prefs
|
Resources Resources are items that may be checked in and out of your Center(s) and lent to students or staff. The borrowing of resources at your center(s) can be tracked, recorded, and the data collected can be displayed through Reports. Resources can be utilized in many ways, but common examples include Laptops, Calculators, or Books that users can reserve, checkout, and return. File:3446265.png Creating a ResourceTo begin creating a resource, go to Other > Resources > Resources (List), then click the + icon to create your new resource.
Resource TypesResource Types can be used to group resources together, for the purpose of reporting or to block certain students from accessing certain resources. This can be managed in the Resource Types tab of the Resources menu.
Within each Resource Type, two more notable fields are available.
File:1971204.png
Permission GroupsThere are a couple settings of note within your permission group(s) relating to Resources. Other > Other Options > Groups > [Your Group] > Log In/Out
Other > Other Options > Groups > [Your Group] > Admin/Modules
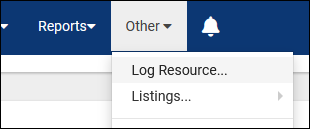
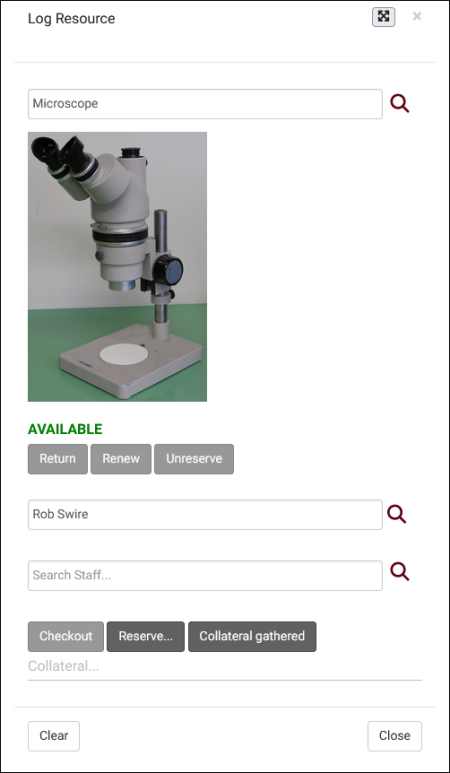
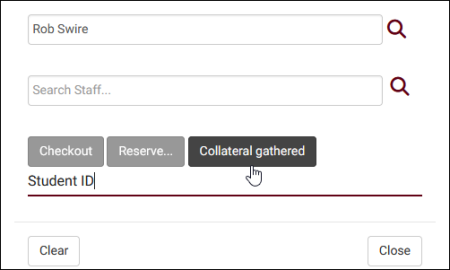
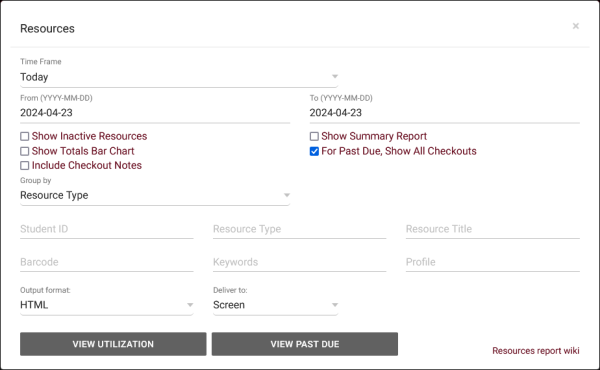
Utilizing a ResourceAfter creating your resource and updating your groups, you're ready to start checking out resources. This option can be found by going to Other > Log Resource. You will then be brought to the following screen with two text entry areas available. The first is where you select a resource (searching by Barcode, Title, or Keywords), the second allows you to select a student or staff member. Once one or both fields are selected, additional options become available to check out, return, or reserve this item. In the event that Collateral Logic is being utilized, more options will be available in regards to collecting/returning the collateral item. Resource EmailsResource emails can be customized to inform students of the due date of their checked-out resource, or if the resource is overdue. These options are part of your profile preferences, in Other > Other Options > Profiles > [Your Profile] > Prefs > Emails > Resource Checkout Emails. Similar to your other Profile Emails, you can write a subject line and body of your email, an additional SMS text, and choose when this email is sent. Unique to resource emails is Send additional overdue emails daily, which will resend the overdue notice for each day the item is still checked out. Resource ReportsA resource report is available to obtain data regarding how your resources are being utilized. This can be found by going to Reports > Management > Resources.
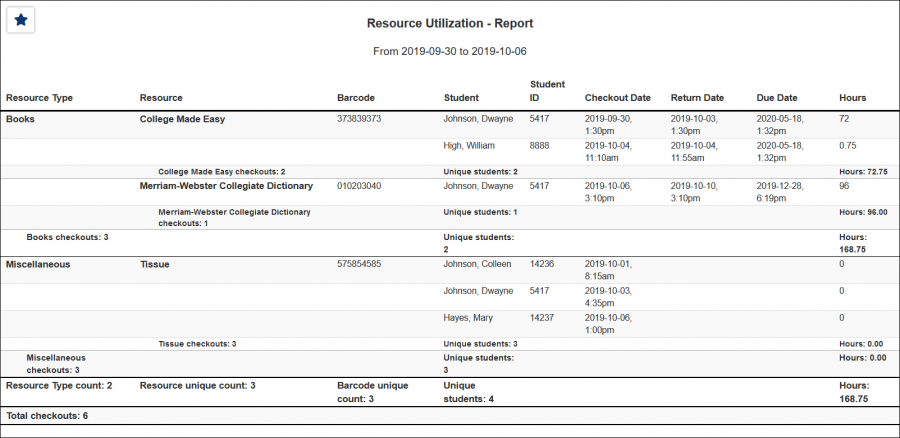
This report exports resource usage, showing the students who have checked out a particular resource, the checkout date and time, as well as total hours. This can either be run on overall Utilization, or specifically on Past Due resources.
|

