| The Trac System is immensely customizable, and the students’ view is no exception. It can be as simple or as feature-rich as you’d like it to be. That’s why in this Newsletter, we’ll be going over exactly how you can customize it. Everything from written instructions to group permissions.
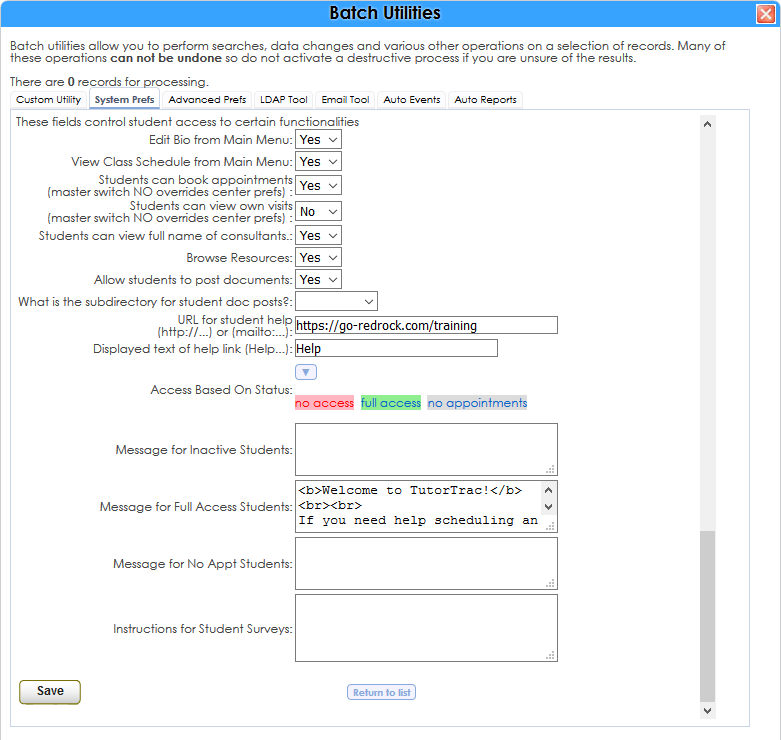
Student Access – Utlities and Prefs > System Prefs > StudentAccess
This is one of your primary tools for modifying what students are able to see. Here you can set whether or not they’re allowed to confirm their own bios, if they can browse resources, if they can book appointments, and more.
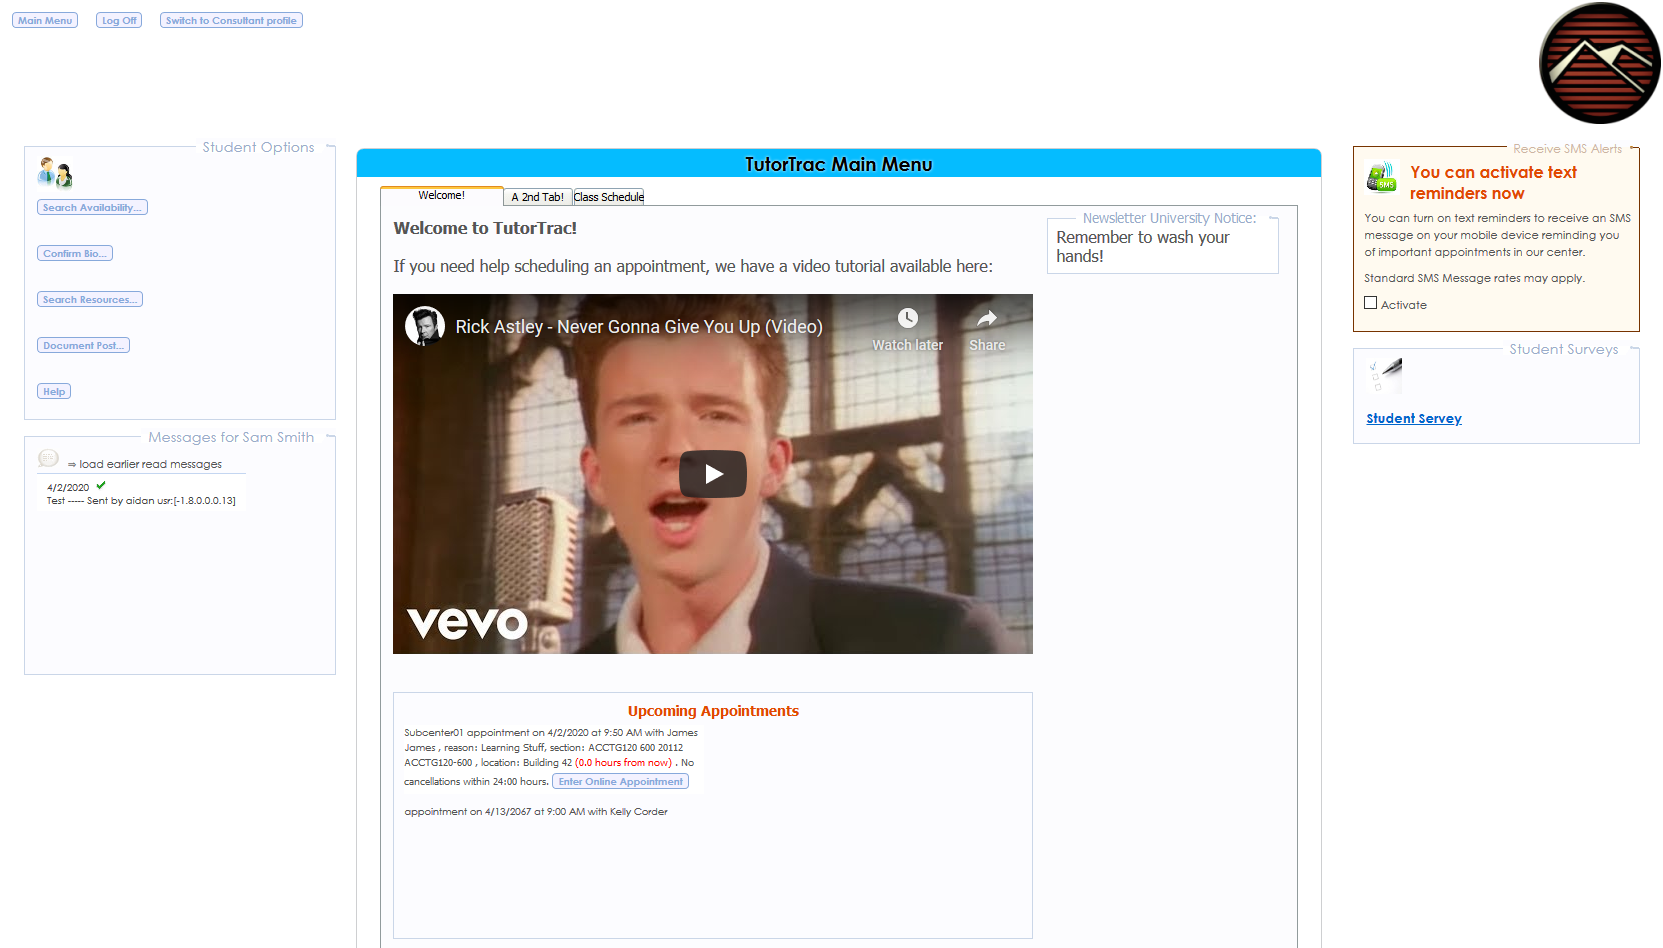
You can also change the message that students see on their home page. This supports HTML tags, so you can control exactly how the message is displayed, and even embed images and Youtube videos.
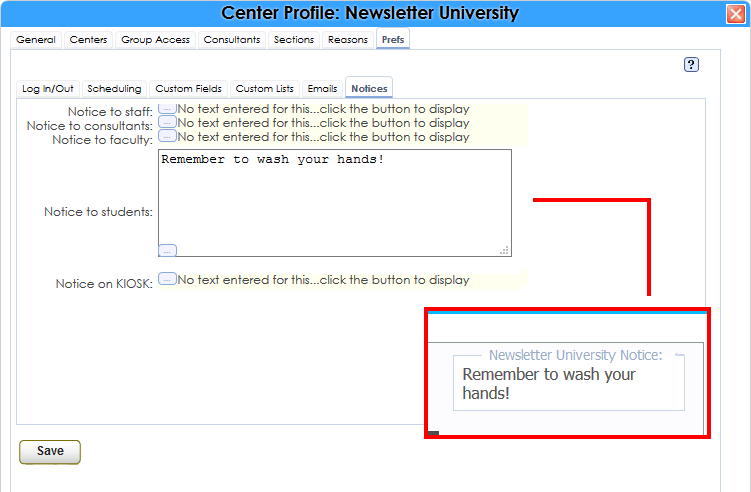
Center Notices – Center Profile > Prefs > Notices
Here you can write notices to your students. This appears in a gray box on the students’ home page. You can also write notices for staff or KIOSKs here as well. The name of the gray box is based on the name of your Trac profile.
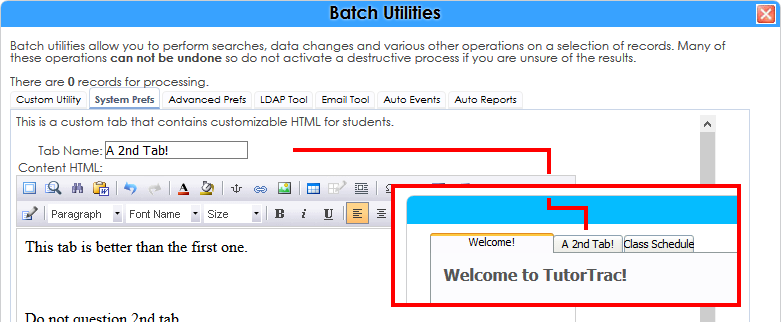
Creating a Second Tab – Utilities and Prefs > System Prefs > MainMenuCustomTab-Students
Write out what you’d like on your second tab, then click save. This will appear as a selectable tab within the student’s main menu window.
Appointment Search
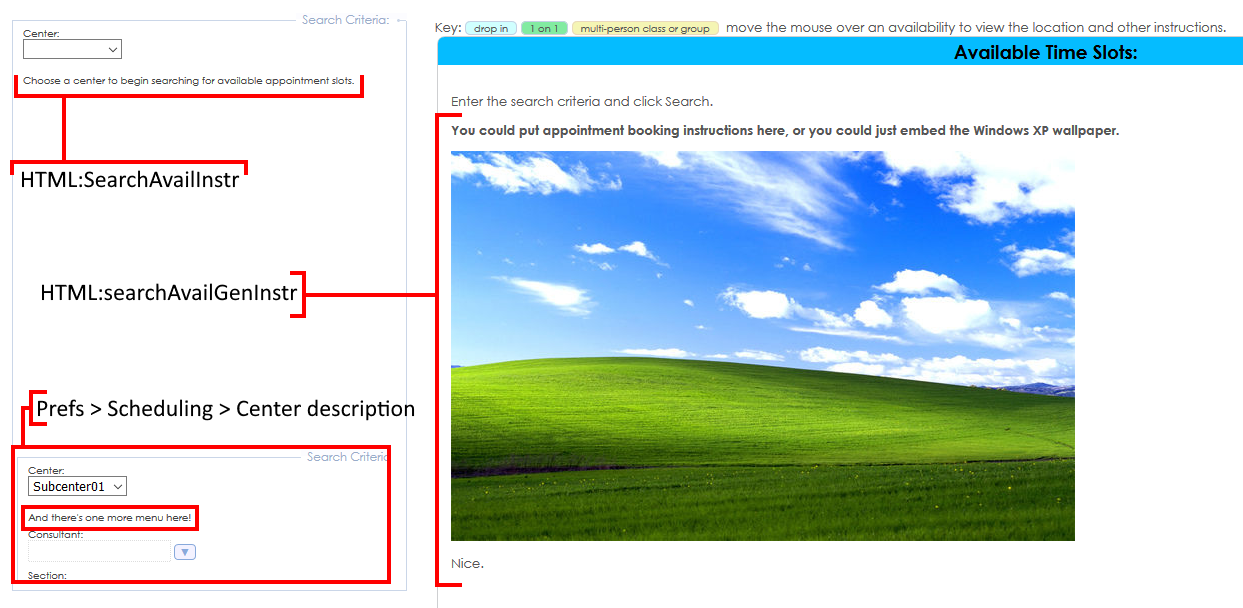
- Text on the right side of the Window
- Trac Navigation > Trac Man icon > Utilities and Prefs > Advanced Prefs > search for, or add ‘HTML:searchAvailGenInstr’ – You can input text into that data box just like the main menu welcome page, HTML and all.
- Text below the center dropdown box
- Trac Navigation > Trac Man icon > Utilities and Prefs > Advanced Prefs > HTML:SearchAvailInstr – While you can’t embed images here, it still supports some of the more basic HTML tags, such as bold, italics, or underline.
- Text shown after choosing a center
- Trac Navigation > Search Glass icon > Center Profiles > [Your Center] > Prefs > Scheduling > ‘Center description/instruction on search’ – This text appears only after choosing a center.
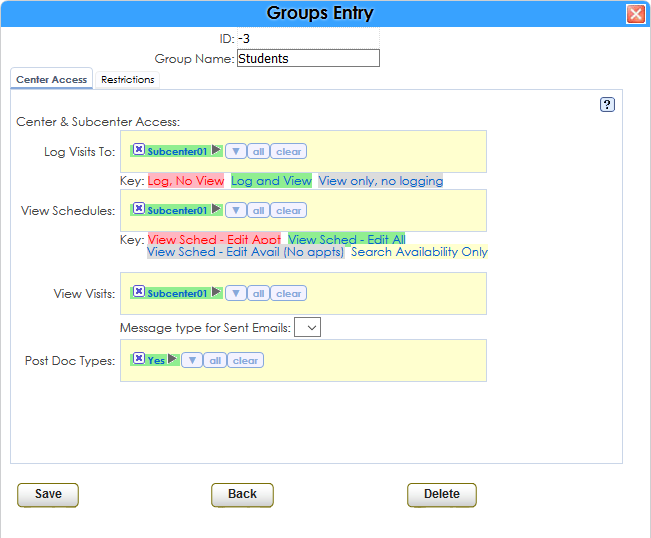
Student Permissions – Center Profile > Group Access > Students
Here you can set which centers students are able to book appointments in (if any), whether or not they can view their own visits (If you allowed them to in GroupAccess), as well as what kind of documents they can post.
More Questions?
Feel free to send us an email at Helpdesk@Go-Redrock.com, or by submitting a ticket through our helpdesk.
Thank you for your continued support.
|