| Has there ever been a last-minute appointment that has come up? Now you are trying to figure out a quick way to “cancel” your day worth of appointments so that the students don’t get penalized by the permission rules in place. A fast and easy way to do that would be by placing a reserve block on the calendar. This block simple allows you to put a block over the scheduled appointments and “blocks” those permission rules.
By creating the availability block, this allows you to cancel the appointment and keep the data for reporting reasons. If instead the appointment was deleted, information on booked appointments and the students that booked them, would be lost. With that being said, availability blocks are a very convenient tool.
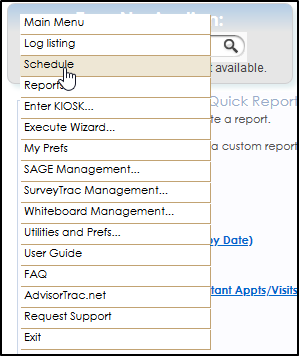
Let’s start by going to our schedule. Click on the Trac Man Icon and select schedule.

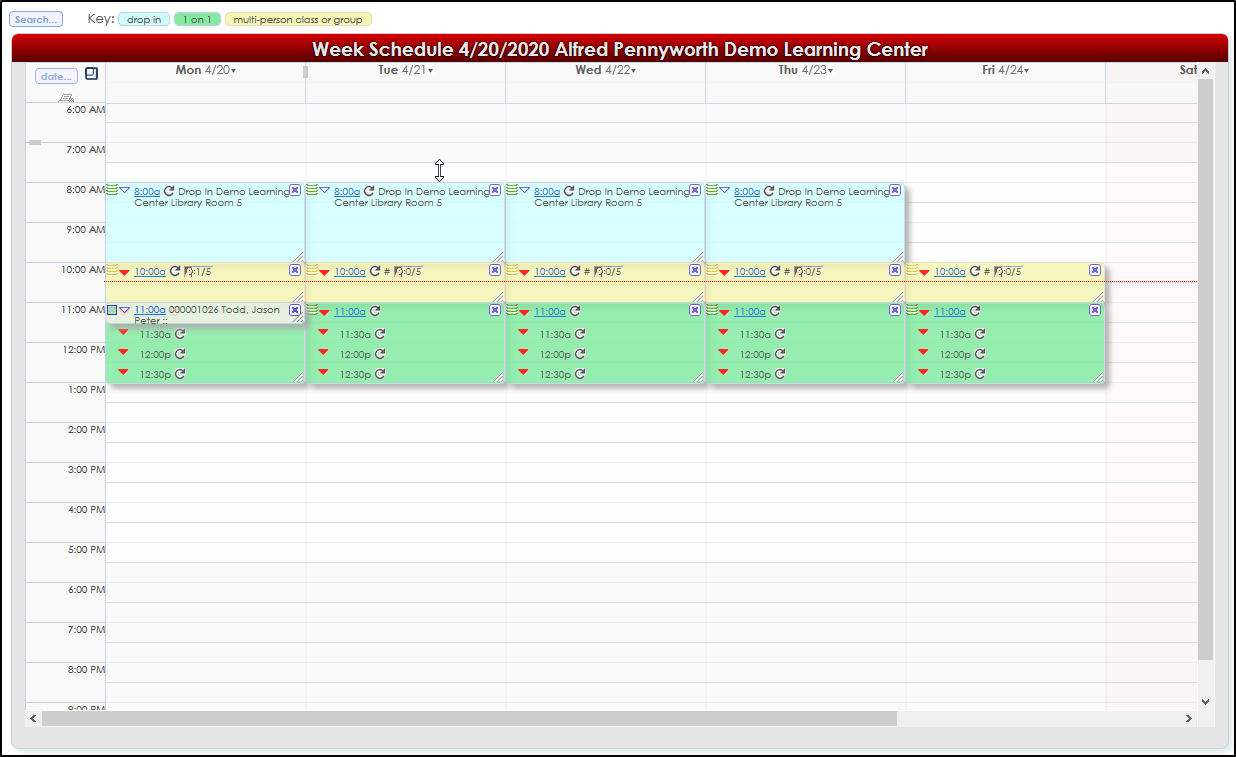
Once we have arrived at the schedule, we can check to see how our availabilities look. If we find a day that we’re are no longer available for, we can add an availability block to prevent anyone from booking an appointment and cancel an already scheduled for the day.
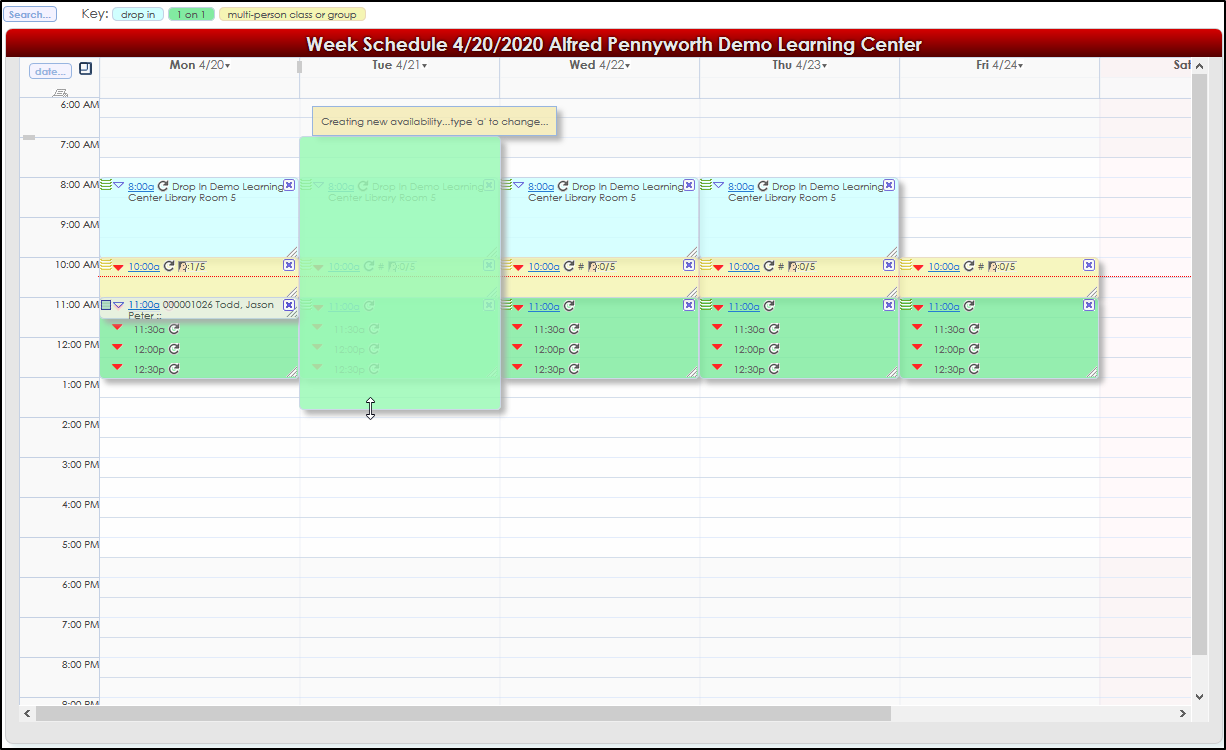
First click on the schedule and drag till the day’s schedule is completely covered by the new block.
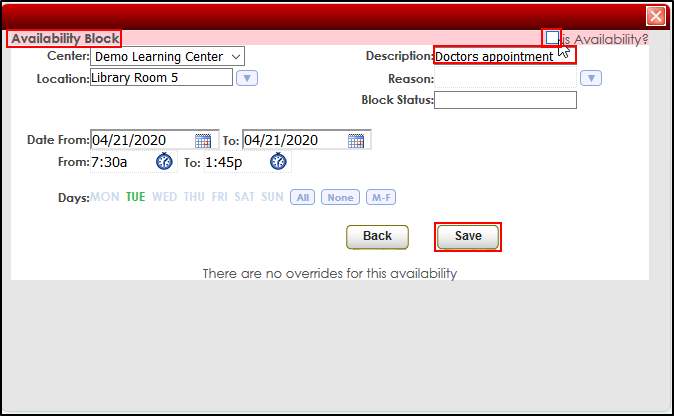
Then uncheck the availability box at the top right corner of the new window. The availability block will now become a Reserve Block and we can enter the description of the block in the example we entered “doctors’ appointment”.
Once the information is correct, click on save and the new Reserve Block will appear on the schedule.
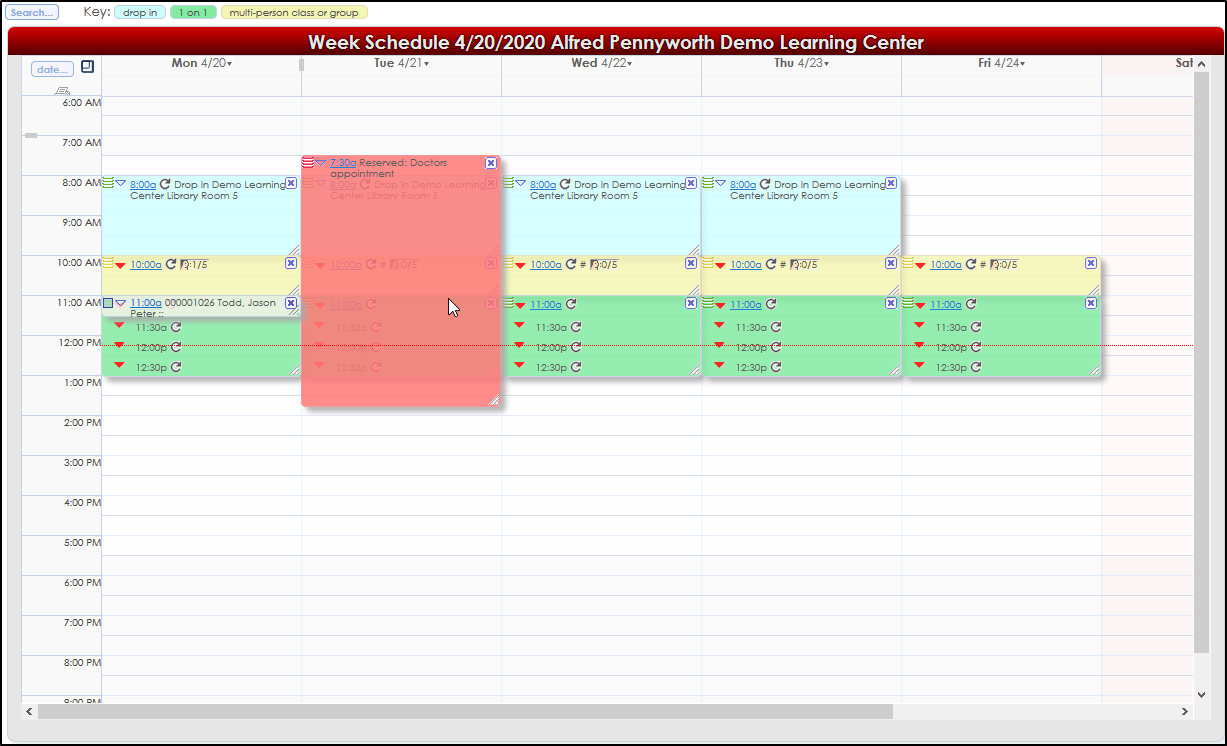
Now students will not be able to book appointments, and students that already booked will not be penalized for the missed appointment.
Now that we know how to create an availability block for one day, this can be used by tutors for any day they may become unavailable. Now let’s take a look at how an administrator might create a Center Block for spring break.
First go back to track navigation and hover over the magnifying glass, then click on center profiles.

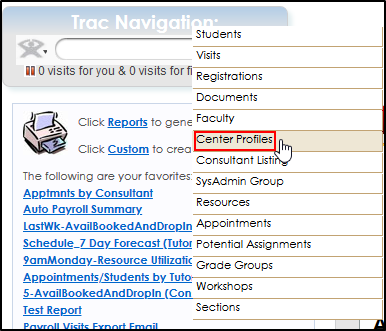
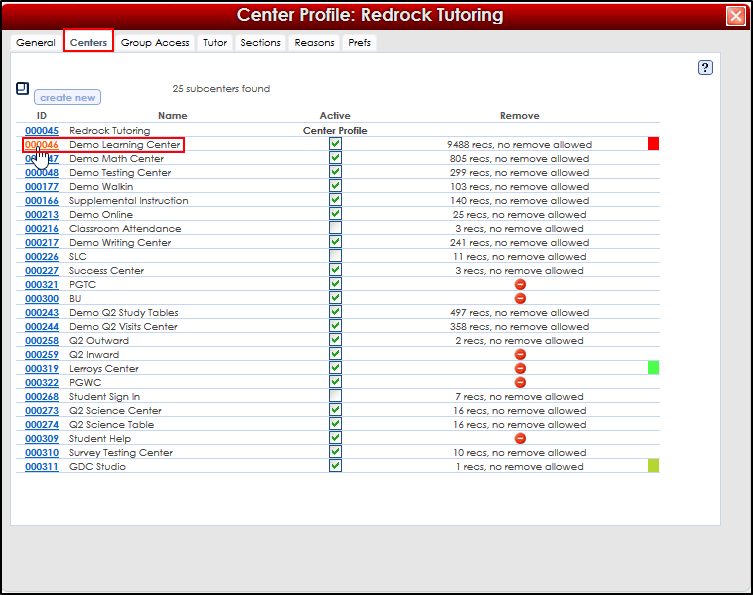
Next, we click on our center profile, followed by clicking on the centers table and clicking on the subcenter we wish to create the block for.
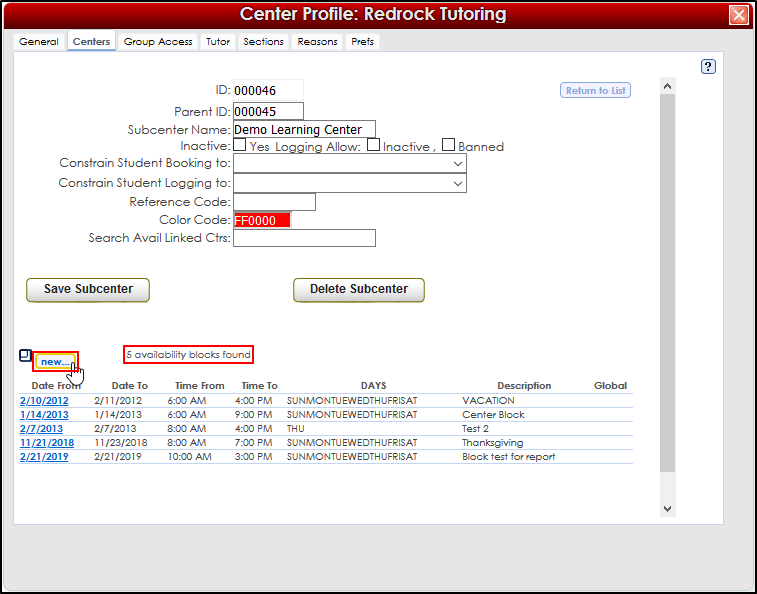
Next, we go to the bottom of the page and select new. This will also allow us to see other availability blocks that were created in the past, if any.
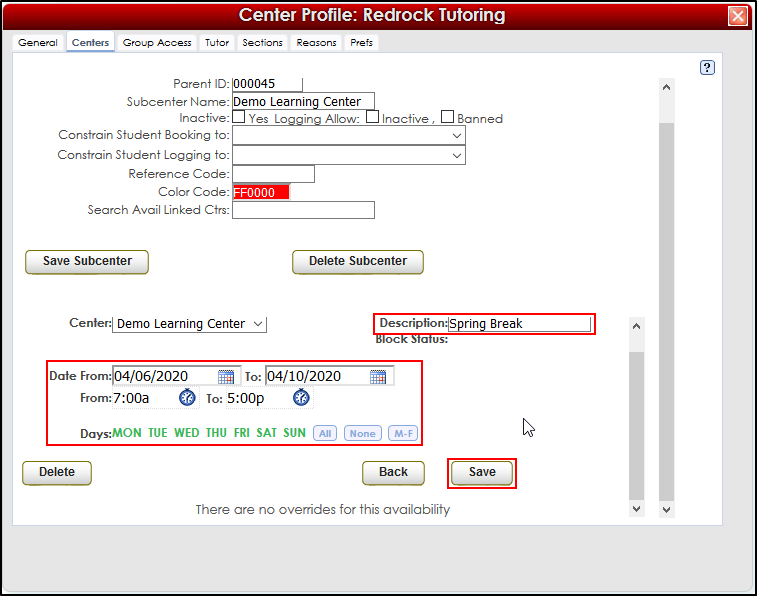
Here we can adjust the time, date range, days of the week, and description. Finally, we can hit save.
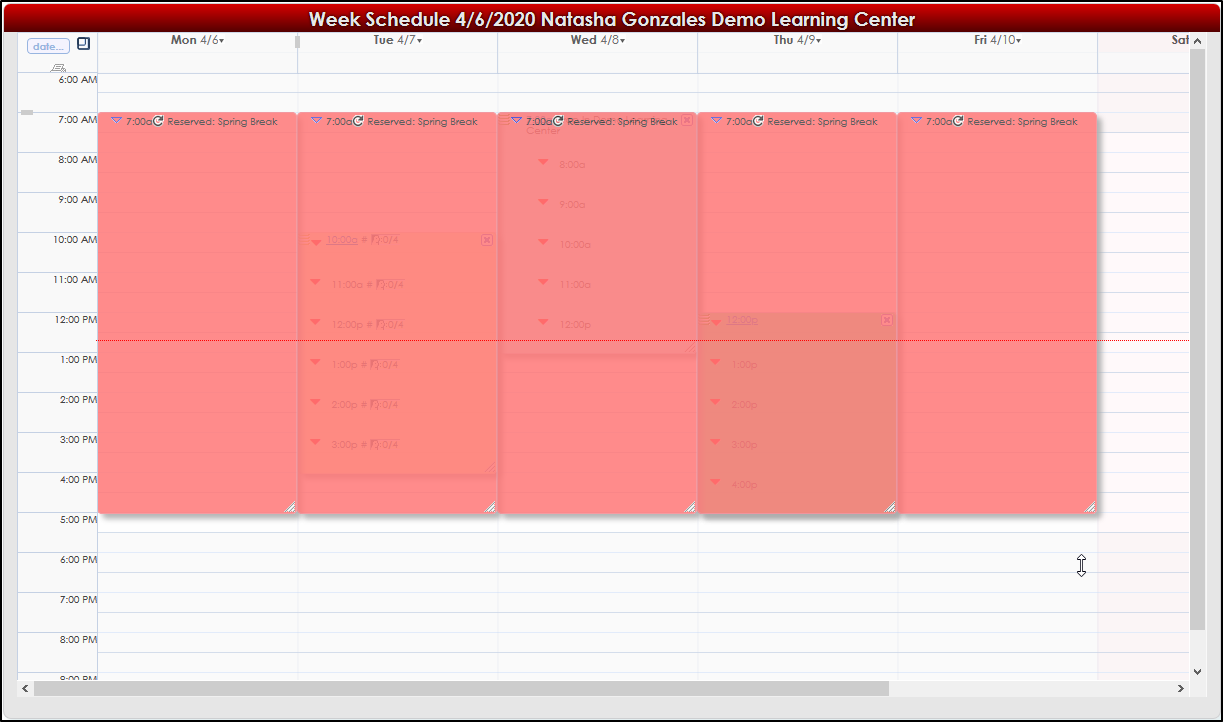
Upon visiting the schedule, we can see that the Center Block has been created and can span for any length of time desired.
More Questions?
We hope that you find this newsletter helpful and as always if you have any questions on this or any other features, please feel free to let us know by going to https://helpdesk.go-redrock.com and submitting a ticket.
Thank you for your continued support!
|