|
We are excited for the new academic year and want to help you prepare your Trac application for the new semester, with this week's Newsletter.
You’ll find that it is filled with new information, helpful hints and tips, and even some new feature that you can explore. We want this newsletter to be valuable for you so please, share your feedback and as always please let us know if you have any questions.
An important note: Your imports contain student registrations specific to a term, the timing between changing your Term Code and importing your registrations is important.
Step 1. Have your IT upload the new Student and Course Files to your server, or the SFTP site if hosted
- If the format (column layout, delimiter, etc) of the file has changed since the last import, your IT will need to send Redrock a sample file to create or update your import script.
Step 2. Change the Term Number
- As a SysAdmin, update your Term Number in your System Preferences. The term number is always a numeric value (e.g., 201910, 1910).
Trac Navigation > Trac-man > Utilities and Prefs -> System Prefs > CurrentTerm > Change to the new term number.
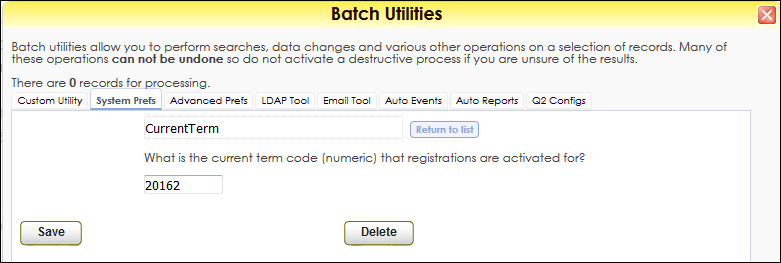
Step 3. Change Semester Dates
- As a SysAdmin, update your Semester Start and End dates in your System Preferences. The correct date format is MM/DD/YYYY.
Trac Navigation > Trac-man > Utilities and Prefs > System Prefs > SemesterStart/SemesterEnd

Step 4. Run the import
- As a SysAdmin, run the import utility manually. To view the status of your import, click on View Import Status > Execute. This will also tell you if the import has completed.
Trac Navigation -> Trac-man > Utilities and Prefs > Custom Utility > Standard > Import Student Data > Execute.
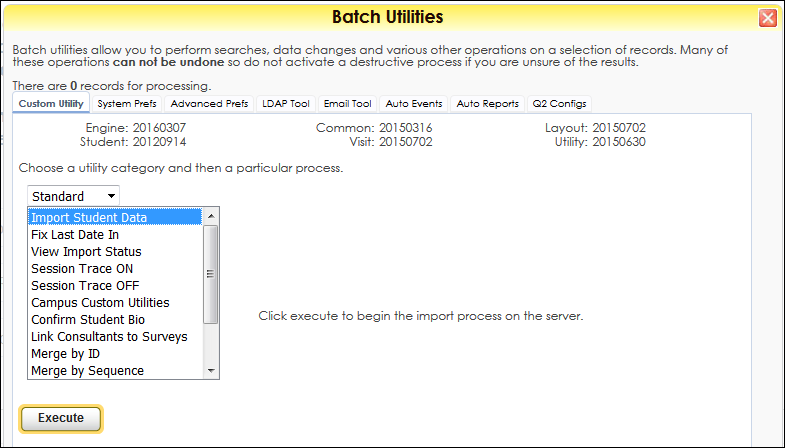
Step 5. Globally Activate Sections
- As a Center Profile Admin- Go to Trac Navigation > Search Glass > Center Profile > click on your Profile > Sections Tab > List Options > Activate These… That will check the box to the left of the Section Term ID.
Step 6. Activate Sections per Subcenter
You have two options to add the sections to your subcenter.
- First Option is to add ALL the sections to ALL Subcenters. From the Profile Sections tab, click on List Options > Subcenter Activation > Choose 'activate' or 'deactivate' and select the centers for which you would like add the all the sections to > Continue.
- Second Option is to add designated sections to a specific Subcenter. From the Profile Sections tab, select Subcenter Options > Click on the subcenter name > Check box in the middle box to activate the sections one by one.
Following either option will check the box to the right of the Section Term ID.
Trac Navigation > Search Glass > Center Profile > click on your Profile > Sections Tab

The next steps are optional since your center may or may not utilize these preferences
Step 7. Consultant Specialties [Optional]
- As a Center Profile Admin to add new sections or manually to your consultants- Go to the Trac Navigation -> Search Glass -> Center Profile -> Click on your Profile -> Consultants Tab -> Select consultants name-> Section Specialties Tab -> Search for the sections the consultant can meet with a student -> Check box to activate the sections -> Save.
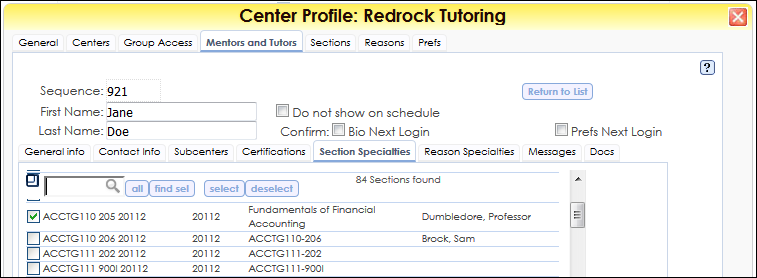
- As a SysAdmin to copy the consultant specialties from previous term to the new term- Go to the Trac Navigation -> Tracman Icon -> Utilities and Prefs -> Custom Utility -> Standard -> Copy Specialties -> Add the previous Term and the current term -> Execute.
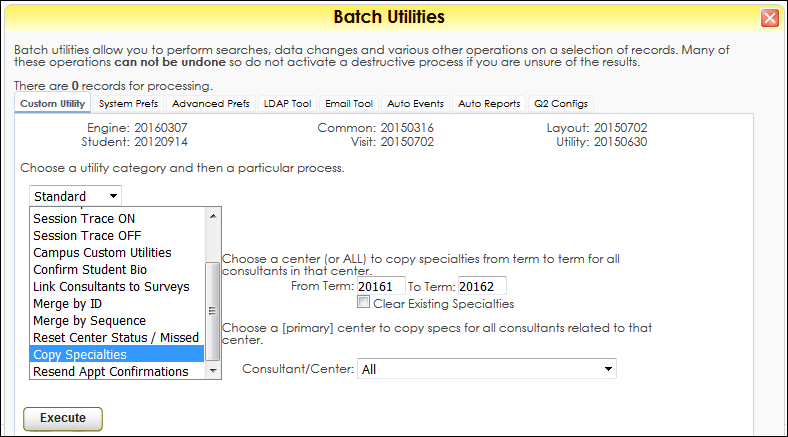
Step 8. Reset Center Status [Optional]
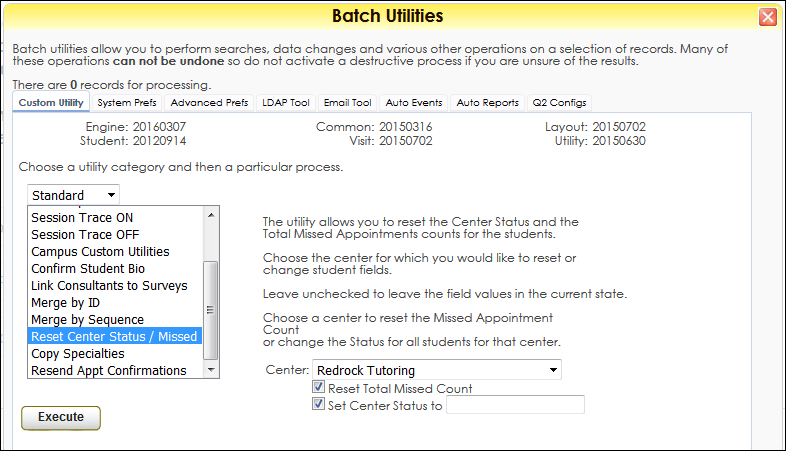
- First Step as a SysAdmin - Go to Trac Navigation > Trac-man > Utilities and Prefs > Custom Utility > Standard > Reset Center Status/Missed > Check the boxes “Reset Total Missed Count” and “Set Center Status to (leave blank)” > Execute.
- Second Step as a Center Profile Admin - Go to Trac Navigation > Search Glass > Center Profile > Click on your Profile > Prefs Tab > Scheduling Tab > change the date in “Student max missed:” > Save.

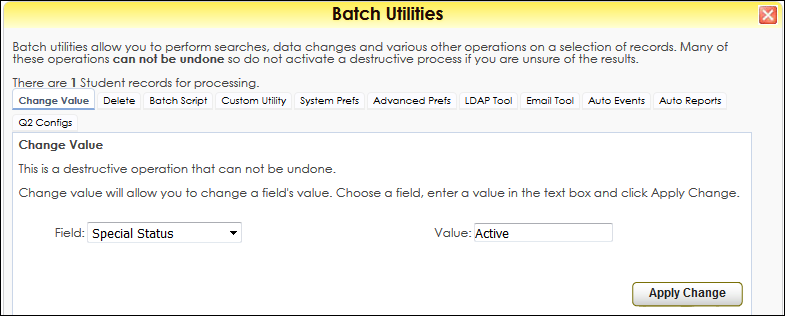
- Third Step as a SysAdmin - Go to Trac Navigation > Search Glass > Students > Search for “Inactive” Students > Trac Navigation > Trac-man > Utilities and Prefs > Change Value > Field: “Special Status” > Value: (Blank) or Active > Execute.
Other Settings - Max Appointment Rule
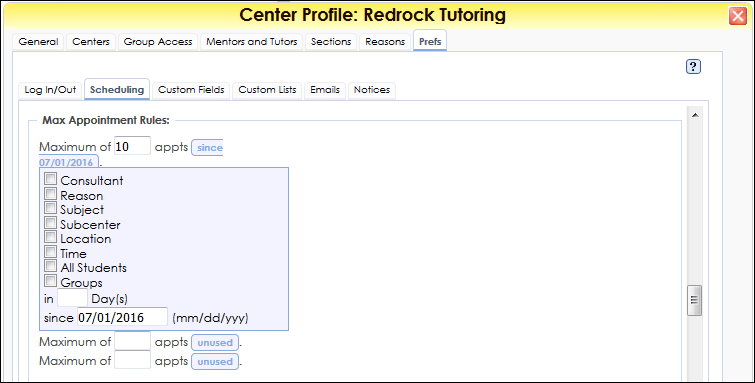
- As a Center Profile Admin - Go to the Trac Navigation -> Search Glass -> Center Profile -> Click on your Profile -> Prefs Tab -> Scheduling Tab -> Max Appointment Rules -> Update any date that is using the preference -> Save.
Other Settings - Other Scheduling Block
- As a Center Profile Admin - Go to Trac Navigation > Search Glass > Center Profile > Click on your Profile > Prefs Tab > Scheduling Tab > Other Scheduling Block > Update any date that is using the preference > Save.

Step 9. Deactivate Prior Semester Sections [Optional]
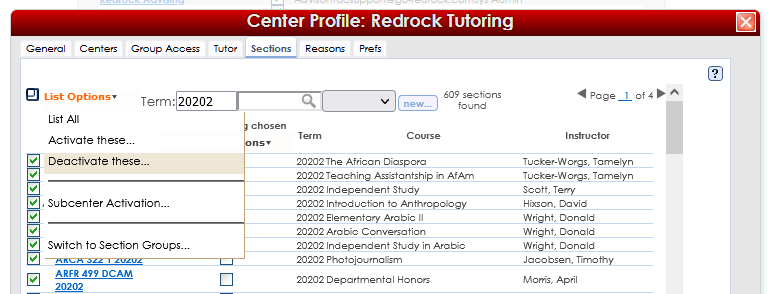
As an admin, go to Trac Navigation > Search Glass > Center Profiles > [Your Profile] > Sections > Search for your prior term number > List Options > Deactivate These.
More Questions?
We hope that you find this newsletter helpful and as always if you have any questions on this or any other features, please feel free to let us know by going to https://helpdesk.go-redrock.com and submitting a ticket.
Thank you for your continued support!
| 


