| Let’s say you want to reset the missed appointment counter, maybe a new semester is starting or you just want to change the missed appointment threshold. Here are the required steps to reset these restrictions.
This is a follow-up to our previous article covering how to configure these preferences in the first place, which can be found here.
Step 1. Resetting Dates
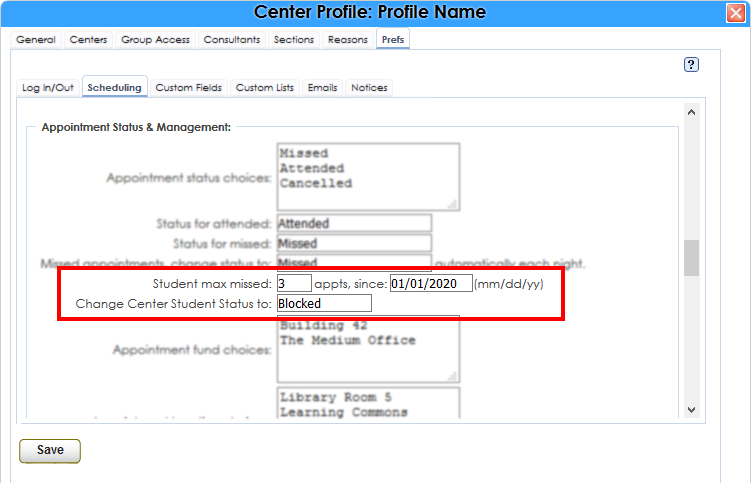
Go to Trac Navigation > Search Glass > Center Profiles > [Your Profile] > Prefs > Scheduling > Appointment Status & Management. Here, you will find the first date to update. Set this to the start of your new semester, or any arbitrary date.
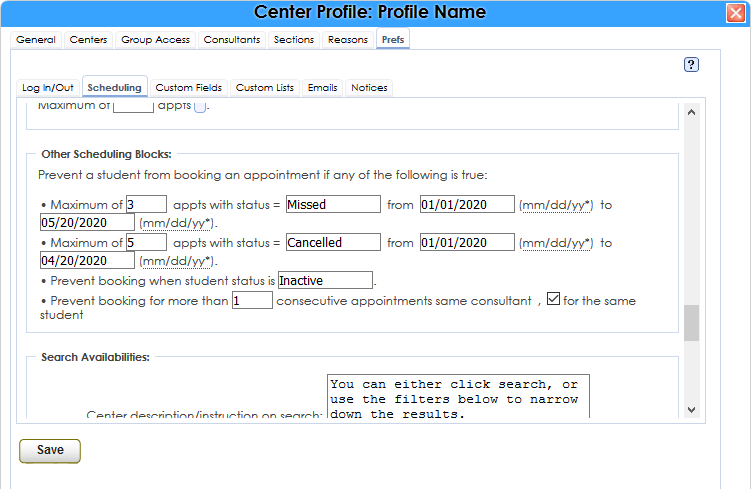
Scroll down further to the “Other Scheduling Blocks” section of the same menu, and update the dates here as well.
Click save once these have been updated.
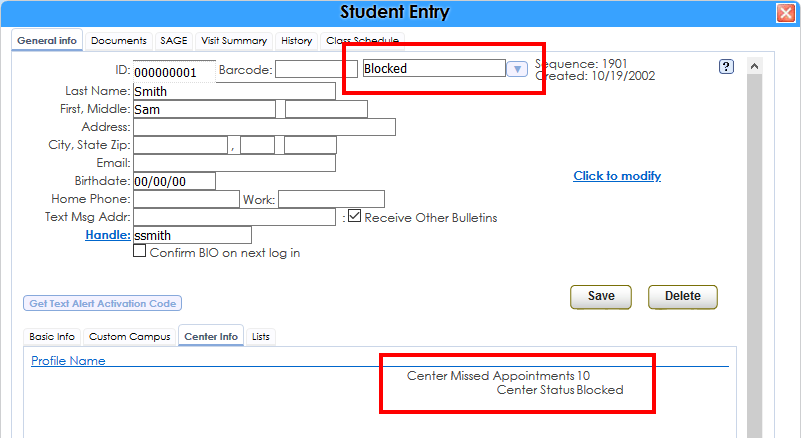
Student Entry
There are two fields that these preferences affect.
- Special Status – Their current status at the top of the General Info tab. This is their system wide status. This will only be changed if you have 1 Trac Profile. If you have more than 1, only the center status is changed.
- Center Status – Their current center status and total missed appointments in the “Center Info” tab. This is their center specific status.
Once they pass the missed threashold, one or both of these statuses will be changed.
Step 2. Resetting Missed Appointment Counter and Center Status
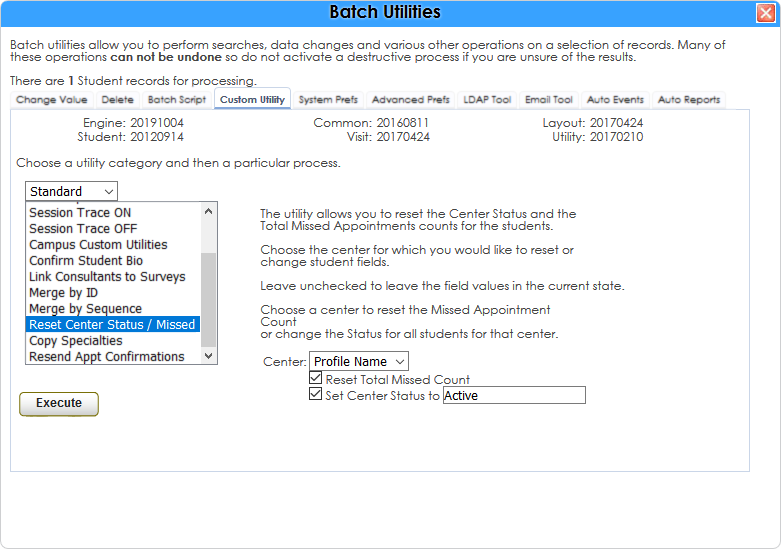
Go to Trac Navigation > Trac Man icon > Utilities and Prefs > Custom Utility > Standard > Reset Center Status / Missed. Choose your center, check the “Reset Total Missed Count” box, check “set Center Status to” (leave it blank or specify a status). Click execute to run the utility.
Step 3. Resetting Global Student Statuses — Only required if you have a single Trac Profile
The above utility only changes their center status, not their special status. For this, we’ll utilize the Change Value utility.
First, we need to get our list of students. Go to Trac Navigation > Search Glass > Students. Then, click on List Options > Search. Change “Status” to whatever status they were changed to (inactive, blocked, etc), then click search.
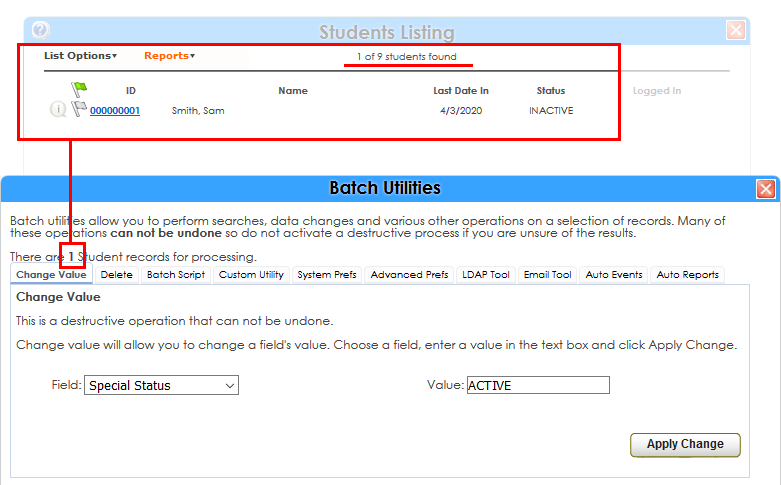
Once you have your list of students, go to Trac Navigation > Trac Man > Utilities and Prefs > Change Value. Above the tabs, you’ll see “There are [X] student records for processing”, make sure this matches the number found on the student listing. Keep in mind that this is a destructive operation. Take caution as to not accidentally change another field, as this cannot be undone. Ensure that this is the only Trac System tab you have open.
Set “Field” to “Special Status”, set “Value” to or blank (or specify a status), then click “Apply Change”.
The student(s) will now be able to login and book appointments again.
More Questions?
We hope that you find this newsletter helpful and as always if you have any questions on this or any other features, please feel free to let us know by going to https://helpdesk.go-redrock.com and submitting a ticket.
Thank you for your continued support!
| 


