TracCloudGuideListingsTerms: Difference between revisions
From Redrock Wiki
No edit summary |
No edit summary |
||
| Line 83: | Line 83: | ||
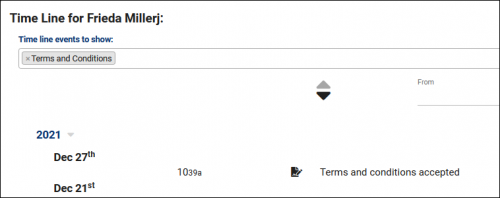
[[File:1416500.png|500px|Screenshot: Student Time Line showing a recent Term/Condition agreement.]] | [[File:1416500.png|500px|Screenshot: Student Time Line showing a recent Term/Condition agreement.]] | ||
<hr> | |||
==4. Allowing Students to View Accepted Terms and Conditions== | |||
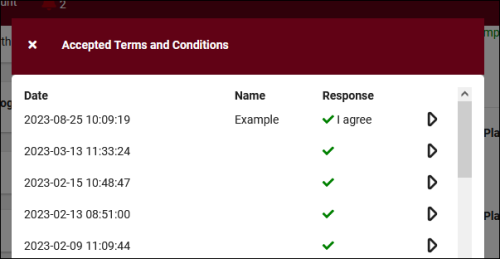
In order for students to be able to view terms and conditions that they've previously accepted, a system preference needs to be enabled. Go to <i>Other > Other Options > Preferences > System Preferences > General Appointment Settings > Check "Allow students to view accepted Terms and Conditions on dashboard" > Save</i>. Once enabled, students will see this button on their main menu next to the calendar URL. Clicking it will open a list of terms and conditions they've accepted, where they can see their response and the terms themselves by clicking on the arrow button. | |||
[[File:7304703.png|500px]] | |||
[[File:2235798.png|500px]] | |||
|} | |} | ||
[[Category:TracCloud]] | [[Category:TracCloud]] | ||
Revision as of 11:10, 2 October 2023
|
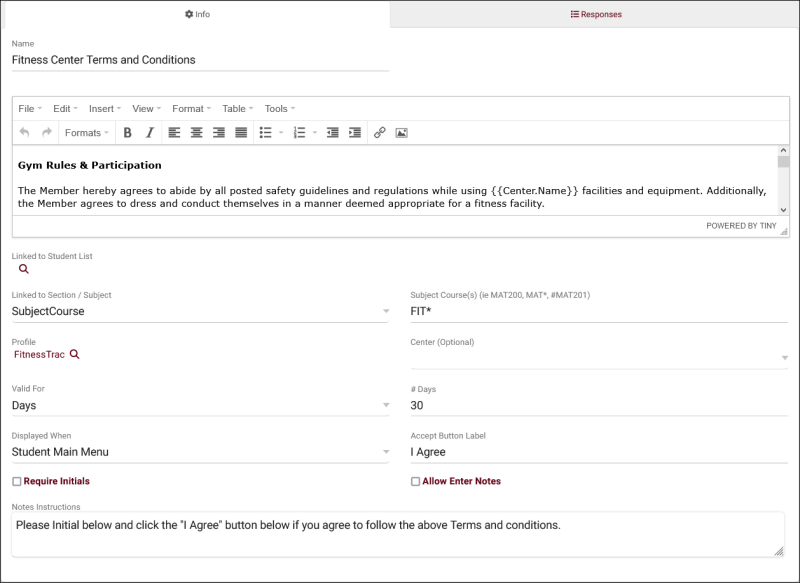
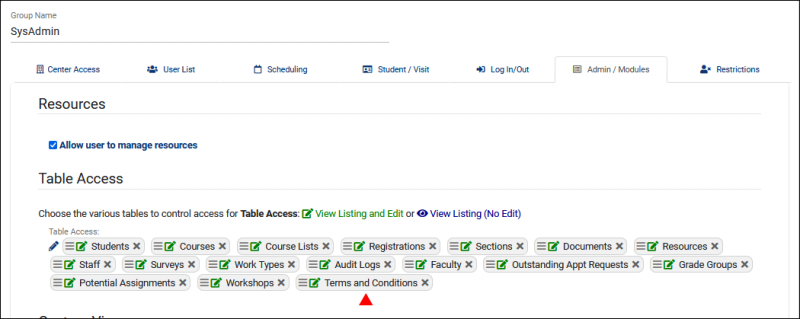
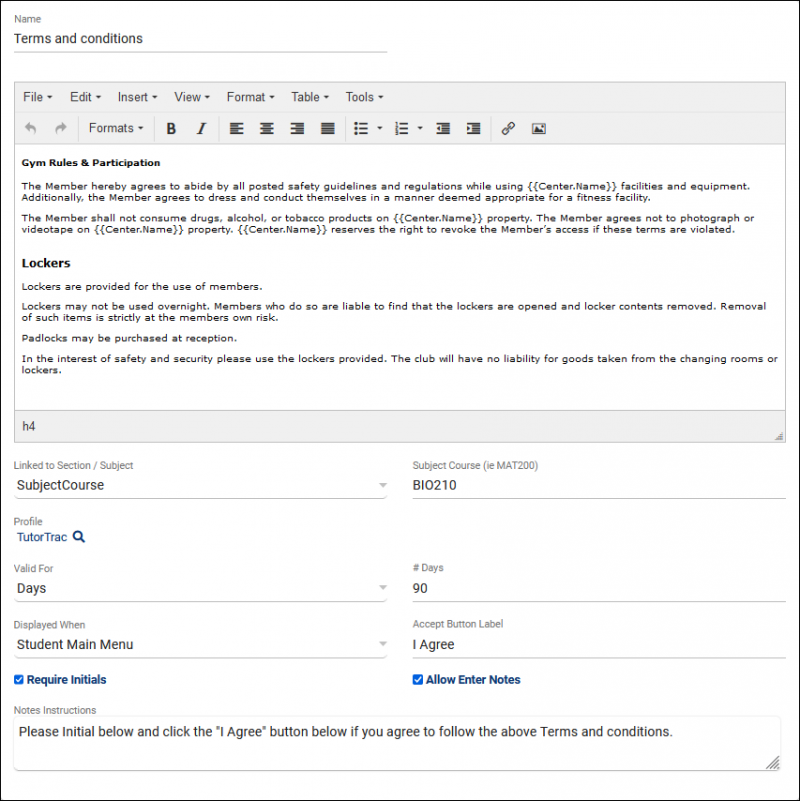
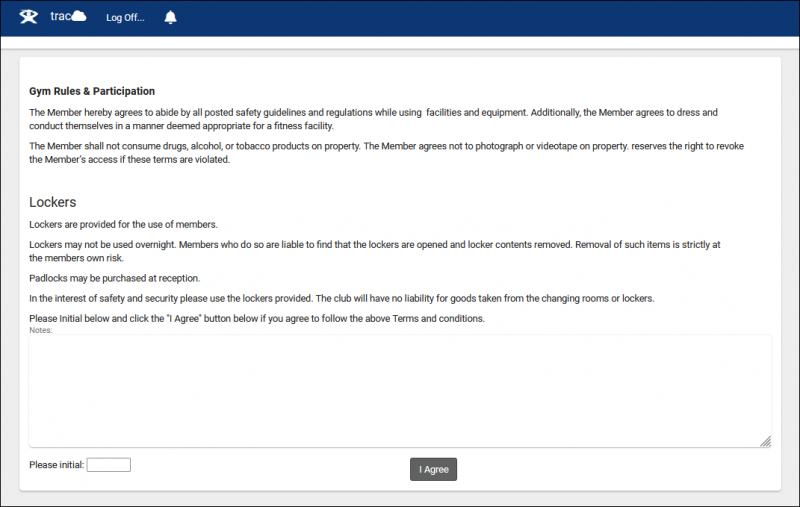
Terms & Conditions Terms & Conditions allows you to create a prompt that appears for students when they're logging in or booking an appointment. The prompt will contain a custom message, which the student will have to agree to before continuing. While Terms/Conditions are of course the typical use-case, this feature can also be used for any purpose where a student would need to agree to a statement before having full access to the system. 1. Creating a new Term/ConditionNavigate to Other > Listings > Terms and Conditions. This will take you to the Terms and Conditions listing, where you can view or edit and previous entries. To create a new Term/Condition, click the hamburger icon and select New Terms and Conditions.
2. Group SettingsIf you need to allow another set of staff members in your TracCloud instance to access/modify Terms and Conditions, you will need to apply a change to their permission group. Specifically, the Terms and Conditions option will need to be added to Table Access as seen below. This can either be set to View and Edit for full access, or View Only, if you don't want these users making any changes. Other > Other Options > Groups > [The group you want to edit] > Admin / Modules > Table Access 3. Example ConfigurationThe screenshot below shows an example of how Terms and Conditions can be configured, and how it displays to students. Here's how that prompt looks to a student when logging into their account. After the student agrees, the record of this agreement will appear in their Time Line as seen below. 4. Allowing Students to View Accepted Terms and ConditionsIn order for students to be able to view terms and conditions that they've previously accepted, a system preference needs to be enabled. Go to Other > Other Options > Preferences > System Preferences > General Appointment Settings > Check "Allow students to view accepted Terms and Conditions on dashboard" > Save. Once enabled, students will see this button on their main menu next to the calendar URL. Clicking it will open a list of terms and conditions they've accepted, where they can see their response and the terms themselves by clicking on the arrow button. |

