TracCloud: Payroll: Difference between revisions
From Redrock Wiki
No edit summary |
No edit summary |
||
| Line 140: | Line 140: | ||
==7. Funds== | ==7. Funds== | ||
Funds can be entered in several locations, from the student profile to the consultant. The order in which these are prioritized is <i>Student > Visit > Appointment > Availability > Consultant</i>, with the Consultant Fund only being utilized if the other 4 funds for a particular scenario are blank. Information on enabling each of these fund fields can be found below. <b>Consultant Fund</b> is enabled by default. | Funds can be entered in several locations, from the student profile to the consultant. The order in which these are prioritized is <i>Student > Visit > Appointment > Availability > Consultant > Center</i>, with the Consultant Fund only being utilized if the other 4 funds for a particular scenario are blank. Information on enabling each of these fund fields can be found below. <b>Consultant Fund</b> is enabled by default. | ||
Revision as of 23:56, 2 November 2022
Getting Started / Basics
|
Tracking Staff Payroll in TracCloud TracCloud provides the ability to track hours and pay rates of your consultants based on different work types and pay bases. You can then base other system functionality on whether or not a consultant is logged in for work, and report on this payroll data after the fact. Funds can also be used to define pay rates and to group data in reports. 1. Pay CodesThe first step towards utilizing TracCloud's payroll features is setting up Pay Codes. Each consultant can be assigned to one Pay Code, we will then be utilizing these Pay Code values to determine Pay Rates in our Work Types. Other > Other Options > Preferences > Pay Codes. This is only accessible to SysAdmin accounts. File:2709632.png 2. Pay BasisThis setting determines how we're tracking work hours. Each Profile can be set to use a different Pay Basis. Other > Other Options > Profiles > [Your Profile] > Prefs > Pay Basis.
File:2135910.png If you're utilizing Consultant Work Time as your Pay Basis, you may prefer to have the consultant login button visible on kiosks. To enable this, check Show Consultant Login Button in your Log In/Out prefs. Other > Other Options > Profiles > [Your Profile] > Prefs > Log In/Out.
File:1939821.png In the same menu, and again relevant for those using Consultant Work Time, you have Only show Consultants that are logged in to Work during KIOSK visit login. If enabled, this will filter down the list of available consultants when students are logging in to only those who are logged in for work. This is primarily utilized for Drop-in-focused environments. Other > Other Options > Profiles > [Your Profile] > Prefs > Log In/Out. File:7588159.png 3. Work TypesNext up is Work Types, you can think of these as a form of Pay Rate condition. You'll end up creating multiple of them in a typically configuration to cover each possible condition where a Pay Rate needs to be defined. Other > Listings > Work Types.
File:9158623.png To create new Work Type, click the Hamburger icon (File:Hamburger.png) and select New Work Type. This will bring you to the following screen.
To provide a Permission Group the ability to view/modify Work Types, it can be added to the relevant Group's table access settings. Other > Other Options > Groups > [The Group you want to modify] > Admin / Modules > Table Access. File:6838667.png 4. Tutor Pay CodesNext up, we need to assign a Pay Code to our consultants. The is as simple as going to their profile and choosing the correct Pay Code from the drop-down menu. Save after making changes. Other > Listings > Staff > [Your Consultant] > Pay Code. File:5481492.png
5. Work Reasons (If Pay Basis is Work Time)If Consultants are logging in for work hours (via kiosk or dashboard), work Reasons can be created to better categorize their hours. Simply create a reason as you normally would, and make sure to check the Work Reason checkbox. Other > Other Options > Profiles > [Your Profile] > Reasons > New Reason.
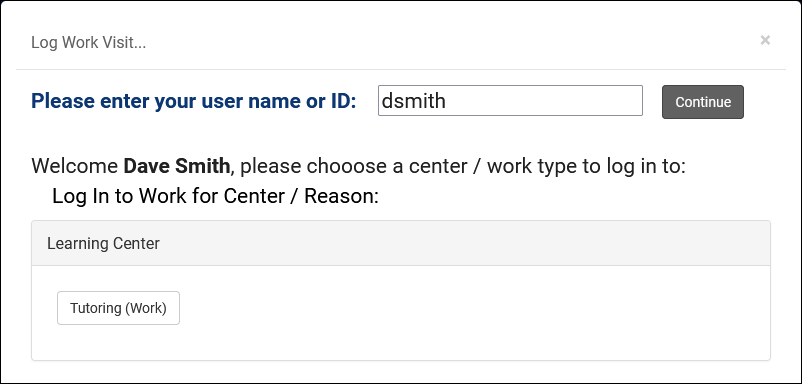
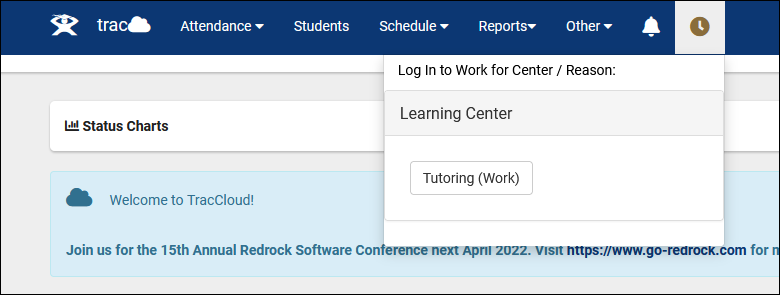
File:6556093.png The next time a consultant logs into a center, they will see the available work reasons to select. 6. Work Visits (If Pay Basis is Work Time)There are two ways a consultant can start their work visit. 1. From a Kiosk or Log Listing
2. From the dashboard
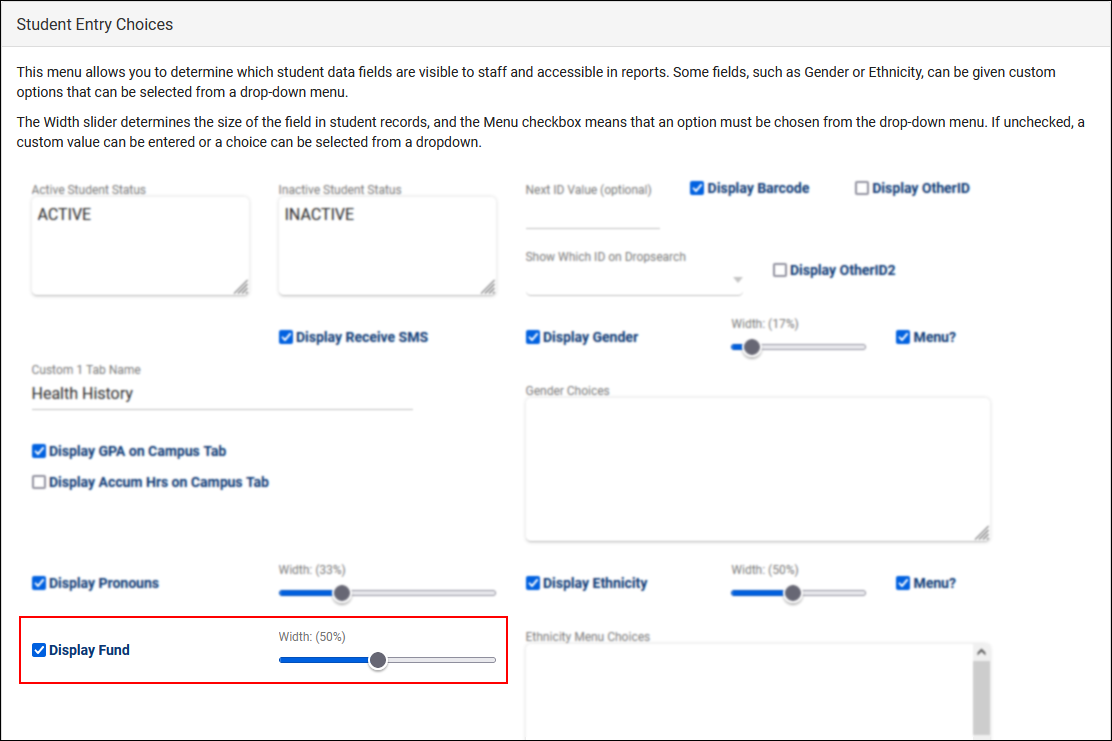
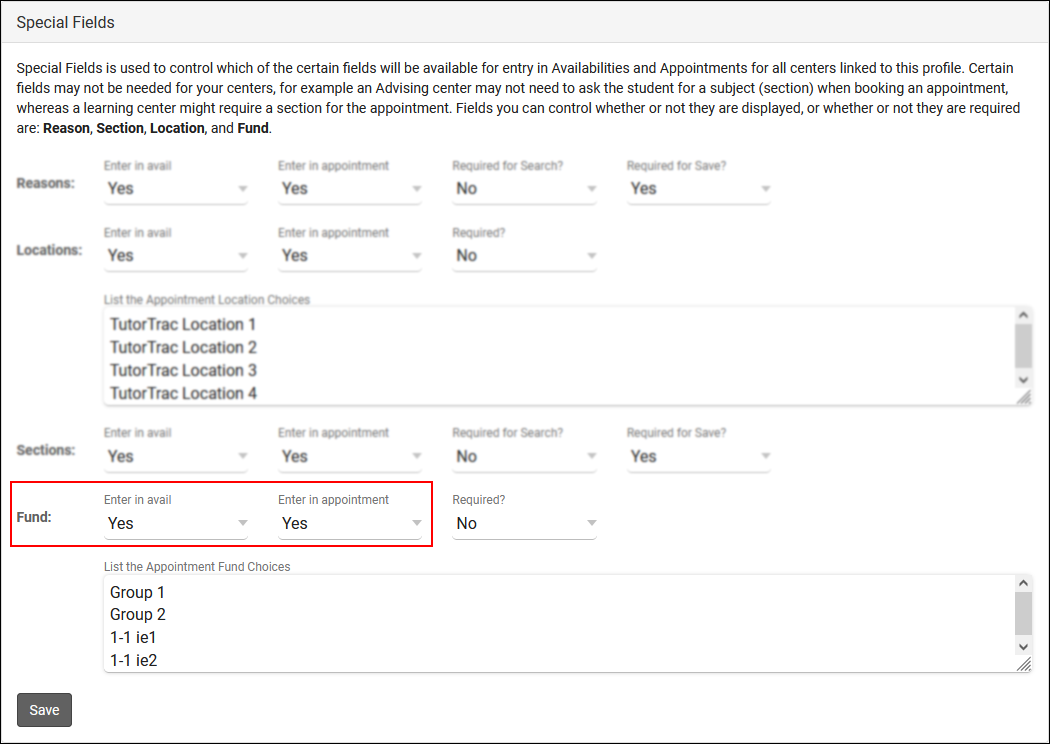
7. FundsFunds can be entered in several locations, from the student profile to the consultant. The order in which these are prioritized is Student > Visit > Appointment > Availability > Consultant > Center, with the Consultant Fund only being utilized if the other 4 funds for a particular scenario are blank. Information on enabling each of these fund fields can be found below. Consultant Fund is enabled by default.
Other > Other Options > Preferences > Student Entry Choices > Display Fund.
Appointment and Availability Fund can be found in your Profile Preferences. The Appointment Preference also applies to Visit Fund. Other > Other Options > Profiles > Prefs > Scheduling > Special Fields.
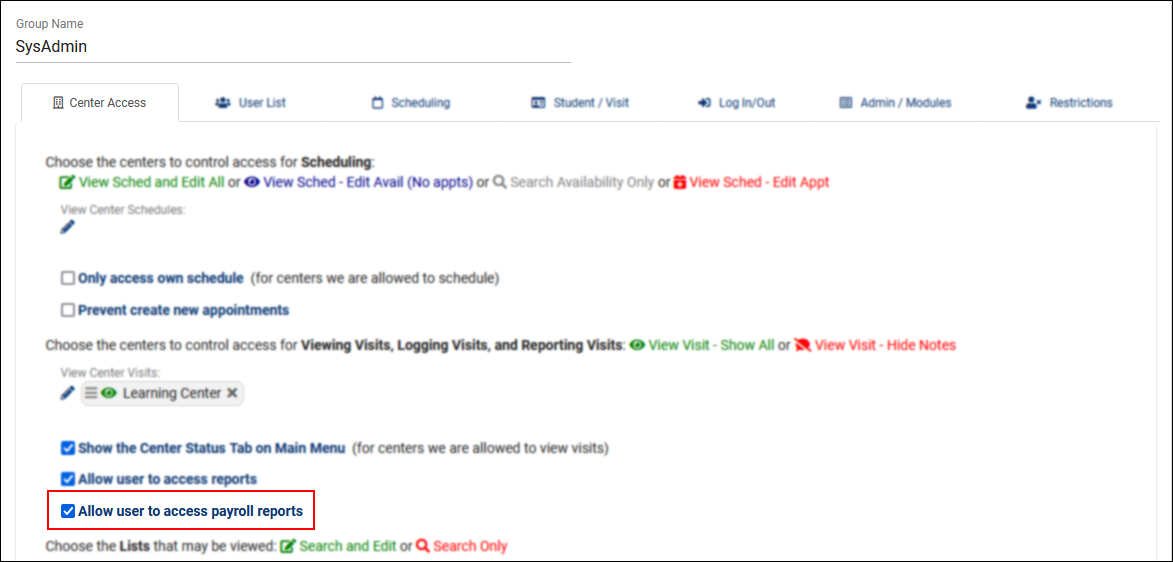
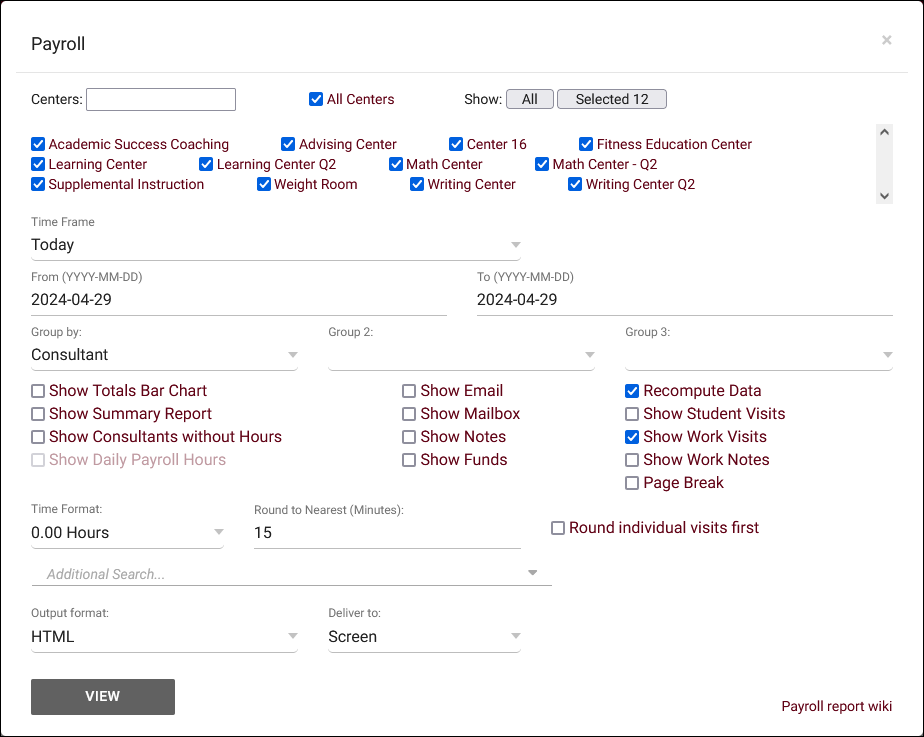
8. Payroll ReportsThere are two Payroll reports available for this information, found in the Navigation Bar, under Reports > Payroll. Access to these reports does require Allow user to access payroll reports to be enabled in the relevant permission group. Other > Other Options > Groups > [The group you want to modify] > Center Access.
Once enabled, the following reports will be available.
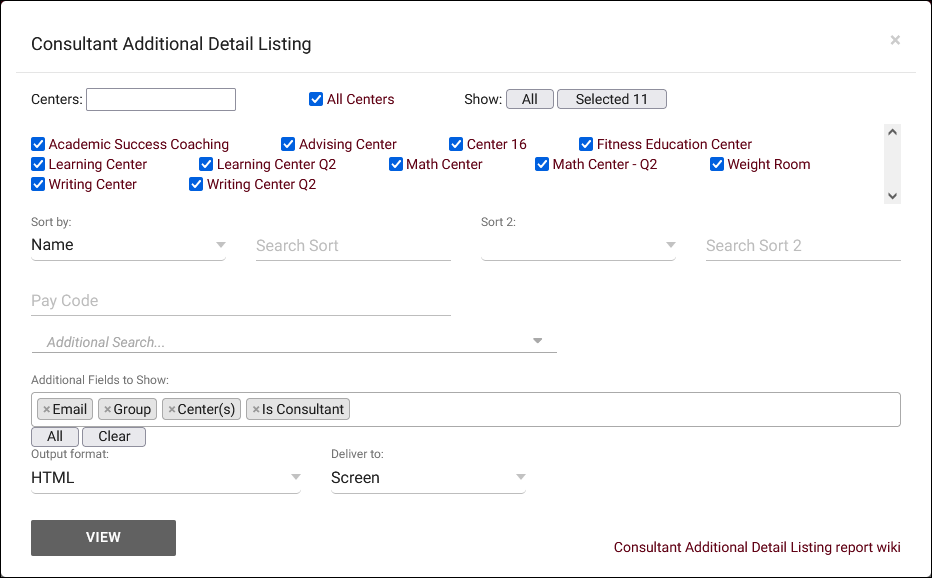
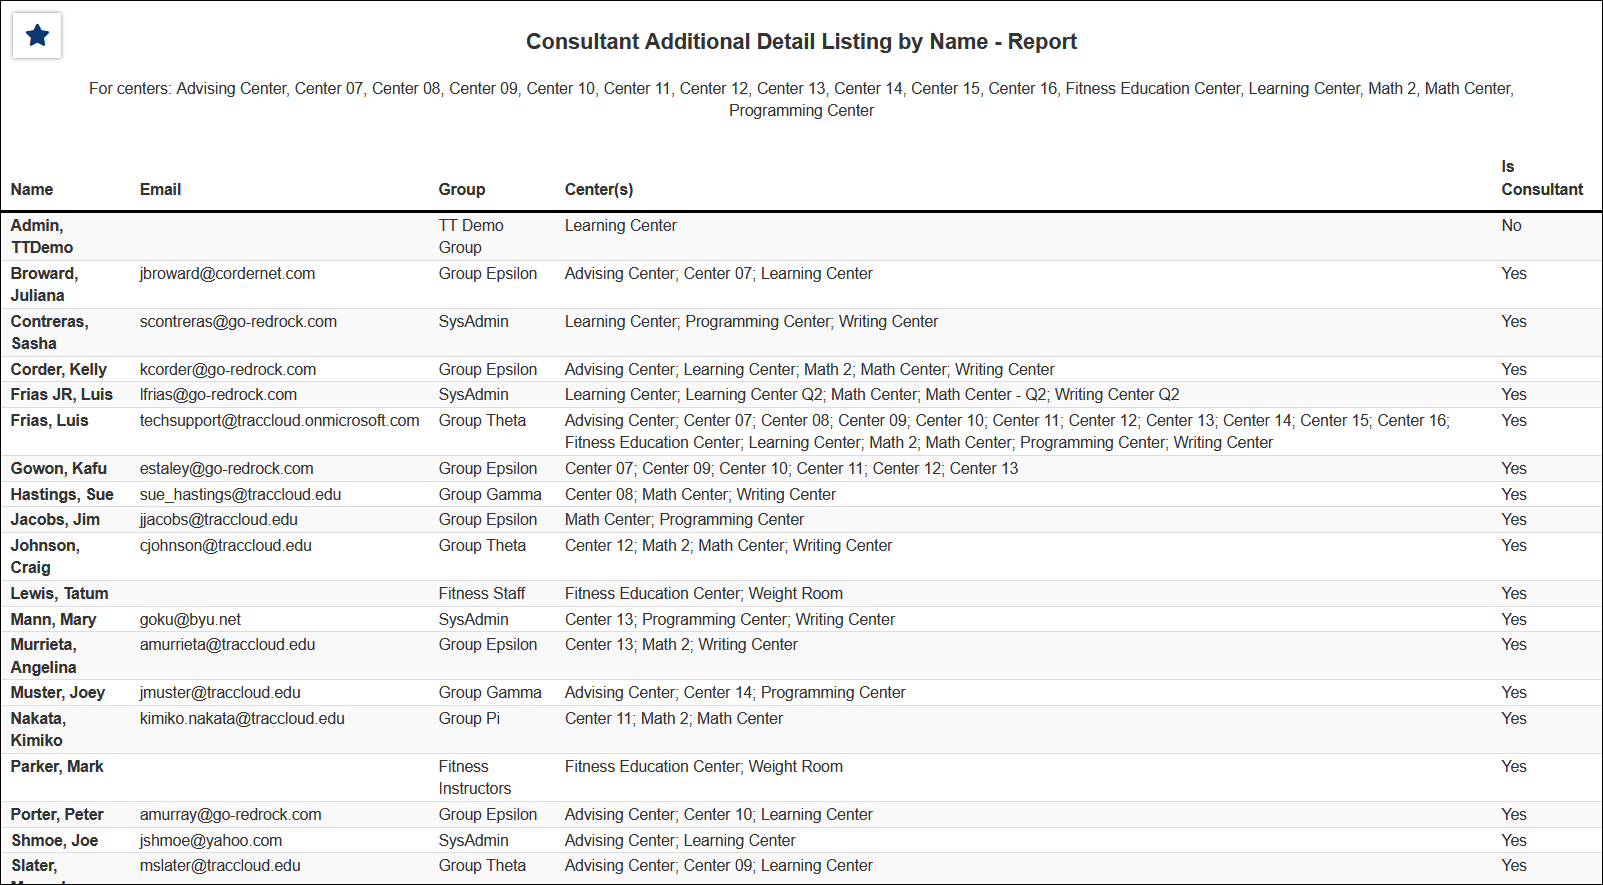
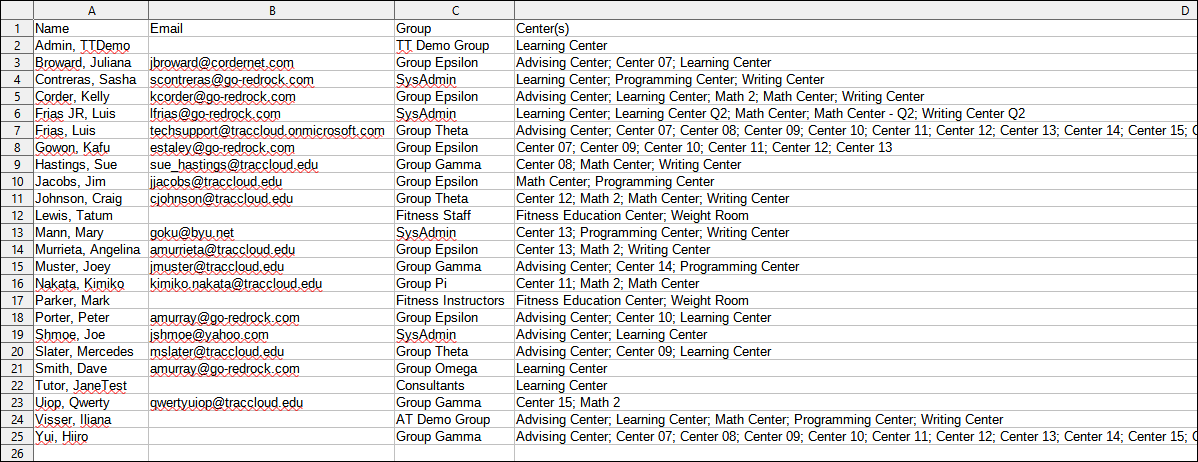
Consultant Additional Detail Listing This report will pull all active staff into a report with their name, email, assigned group, linked centers, and if they are a consultant (have a schedule on the calendar).
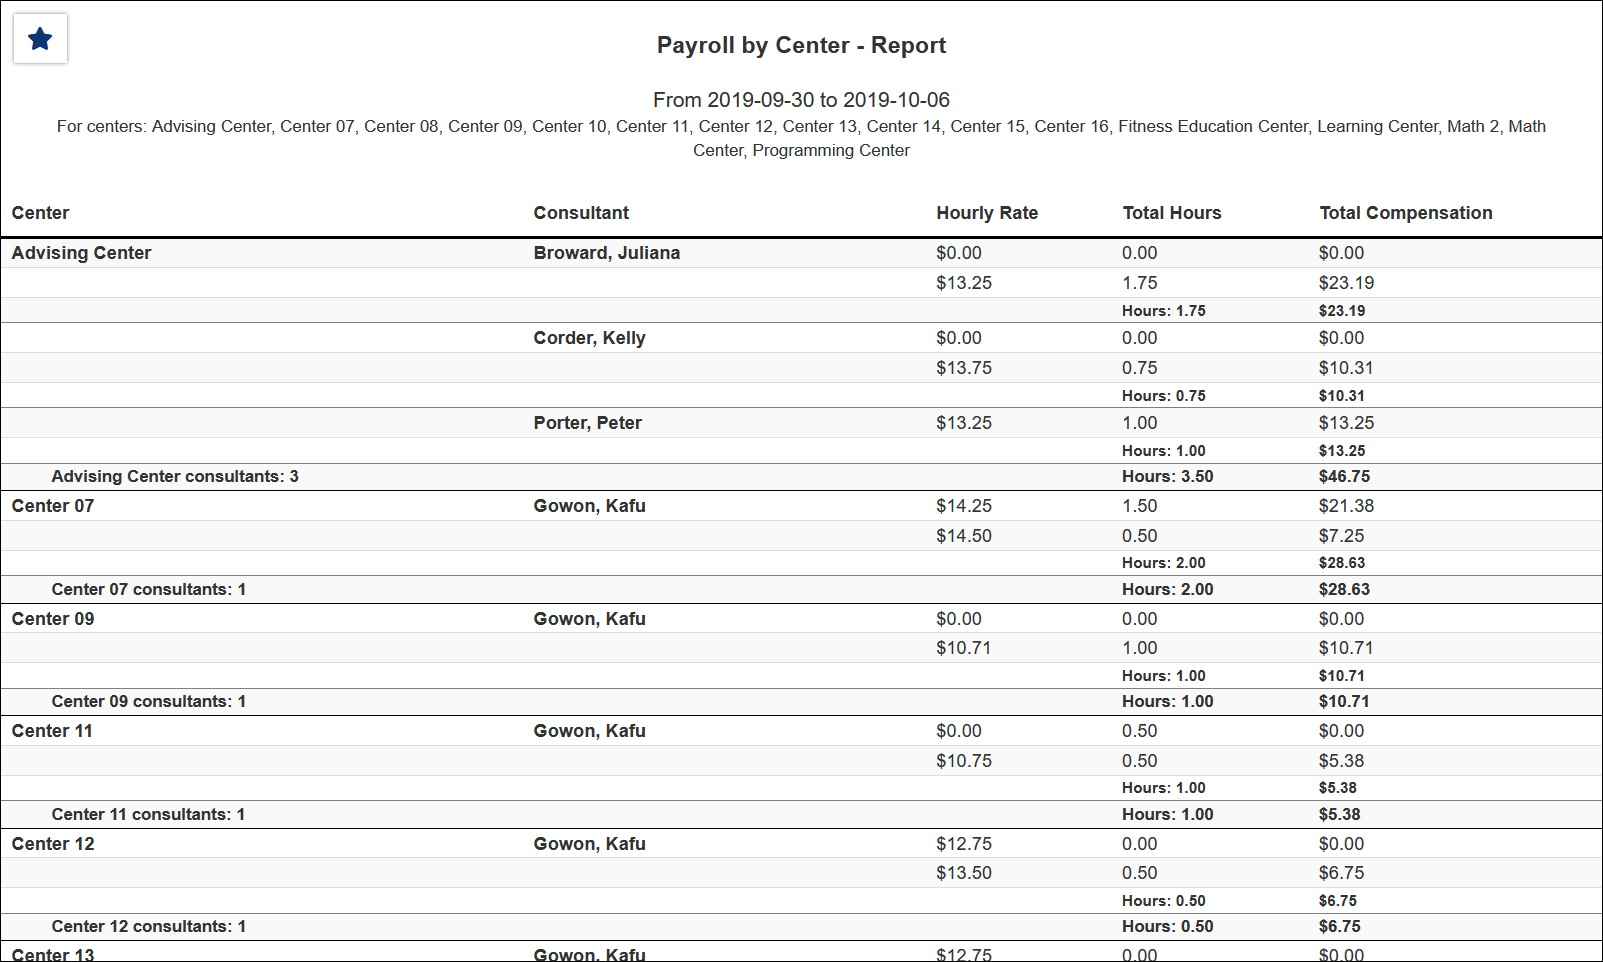
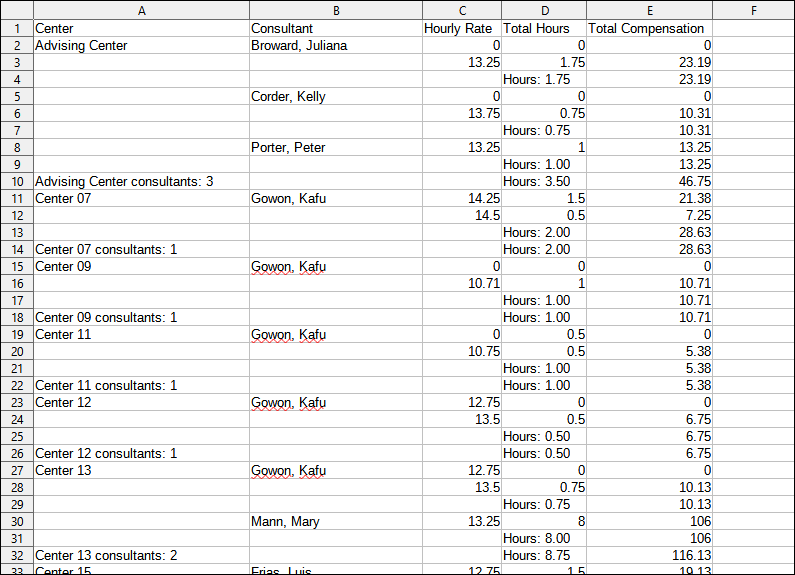
Payroll This report will show you payroll grouped by the center. Consultant, hourly rate, total hours, and total compensation will be displayed.
|
