TracCloud: Tasks: Difference between revisions
From Redrock Wiki
No edit summary |
No edit summary |
||
| (4 intermediate revisions by the same user not shown) | |||
| Line 6: | Line 6: | ||
<big><b>Task Types</b></big><br> | <big><b>Task Types</b></big><br> | ||
Tasks can be created for [[TracCloudGuideListingsStudents|students]] or [[ | Tasks can be created for [[TracCloudGuideListingsStudents|students]] or [[TracCloud:_Staff_and_Consultants|staff]], displaying as a notification letting them know of something they need to complete. These tasks are assigned types, which are then assigned to permission groups to determine which staff members can create what tasks. | ||
<div class="line"></div> | <div class="line"></div> | ||
<big><b>Creating a Task Type</b></big><br> | <big><b>Creating a Task Type</b></big><br> | ||
| Line 16: | Line 16: | ||
<big><b>Assigning Task Type Access</big></b><br> | <big><b>Assigning Task Type Access</big></b><br> | ||
After creating your task type, you will need to update [[ | After creating your task type, you will need to update [[TracCloud:_Permission_Groups|permission groups]] so your staff can access and create tasks in this category. Within each permission group, under the <i>Center Access</i> tab, you will find a Task Types list, where you can designate access to specific types.<br> | ||
<i>Other > Other Options > Groups > [The group you want to edit] > Center Access</i><br> | <i>Other > Other Options > Groups > [The group you want to edit] > Center Access</i><br> | ||
| Line 52: | Line 52: | ||
<hr> | <hr> | ||
<big><b>Tasks Report</b></big><br> | <big><b>Tasks Report</b></big><br> | ||
{{: | {{:TracCloud_Report:_Tasks}} | ||
[[Category:TracCloud]] | [[Category:TracCloud]] | ||
<hr> | <hr> | ||
<i>See Also:</i> | <i>See Also:</i> | ||
[[TracCloudGuideGlobalNotifications|Notification Types]] | [[TracCloudGuideGlobalNotifications|Notification Types]] | ||
Revision as of 15:54, 19 November 2024
Task Types
Tasks can be created for students or staff, displaying as a notification letting them know of something they need to complete. These tasks are assigned types, which are then assigned to permission groups to determine which staff members can create what tasks.
Creating a Task Type
To create a new Task Type, go to Other > Other Options > Preferences > Task Types. Here, you will find your list of available types. To add a new type, click the + icon and select the name to rename it.
Assigning Task Type Access
After creating your task type, you will need to update permission groups so your staff can access and create tasks in this category. Within each permission group, under the Center Access tab, you will find a Task Types list, where you can designate access to specific types.
Other > Other Options > Groups > [The group you want to edit] > Center Access
Additionally, to provide access to the dashboard Student Tasks utility, go to the Student / Visit tab in the permission group and enable Show the Tasks & Create Task on Main Menu.
Creating Tasks for Students/Staff
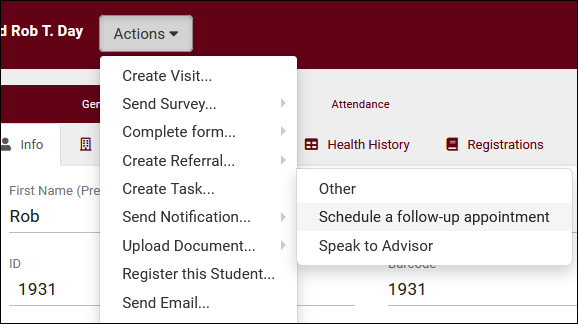
A task can either be submitted from the dashboard (if the permission group allows it) or a student/staff profile directly. Either option will take you to a task creation menu.
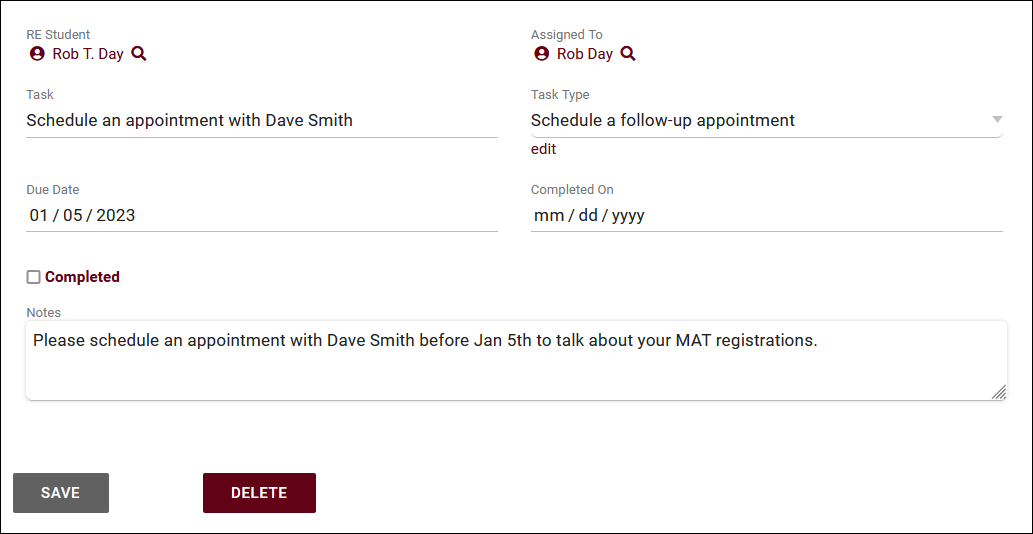
The Task creation menu allows you to select the student and staff member this task is assigned to, the task and task type, the due date, and additional notes if more information is needed.
Recipient View
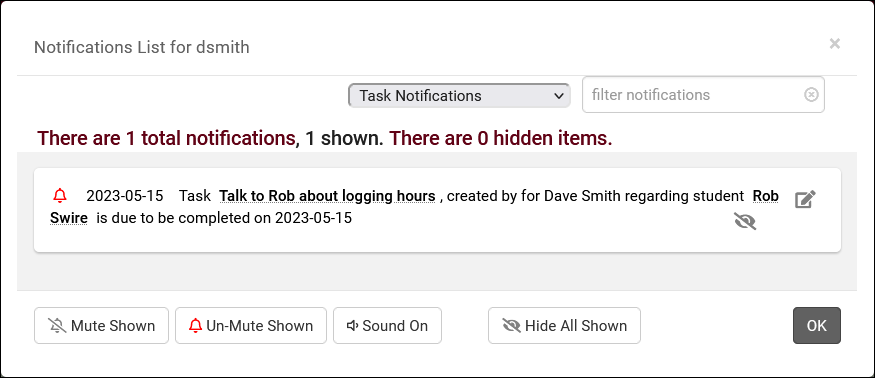
As the recipient of a task, we can find our upcoming tasks in our notification list (bell icon in navigation bar). Once we’ve completed the task, we can click the edit icon, check the “Completed” checkbox, then save.
The completed task can be found in the student/staff timeline if we need to refer back to it later.
Task Listing
The Task Listing contains a list of all tasks that have been created for your users, allowing you to easily access a specific task or simply view recently submitted tasks. New tasks can also be created from this menu by clicking the hamburger icon in the top-left.
Other > Tasks
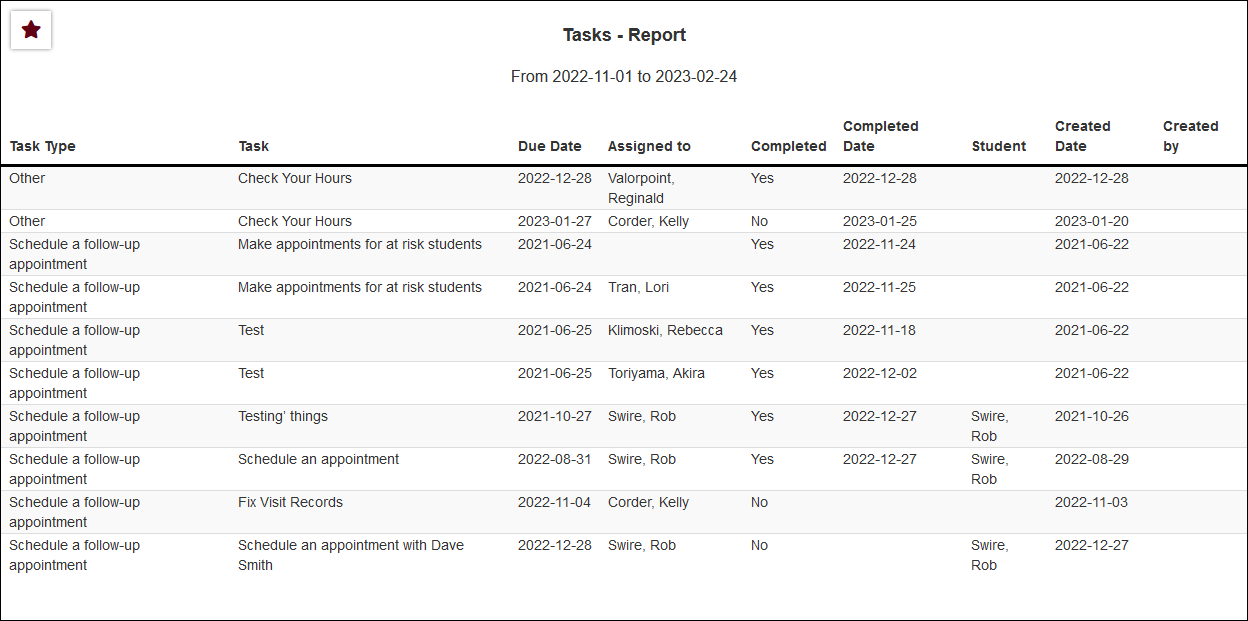
Tasks Report
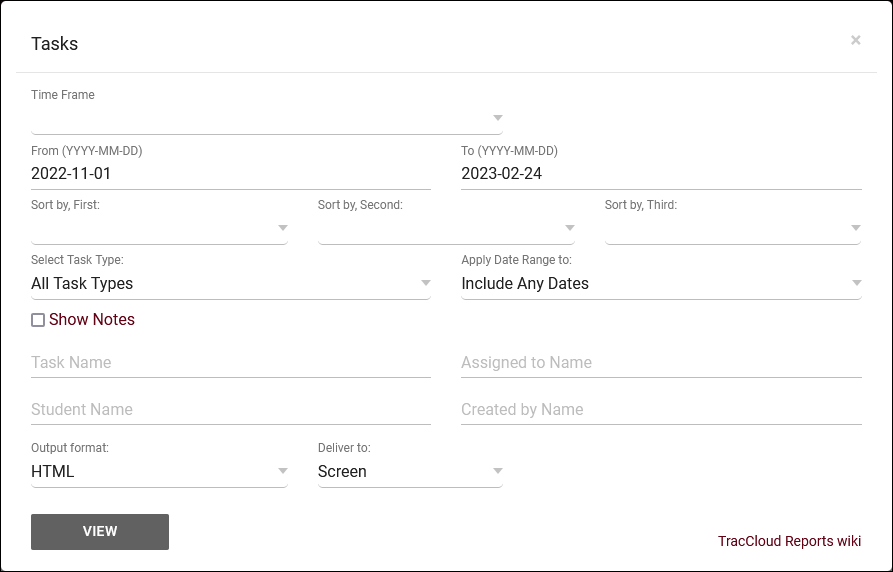
The Tasks report, found in Reports > Management, allows you to review submitted tasks and their status. This includes the task type, due date, created date, whether or not it has been completed, and more.
- Time Frame
- The date range for the data in this report. Beyond entering a date range manually, you can also choose a preset date range (Today, This Month, This Semester, etc) from the dropdown list above.
- Sort by
- Choose how the selected data is sorted.
- Select Task Type
- Select the specific task type/category that you want to include in this report.
- Apply Date Range to
- Choose what your selected date range is in reference to. Defaults to any matching date range.
- Show Notes
- Include the contents of the Notes field in report results.
- Task Name, Assigned to Name, Student Name, Created by Name
- These fields allow you to further filter report results to view the specific tasks you're looking for.
- Output format
- Use HTML to view report data in your browser, or export this report to a CSV file (available for most reports). Some reports offer additional CSV options depending on if you want to include totals and/or data grouping in your export.
- Deliver to
- Display this report immediately in your browser ("Screen"), or send the report to a specified email address ("Email"). Multiple email addresses can be specified, use ; to separate them (example@example.edu;sample@example.edu).
See Also:
Success Plans - Steps can be based on tasks.
Work Plans - Steps can be based on tasks.


