|
|
Log In/Out Preferences
The first section of our “Prefs” tab contains our Log In/Out preferences. These preferences control how the log listing displays, kiosk preferences, additional kiosk features, and more. This article will go through every preference in this menu, explaining exactly how they function.
Log In/OutFile:7k5mj5hg45g46j4k4.png
- Choose Consultant on Login & # Choices
- Ask for Subject
- Ask for Reason
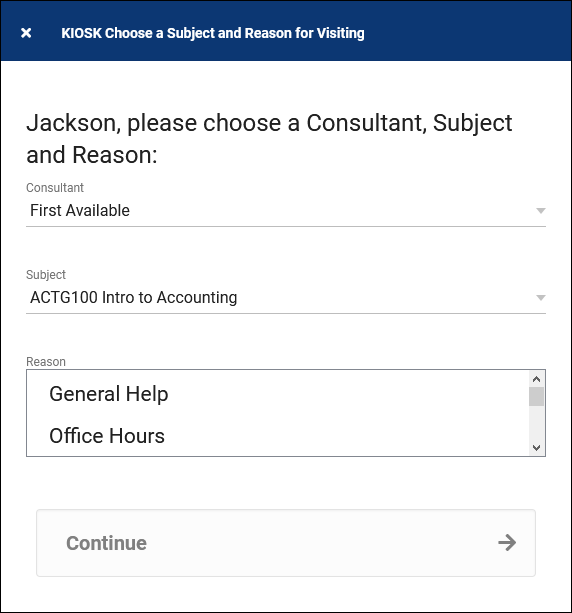
- These settings control which options appear during the login process, as well as how many options appear at once. As an example, the screenshot below matches the configuration above. Since we have the Reason choices set to 2, we can see 2 reasons at once in the login window, but of course we can still scroll down to see all available options.

- Choose Consultant on Logout & # Choices
- If enabled, TracCloud will ask what consultant the student visited with while concluding their visit. # of choices behaves just like the preference above.
- Set initial status to waiting on log in
- If enabled, when a student logs in, their status will be “waiting” by default, rather than “Started [meeting with consultant]”. This would be utilized when you need to keep track of wait time in addition to actual visit time.
- Include wait time in total for visit
- If enabled, the wait time will be included in the total visit time in the student’s history.
- When this time limit is reached, the “Wait Time” counter on the Log Listing/Kiosk changes color to be more noticeable.
- Format to display Subject
- This preference controls how the subject field is displayed during the login process. For example, you can choose to only display the Subject or the Title, or you can include the full Subject Section Title if needed.
- This preference controls the order of questions asked during the login process. For example, if you want the student/staff to select a consultant first, then select a subject that the consultant can assist with, you would put “Consultant” prior to “Subject” in this section. This also works in reverse, if you want you want to select a subject first, then a consultant that is able to assist.
- ________ choice determines list of ________
- This preference changes depending on the KIOSK order defined above. If you choose subject before consultant, these checkboxes ask if you want to let the staff/student’s Subject choice determine the list of consultants, based on the consultants assigned course list.
- Only show Consultants that are available for dropin during KIOSK visit login
- If enabled, only consultants that have a currently available drop-in availability will appear in the Consultant box.
- Only show Consultants that are logged in to Work during KIOSK visit login
- If enabled, only consultants who are currently logged in for a Work visit will appear in the consultant choice box.
- Only show if linked to Student record as Primary Consultant
- If enabled, only the student’s assigned consultant will appear within availability searches and Kiosks. This requires that “Linked Staff to Student” is configured for your profile and centers.
- Allow ‘First Available’ as a choice
- If enabled, “First Available” will be an available consultant choice during the login process. A consultant can be selected during the Waiting to Started visit status change, during the logout process, or manually changed within the student’s visit record after the fact.
- Allow 'First Available' for these centers:
- Ties into the previous setting, you can restrict which centers can choose “First Available” as an option.
- Delay for Welcome and Goodbye Message (seconds)
- Controls how long the Welcome and Goodbye messages display before automatically closing.
- Delay for log listing refresh (seconds)
- This setting controls the frequency of automatic log listing refreshes, allowing you to see the most up to date visit data.
Log List CustomizationThese settings determine what and how information is displayed on the Log Listing, from both the staff and Kiosk point of view.
File:546u4kk5j56h5.png
- This lets you specify if the log listing is shown in a Tile or Vertical List format. A simple example of a Vertical List format can be seen below, and tiles can be seen in the next preference description.
- File:76k68l68l6jhyt.png
- This setting controls the gap between students shown in the listing when the Tile layout is selected.
- Tile Spacing: 10

- Tile Spacing: 50

- Show Touchless QR Code for KIOSK Student Signin on Phone
- This preference adds a QR code to your Kiosk. Students can scan this with their phones, which will take them to a URL where they can enter their ID to login/logout. This QR code automatically regenerates after several minutes, so students can’t keep the URL for later use.
- File:46j554jt34g45h35j.png
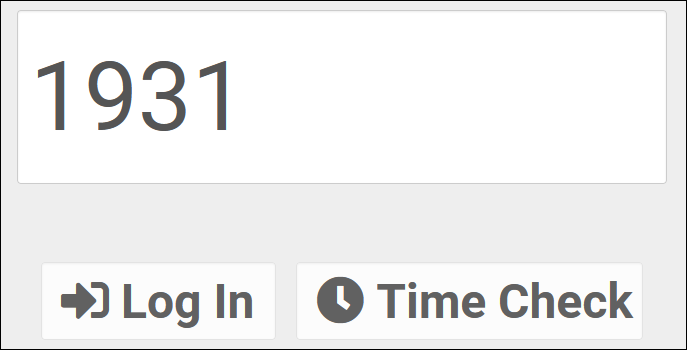
- Show Time Check Button on KIOSK
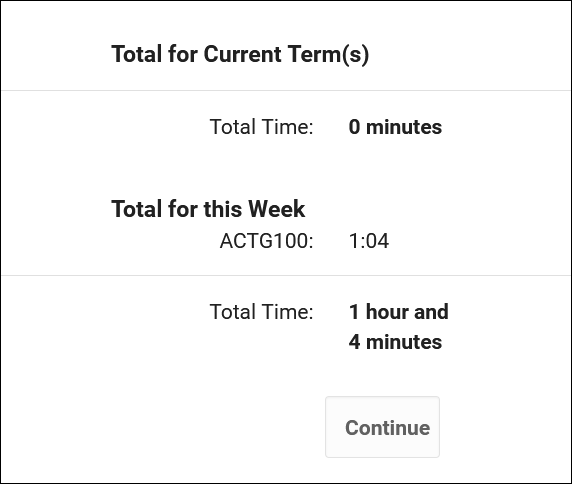
- This adds an additional “Time Check” button to the Kiosk login page, which allows users to quickly check their past visit time from a Kiosk.
 
- Show Consultant Login Button
- This preference adds separate login prompt on the log listing for work visits. If selected, users are prompted to enter their IDs, and as long as they have a valid consultant account, they can directly login for a work visit.
More information on customizing the fields shown on the log listing (blue/yellow columns in the above screenshot) will be covered in the next article.
|


