TracCloud: Student Entry Choices
From Redrock Wiki
Global Preferences
Student Entry Choices
This menu, found in Other ➜ Other Options ➜ Preferences ➜ Student Entry Choices, allows you to determine which student data fields are enabled (and accessible for searches and reports by extension). This includes fields such as major, ethnicity, pronouns, etc. You can also determine how some of these fields display and what choices are available. Enabling a field here does not inherently give all staff access to it. In order for a staff member to see a field, their permission groups must allow access.
For information on custom student data fields, see Custom Fields.

- Next ID Value
- When creating new student accounts manually and allowing TracCloud to assign IDs, this setting determines the next ID TracCloud will use. For example, if your imported student ID range is 0000001 to 999999, you can set this to 1000000 to prevent manually created students from conflicting with imported accounts later on.
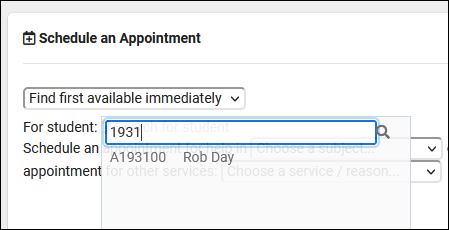
- Show Which ID on Dropsearch
- When searching for a student in the search availability widget or batch entry page, a drop-down menu appears containing students that match your search. This preference determines which identifier is shown next to the student's name: ID, Other ID, Other ID2, or Barcode.

- Display [Field name]
- This option determines whether or not the field is enabled. For example, if Ethnicity isn't an important data point for your campus, you can hide that to simplify the staff view of student profiles and reduce the number of options available in reports. Once enabled, the field functions like any other in student profiles. Access to these fields is based on permission group.
- Width
- This determines the size of the field within student profiles. 100% will span the entire Info box, while 8% will only have enough space for a single letter to be visible.
- 100%

- 33%

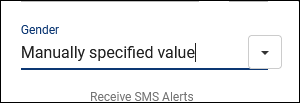
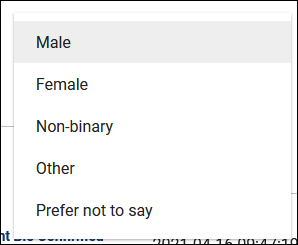
- [Field name] Choices
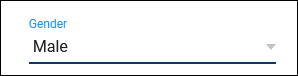
- This determines the available options for a field. For example, a drop-down list of gender or major options that can be selected by staff, or even students themselves via Confirm Bio.
- Menu?
- This checkbox determines how the available choices are displayed and whether or not a staff member can type in a custom value. Unchecked, the choices will appear in a drop-down menu from the right-side of the field, or you can click in the text box and type something else. Alternatively, with Menu checked, only choices in the drop-down menu may be selected.
- Unchecked:

- Checked:


- Custom Tab Name
- This setting determines the names of the custom tabs within student profiles. These tabs will contain the custom fields that you have configured. The number of custom tabs available will differ depending on your license.
- ID Format Code
- Student ID is a numeric value. this option can change how the ID displays on the student listing to visually include alphanumeric characters. See examples below.
Example Student ID: 1931 Format Code How it displays Description %0d 1931 No changes from numeric value. %05d 01931 Convert to 5-digit format with leading zeros. %08d 00001931 Convert to 8-digit format with leading zeros. A%08d A00001931 Add leading A and convert to 8-digit format.
- Allow Profile Admins to Create / Modify Student Lists
- By default, only sysadmins are allowed to create or make batch changes to student lists. If this option is checked, profile admins will be allowed to do so as well.
- Show the Center Visits Tab on Main Menu to Students
- Adds a dashboard widget allowing students to view their own recent visits. This only includes basic details such as date/time, subject, reason, consultant, and center. Visit notes and custom fields are never shown.
- Show/Allow Student Dashboard Documents on Main Menu to Students
- Allows students to view and upload documents to their own profile from a widget on the dashboard.
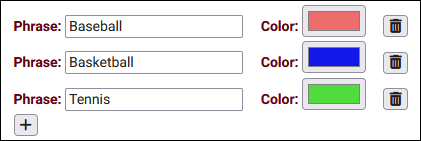
- Student Flag Text Options
- If enabled in permission groups, a new field will become available in the Other info tab of student profiles named "Flag Information." If any text is entered in this field, a grey flag icon will appear next to the student's name on the students listing. These options allow you to set different colored flags based on that field value. Similar functionality can also be found with watch lists if you need multiple indicators (also shown in the screenshot below, to the right of the flags).
- Allow mouse over the flag to show the flag labeled can be checked so that hovering over the flag on the students listing displays the phrase entered below.