| As your university continues to grow, it is exciting to have new students enrolling into your programs. However, when first learning to navigate the Trac System, creating new student profiles manually can seem challenging.
The Trac System is user friendly and with this guide you will soon be an expert in no time!
In this Newsletter, I will be walking you through the steps of how to navigate the Trac System and utilizing screenshots as reference.
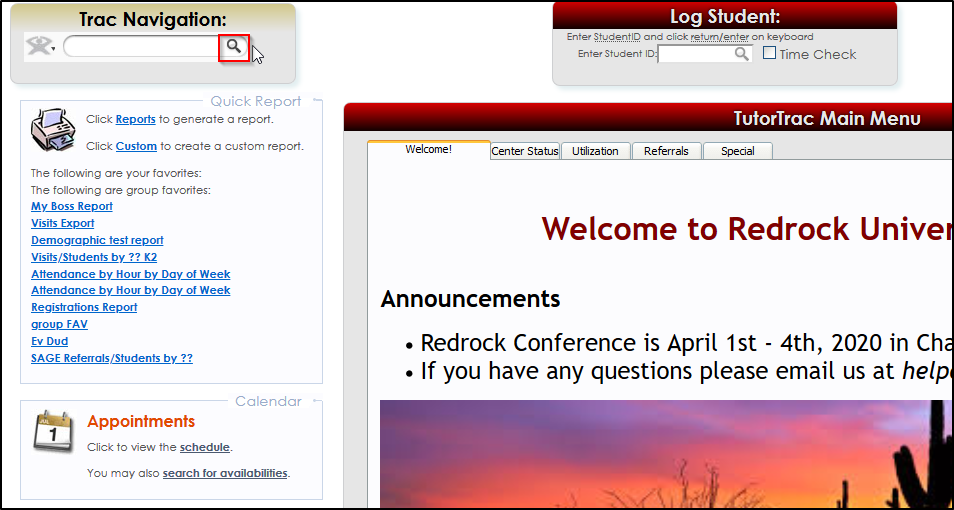
Hover your cursor of the magnifying glass.
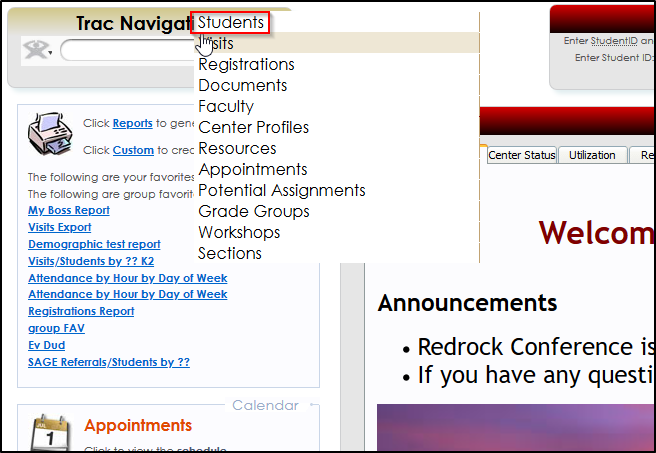
After the list of options appears select “Students”.
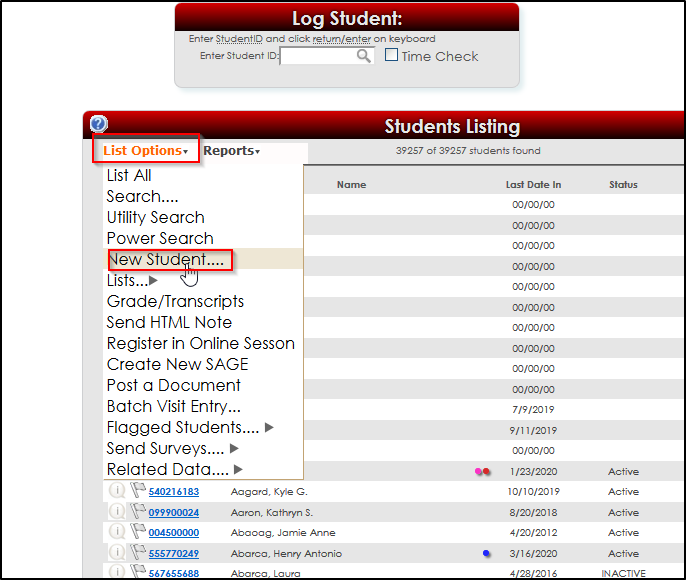
Click on the “List Options” button toward the top left corner of the new window, and select “New Student”.
Now you fill in the necessary information for you student, including: Last name (Doe), First name (John), Email Address (Jdoe@Email.com), and Handle (Jdoe).
Once these fields have been filled out, click save.
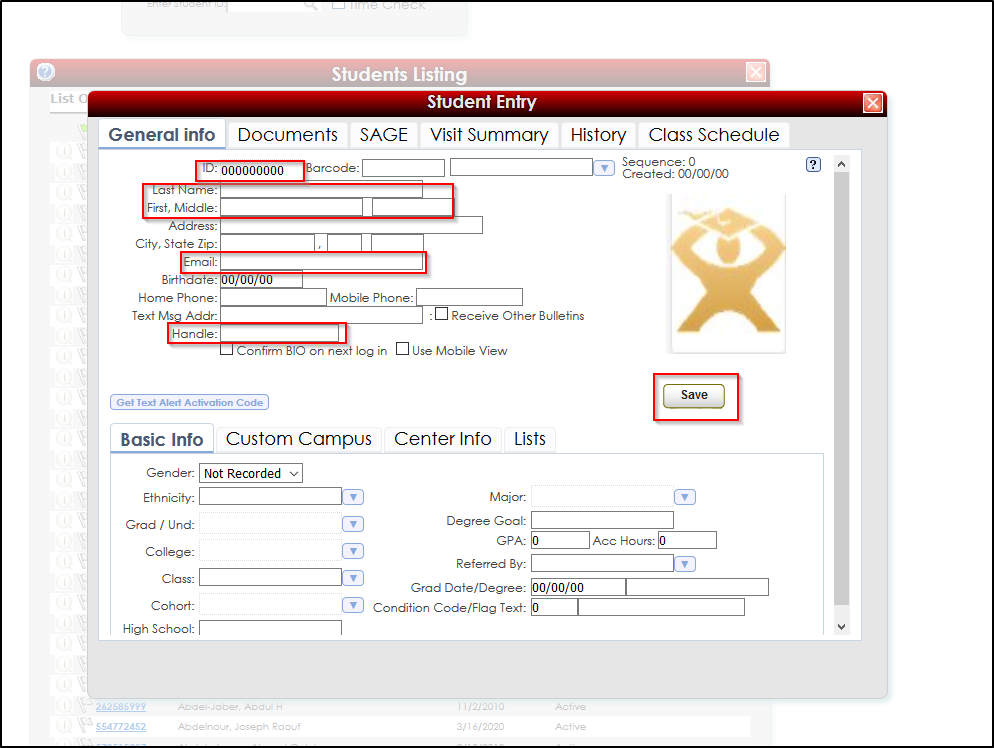
Once all the information is filled in, you can save the student profile and you will be able to find the student by searching for their name or ID number. You can then go back at any time and fill out the remaining fields in the lower tabs of the window.
Note: If IT is importing students, you will need to make sure your manually created student has the same ID number as the profile that was imported from the student file. The student file can then auto populate with the information from the imported file versus creating a new file and entering the information manually.
Student ID Feature
In order to assign a student the next available ID number, a global preference can be put in place.
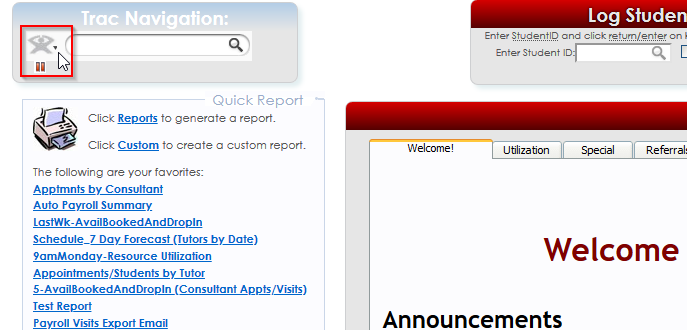
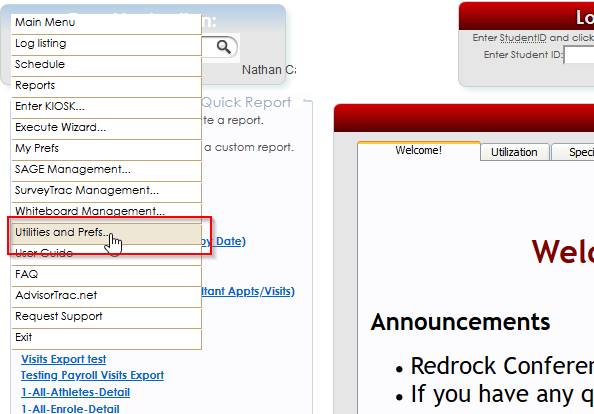
To adjust this preference, go to the Trac Man icon and select “Utilities and Prefs”
Note: Only Administrators with this privilege can make the adjustment.
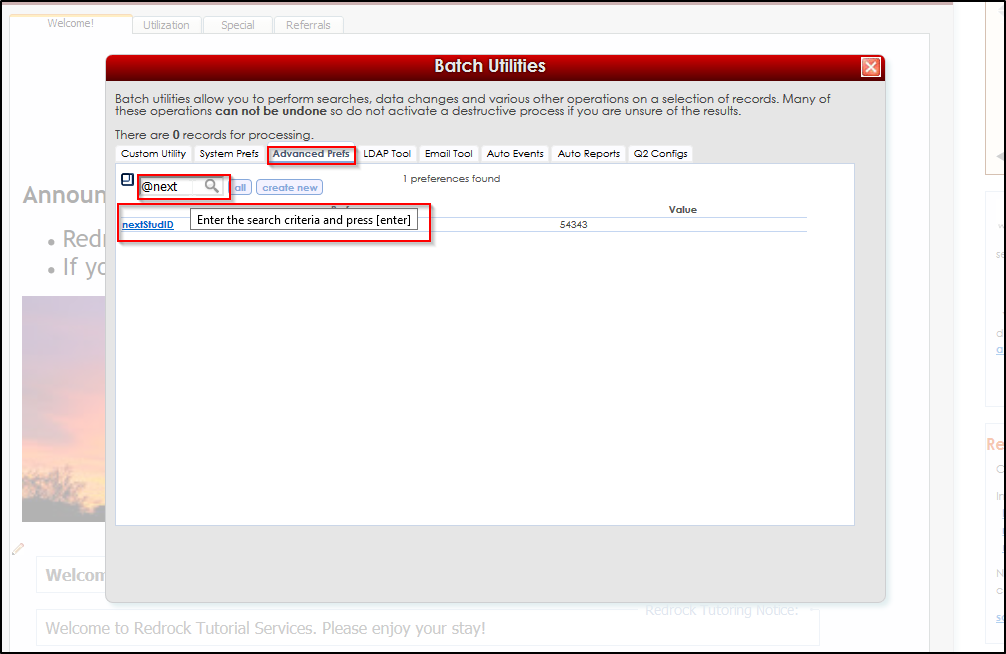
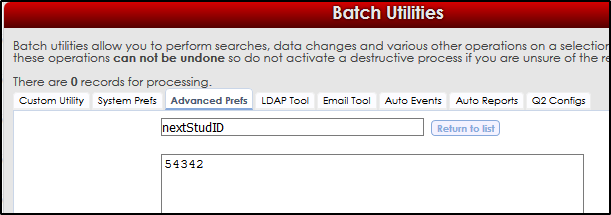
Next, click on the “Advanced Prefs” tab followed by entering “@next” in the search bar. Click the link and enter an ID number your campus is familiar with and can easily find then hit the “Save” button.
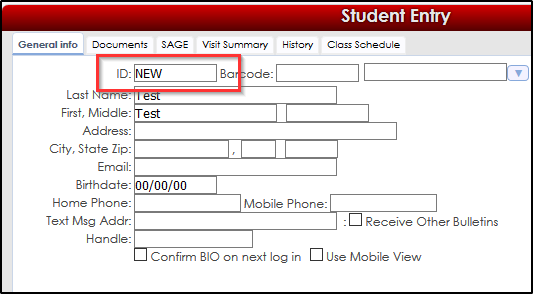
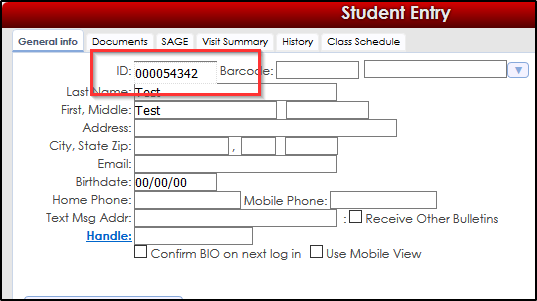
Now that the setting is in place Simply type in “NEW” into the student ID field for the new student entry and upon saving they will receive the next available student ID number.
More Questions?
We hope that you found this Newsletter helpful, and as always if you have any questions about this or any other features, please feel free to let us by emailing Helpdesk@go-redrock.com or submitting a ticket.
Thank you for your continued support!
| 


