TracCloud: Notification Types: Difference between revisions
From Redrock Wiki
No edit summary |
No edit summary |
||
| Line 6: | Line 6: | ||
<big><b>Notification Types</b></big><br> | <big><b>Notification Types</b></big><br> | ||
Notifications | Notifications can be used to send a reminder or notice to students. These notices can be displayed on the student's dashboard, when they login on a kiosk, or they can be emailed to the student directly. The notification can also request a response from that student, whether that be a simple "Submit" or "Okay" button, or a text entry field for students to write in directly.<br> | ||
You can create as many notification types as you need, and they can be assigned to different permission groups determining who can send what notification. | |||
<hr> | |||
==Creating Notification Types== | ==Creating Notification Types== | ||
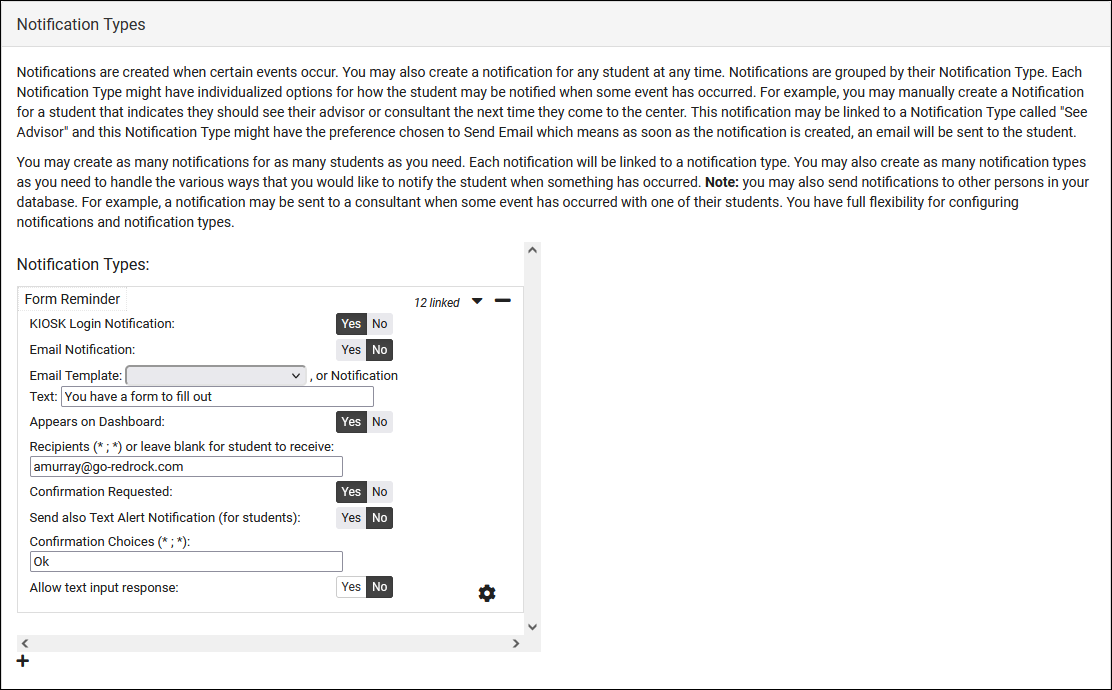
To create a new type, click the <b>+</b> icon and click on the name of the type to rename it.<br> | To create a new type, click the <b>+</b> icon and click on the name of the type to rename it.<br> | ||
[[File: | <span style="color:grey"><i>Other > Other Options > Preferences > Notification Types</i><br></span> | ||
[[File:5253941.png|900px]]<br><br> | |||
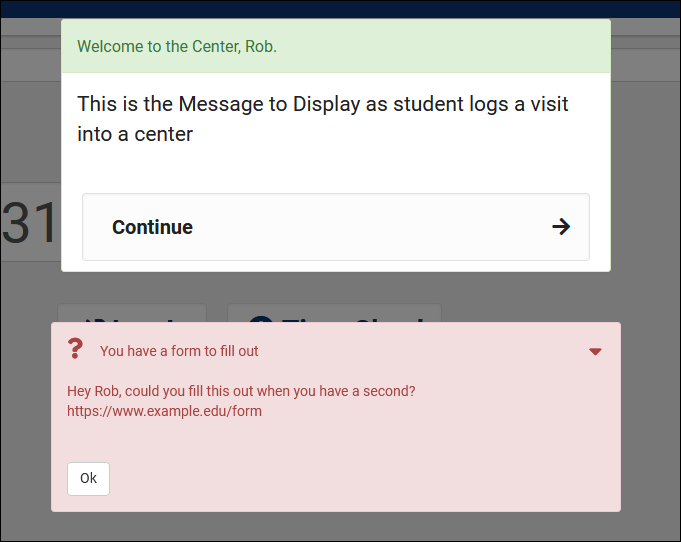
* <b>Kiosk Login Notification</b> means that this notification will appear when the student is logging in via a Kiosk or on the Log Listing. | * <b>Kiosk Login Notification</b> means that this notification will appear when the student is logging in via a Kiosk or on the Log Listing. | ||
::[[File: | ::[[File:9442273.png|500px]]<br><br> | ||
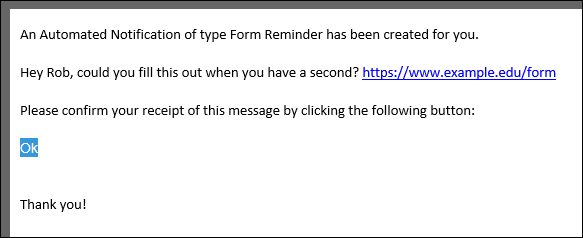
* <b>Email Notification</b> will also send this notification to the student via email. | * <b>Email Notification</b> will also send this notification to the student via email. | ||
::[[File:6842055.png|500px]] | |||
::* <b>Email Template</b> controls the contents of the email sent to the student if Email Notification is enabled. | ::* <b>Email Template</b> controls the contents of the email sent to the student if Email Notification is enabled. | ||
* <b>Notification Text</b> determines the title of the notification box | * <b>Notification Text</b> determines the title of the notification box. | ||
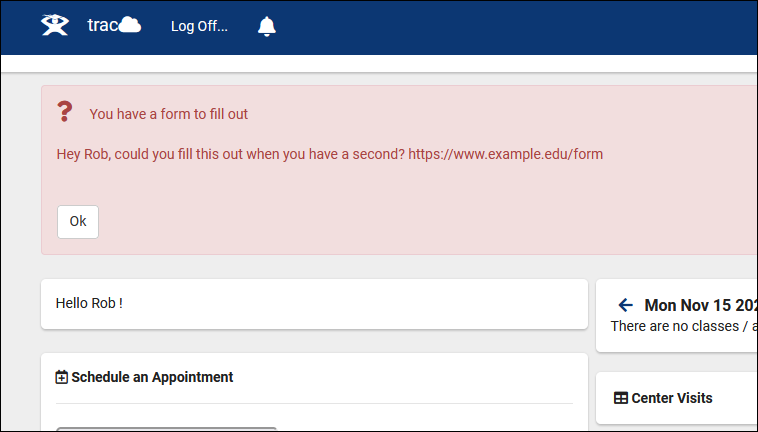
* <b>Appears on Dashboard</b> means that this Notification will appear on the student's dashboard when they login. | * <b>Appears on Dashboard</b> means that this Notification will appear on the student's dashboard when they login. | ||
::[[File: | ::[[File:7253599.png|500px]]<br><br> | ||
* <b>Confirmation Requested</b> means that the student will be able to select one of your defined choices as a response to the notification. | * <b>Confirmation Requested</b> means that the student will be able to select one of your defined choices as a response to the notification. | ||
| Line 41: | Line 40: | ||
* <b> Send also Text Alert Notification (for students)</b> will send a text notification to the student as well (requires the [https://wiki.go-redrock.com/index.php/TracCloudTA TextAlerts Module]). | * <b> Send also Text Alert Notification (for students)</b> will send a text notification to the student as well (requires the [https://wiki.go-redrock.com/index.php/TracCloudTA TextAlerts Module]). | ||
<hr> | |||
==Allowing your Staff to Create Notifications== | |||
After you've created your notification types, you can decide who can send these notifications. Head over to the permission group you want to adjust, and add your new notification type to the <i>Notification Types</i> section.<br><br> | |||
<span style="color:grey"><i>Other > Other Options > Groups > [The group you want to edit] > Center Access</i><br></span> | |||
[[File:7103544.png|600px]] | |||
Revision as of 20:38, 15 November 2021
|
Notification Types Notifications can be used to send a reminder or notice to students. These notices can be displayed on the student's dashboard, when they login on a kiosk, or they can be emailed to the student directly. The notification can also request a response from that student, whether that be a simple "Submit" or "Okay" button, or a text entry field for students to write in directly. You can create as many notification types as you need, and they can be assigned to different permission groups determining who can send what notification. Creating Notification TypesTo create a new type, click the + icon and click on the name of the type to rename it. Other > Other Options > Preferences > Notification Types
Allowing your Staff to Create NotificationsAfter you've created your notification types, you can decide who can send these notifications. Head over to the permission group you want to adjust, and add your new notification type to the Notification Types section. Other > Other Options > Groups > [The group you want to edit] > Center Access
|


