TracCloud: Non-Enrolled Courses
From Redrock Wiki
(Redirected from TracCloud: Non-Enrolled Courses)
How to...
Non-Enrolled courses can be useful in allowing students without registrations or without a relevant registration for the type of appointment/visit they need to still receive tutoring assistance. This article will be going over the process of creating one of these non-enrolled courses.
1. Creating a Course
First, we need to create the course that our section is going to be assigned to.
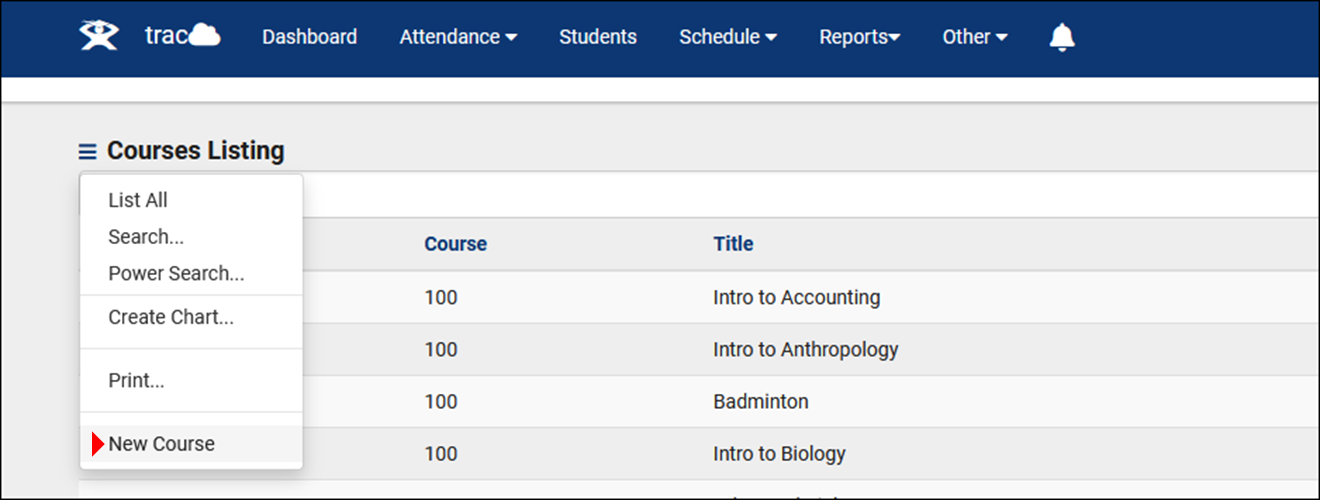
Start by going to Other > Listings > Courses > New Course.

In the Course Entry window, the Subject field is required, and will be the name of our non-enrolled course. In this example, we’ll be calling our course “Other.” The remaining fields are optional and will be left blank for this scenario. Save once you’re ready to move on to step 2.

2. Creating a Term
Our section will need to be assigned to a term. While we could technically assign it to our currently active term, this may not be ideal, since we would need to create a new non-enrolled section each semester. For a case such as this, let’s create a generic term that we can leave active.
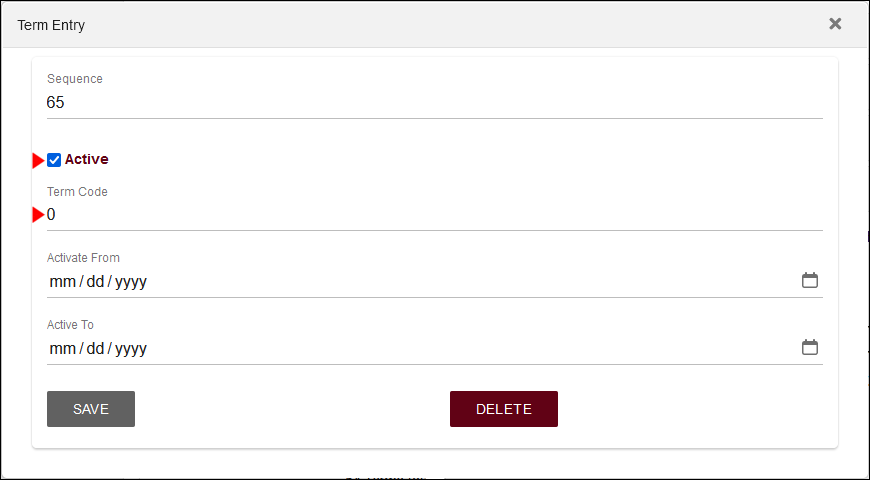
For the name of the term, you can name it anything you'd like. However, naming it "0" has the added benefit that the dates will be copied from your active terms automatically, so there is no extra work needed to update this term later on.
Other > Other Options > Preferences > Terms > New Term.

3. Creating a Section
Next up, we need to create the section that staff and students can select.
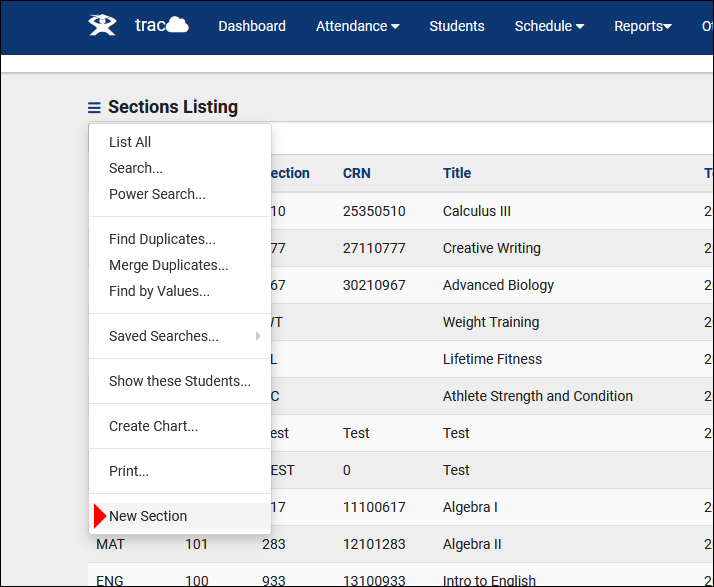
Go to Other > Listings > Sections > New Section.

Select the Course and Term that you just created, check the Non-Enrolled and Active box, then save. The other fields are optional.

4. Update your Course Lists
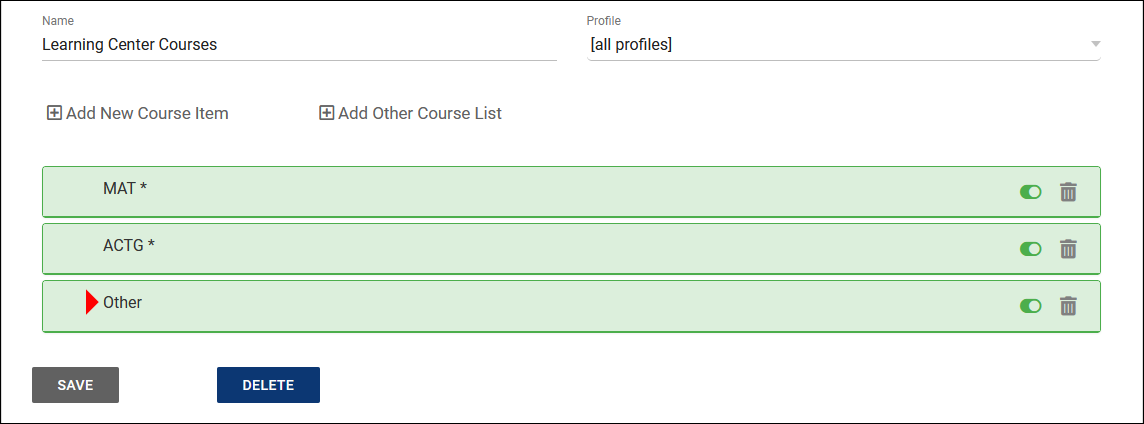
Lastly, you’ll need to update your course lists to ensure that your course is assigned to your Centers and your Consultants. If you need to assign this new subject to multiple course lists at once, check out this article.
Other > Listings > Course Lists > [Your Course List]

You’ll also want to select Process Specialties to update your existing Course Lists.

And you’re all set! Students and staff can now select your non-enrolled course when searching for availabilities or creating visits.
