|
|
The SurveyTrac module allows you to send surveys to students and staff, to collect information about their visits, appointments, or otherwise. These surveys can contain an unlimited number of questions, be initiated by over a dozen different scenarios, and be reported on after the fact or be set to immediately email the results of each response to a specified address. There are practically endless combinations of survey types and questions available to create.
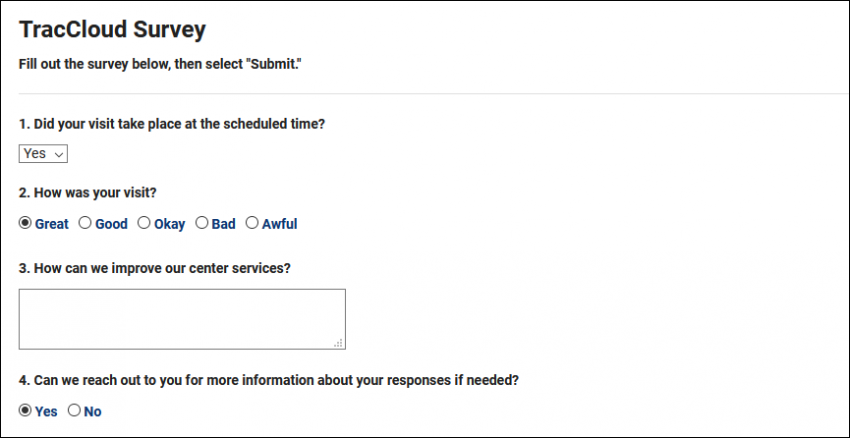
Creating a new Survey
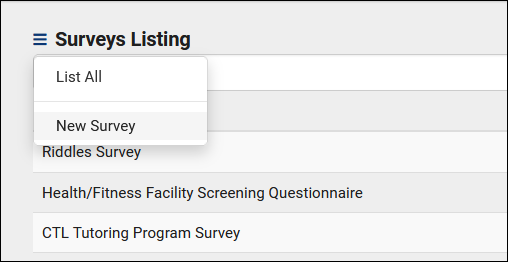
To create a new survey, head over to your SurveyTrac menu (within the “Other” menu in your Navigation Bar), click the hamburger icon, then select “New Survey.” This will bring you to a survey entry form where you can start configuring basic options relating to your survey. Additional options will become available after saving.
General File:3543606.png
- The staff member who created this survey.
- The profile that this survey is assigned to.
- Enables or disables this survey.
- The name of the survey. This will also appear within emails sent to students and staff.
- The active period of the survey. Used for “Initiated Via” options that specify "during survey period," such as “Email after 1st visit during survey period.”
- This setting determines the send criteria for this survey, see table below.
| Initiated Via |
Description
|
| Display during visit entry |
displays within the “Surveys” tab of a visit record, allowing you to fill out and submit the survey from the visit record itself
|
| Email after visit |
will be sent to the student/staff after a visit takes place (immediately after the student is logged out)
|
| Email after 1st visit during survey period |
will be sent to the student/staff after a visit takes place, but only after the student’s first visit during the survey period specified
|
| Email after new student record |
is emailed to the student immediately after their account is created
|
| Show at entry |
displays during the login process.
|
| Show at entry before 1st visit during survey period |
displays during the login process, but only after the student’s first visit during the survey period specified
|
| Show at exit |
displays during the logout process
|
| Show at exit after 1st visit during survey period |
displays during the logout process, but only after the student’s first visit during the survey period specified
|
| Display as link on Main Menu |
displays on student dashboards
|
| Do not auto send |
This survey can be manually sent on the Student Listing, from Student Profiles, Batch Visits, or Group Rosters.
|
| Link on edit student |
Appears as an option within each student’s profile. This allows you to manually send a survey to a student when needed.
|
| Link on edit visit |
displays within the “Surveys” tab of a visit record, allowing you to manually email out a survey relating to a specific visit
|
| Display on document posting |
is manually sent to the student from their profile via the Actions > “Survey Document…” prompt
|
| Display as Student Entry Form |
is manually sent to the student from their profile via the Actions > “Complete form…” prompt
|
- Allows you to optionally only send this survey for In-Person or Online appointments/visits.
- Recipient Email Settings (emailed surveys only)
- Options relating to the emailed survey formatting. From email address and contact name, the subject line, and the body itself. The twig tags {{Survey.Link}} and {{Survey.Name}} can be used to display a link to the survey and the survey name field respectively.
- Determines which centers this survey is assigned to.
- Instructions and Survey Head Text
- These messages will appear at the very top of the survey entry window. Head Text appears in bold at the top, typically a title for the survey. Instructions appears smaller just beneath Head Text, typically a description for the survey or basic instructions.
- The confirmation message will display at the bottom of the survey after submitting responses.
Options
File:6758807.png
- This setting allows students/staff to re-open and edit their responses after the initial submission.
- Will not display student names in responses. Once an Anonymous Survey has responses, it is permanently anonymous.
- These settings determine who this survey will be sent to. For example, if this is an “Email after visit” survey, you can control if the survey gets sent to the Student, the Consultant, the Faculty member, or even all three.
- See Grade Groups and Assignments for more information.
- Allows you to define a percentage chance of a survey being sent to a student. 100% will always send the survey when the 'Initiated Via' criteria is met.
- Email addresses entered here will be notified when a survey has been completed. These emails will contain the questions and answers provided by the student/staff.
- The subject line of the notify email above.
- Which email address is this response notification sent from?
- Link Survey to Reasons/Subjects
- If you only want this survey to be sent out for visits/appointments of a specific reason or subject, you can list out the entries here. For example, “General Help,Exam Prep”
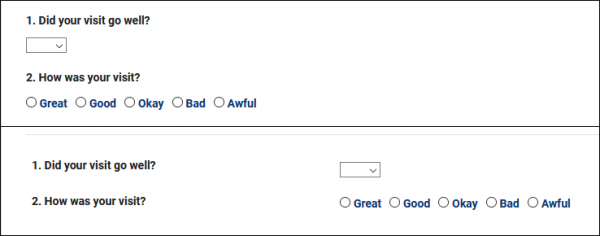
- Position of answer fields, either below or to the right of the question, as seen below.
- Radio Button Style & Multi Checkbox Style
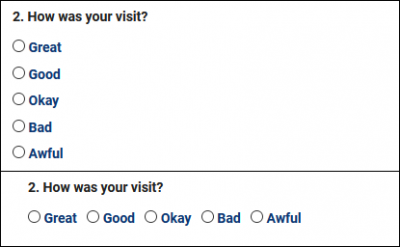
- Determines how Radio and Multi-Checkbox Choice style questions display. Tall vs Wide, as seen below.
Questions and Preview
The Questions tab is where we can configure the questions we’re asking within this survey. The Preview tab allows us to immediately take a look at our survey formatting to make sure everything is appearing as intended.
File:4210337.png
To begin creating a new question, go to hamburger icon > New Question, or click the + icon on the right-hand side.
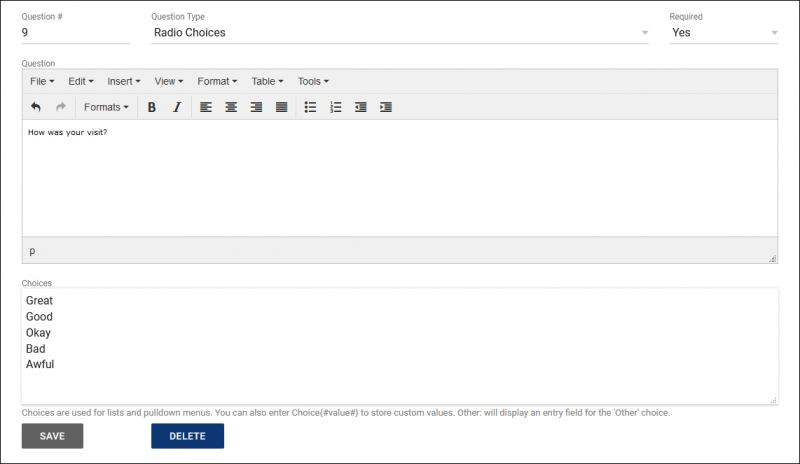
- This determines the order that questions will appear in. 0/Blank will hide the question.
- There are various Question Types available for use, depending on the format of your question. Each of the available options can be seen in the screenshot below.
- File:8503894.png
- Determines whether or not the question requires an answer before being submitted.
- Write out your question here. There are also some optional text formatting tools available if you’d like to display the question in a specific way, including the ability to use standard HTML by selecting Tools > Source Code.
- Depending on the Question Type chosen, you may need to list out the available answers. If this box is available, include your answer choices on unique lines, as seen in the screenshot earlier in this article.
Responses
Here you can find a list of surveys sent, whether or not a response has been recorded, and you even the ability to resend surveys that have not yet had a response back. All of these entries can be opened to view the responses from that student or staff member.
File:2919276.png
Survey Snapshot Report
A Survey Snapshot report can be found in your Management Reports category.
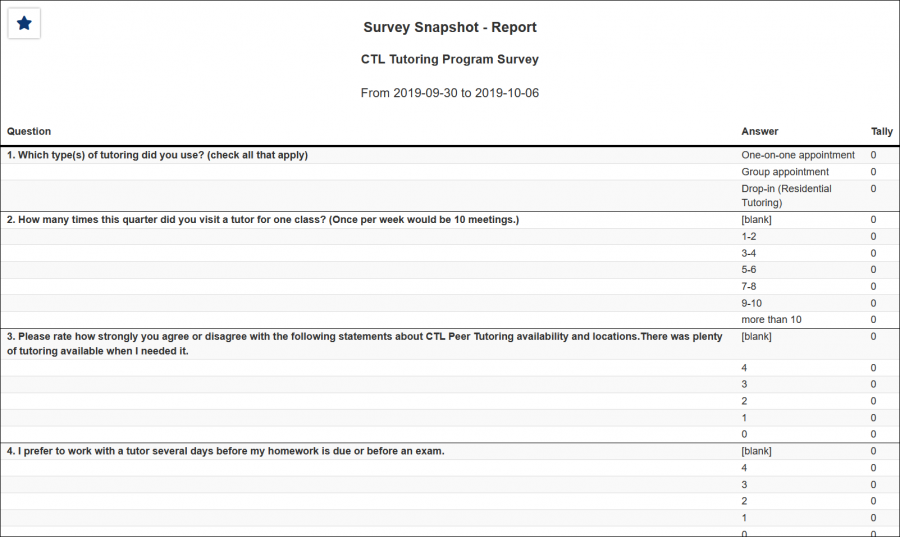
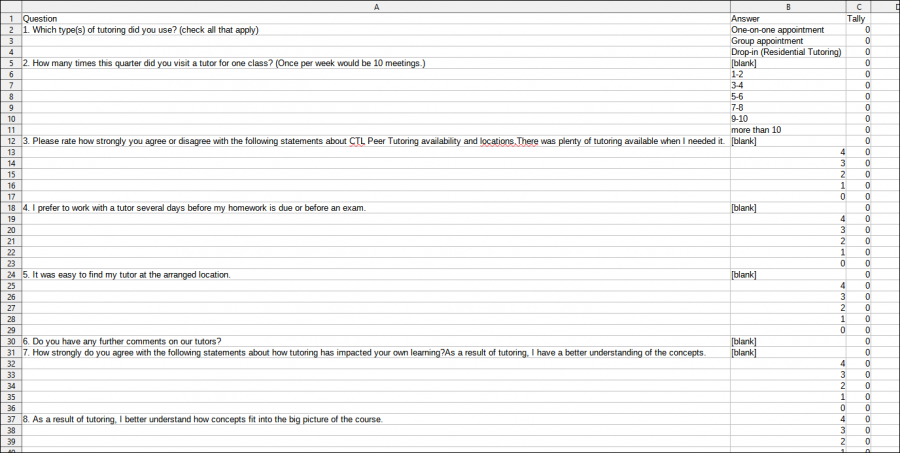
This report allows you to export the response data for any of your SurveyTrac surveys in a Snapshot format, providing the total number of answers for each question.
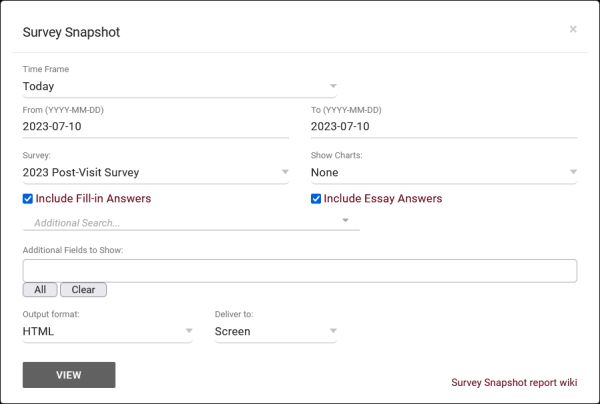
- The date range for the data in this report. Beyond entering a date range manually, you can also choose a preset date range (Today, This Month, This Semester, etc) from the dropdown list above.
- Export responses from this selected survey.
- This field allows you to add charts to the report results. Pie, bar, or line.
- Include Fill-in & Essay Answers
- These options will include the answers that were written manually during the response process (as opposed to checkbox/multiple-choice answers).
- Filter your results by a selected field.
Use * as a wildcard (Subject: MAT*)
| as "or" (Major: Mathematics|Biology)
# as "Not" (Status: #Inactive)
&& as "And" (Major: #Mathematics&&#Biology)
blankornull as a keyword to find records where the field is blank (Reason: blankornull)
Multiple fields can be added to further narrow down your results.
- Additional fields to show
- This can be used to add additional data fields to the report results. For example, you could use this to add a student's email address in a visit report.
- Use HTML to view report data in your browser, or export this report to a CSV file (available for most reports). Some reports offer additional CSV options depending on if you want to include totals and/or data grouping in your export.
- Display this report immediately in your browser ("Screen"), or send the report to a specified email address ("Email"). Multiple email addresses can be specified, use ; to separate them (example@example.edu;sample@example.edu).
HTML
CSV
For information on purchasing the SurveyTrac Module, reach out to sales@go-redrock.com
For SurveyTrac functionality questions, reach out to helpdesk@go-redrock.com
|


