TracCloudNews35: Difference between revisions
From Redrock Wiki
TracCloudNews35
Created page with "{| style="width:100%; vertical-align:top; " | style="width:250px; vertical-align:top; padding:2px 15px 2px 2px;" | {{TracCloudNewslettersTOC}} | style="vertical-align:top; padding:20px 20px 20px 2px;" | {| style="width:100%; vertical-align:top; " ==Custom Views== Views allow you to change the header of the Student, Visit, Faculty, Registration and Document Listings. Views can also be useful for viewing and/or exporting data from the Trac System. Views can also provide a..." |
No edit summary |
||
| Line 1: | Line 1: | ||
<div class="category"> | |||
{{TracCloudNewslettersTOC}} | |||
</div> | |||
==Custom Views== | ==Custom Views== | ||
| Line 34: | Line 33: | ||
{{NewsletterContactInfo}} | {{NewsletterContactInfo}} | ||
[[Category:TracCloud]] | [[Category:TracCloud]] | ||
Revision as of 21:37, 6 November 2023
Custom Views
Views allow you to change the header of the Student, Visit, Faculty, Registration and Document Listings. Views can also be useful for viewing and/or exporting data from the Trac System. Views can also provide an easy way to view certain data points and modify those data points on screen quickly and efficiently.
This newsletter will be walking you through creating a Custom View from the Student listing with the option to modify the listing to change fields for a group of students. First, let's start with an idea. I want my student listing to contain the students' first and last names, their usernames, birthdates, and I want their emails visible and editable.
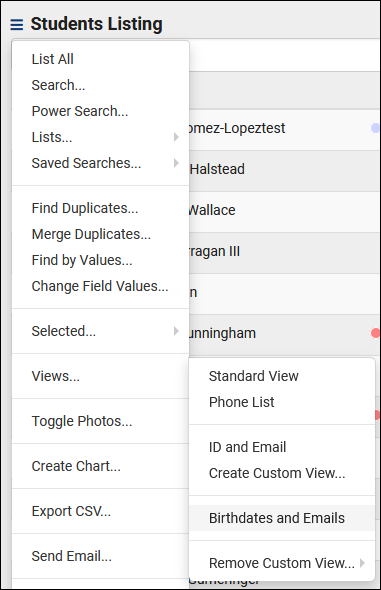
From the student listing, we're going to click the hamburger icon, hover over Views, and click "Create Custom View."
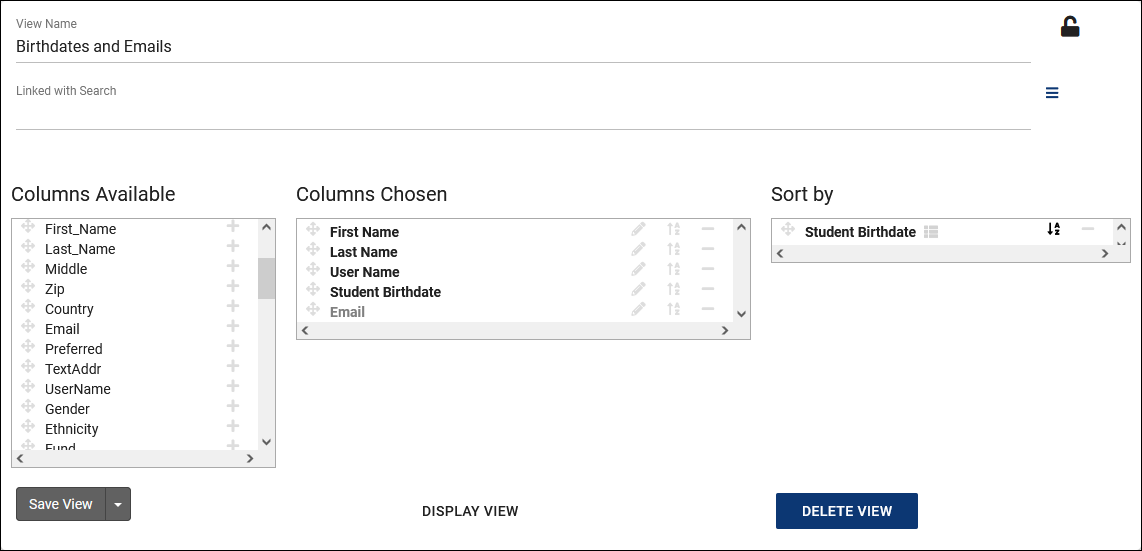
That takes us to the View Creation window. I'm going to call my view "Birthdates and Emails." Within the Columns Available list, I'm going to add the fields I mentioned previously by clicking the + icon, I'm also clicking the A-Z icon for Birthday to sort by this field by default.
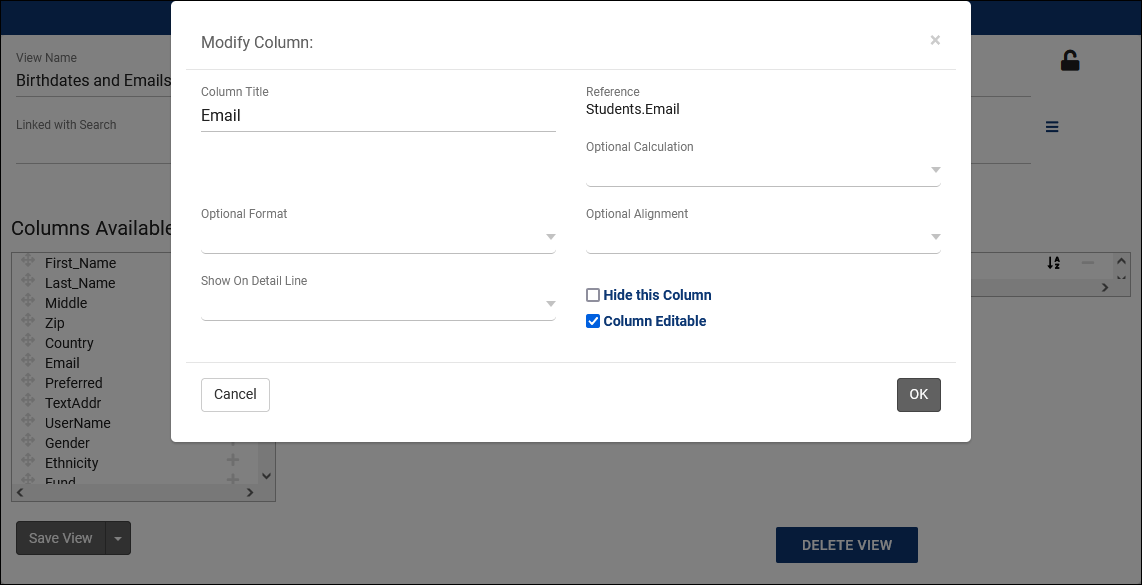
Next up, I want to make the Email field editable. To do this, I'm going to click on the Pencil icon for Email, which will open the following window.
The only change I'll be making for my example is checking Column Editable. Next up, I'll click Save View to save my changes. Going forward, I can always find my custom View in the Hamburger icon > Views menu. I can also edit data in the email column as defined above.
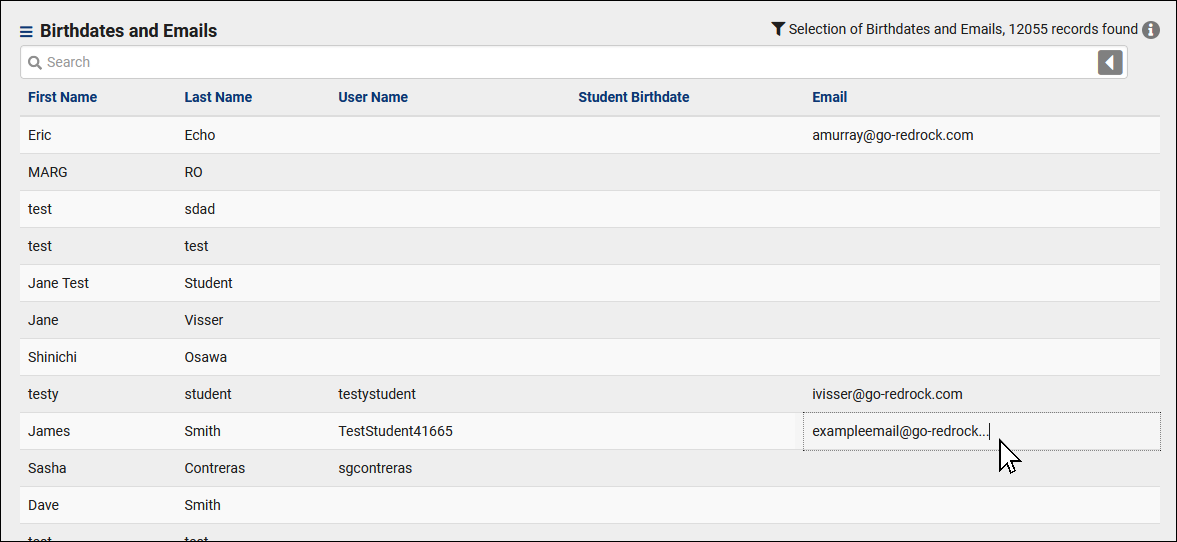
Once the view is selected from my saved views you will notice if I click in the email column for a student on my current listing the email column becomes editable. This view allows me to change email data quickly and efficiently right from the listing.
To learn more about views, including how to share them with other user groups, click here.
More Questions?
We hope that you found this article helpful, and as always if you have any questions about this or any other features, please feel free to let us know by emailing Helpdesk@go-redrock.com or by submitting a ticket.
Thank you for your continued support!


