|
|
Centers
The Centers tab contains all of the Centers created in this profile. A center can represent a physical center, department, or any other division that you may want to designate. From this menu, we can also see the linked course list and the color designation.
File:Jh46k57k75h56.png
Creating a CenterThe hamburger icon button contains the option to create a new center. Once selected, you will be taken to a General tab where you can start configuring your center.

File:7430495.png
- We never recommend deleting centers in TracCloud, as this will remove the related information from reports and general histories. Instead, we recommend setting these records to Inactive, which will hide it from view, but keeps the records available for reports or reactivation.
- All of your centers are assigned to profiles; this field displays which profile this particular center has been assigned to. This will default to whichever profile you started creating the center from.
- The accent color for this center. This color will be shown in the center list and on the schedule.
- File:H46k5k4h3g35h22.png
- The name of the center; this is how this center will be referred to throughout TracCloud.
- Ignore consultant specialties for this center (ie Writing Center)
- When searching for appointments, only consultants who are assigned to the subject selected will appear. When a staff member or student selects “MATH101”, only consultants who can assist with MATH101 will be displayed. This checkbox disables that, allowing consultants in this center to assist with any courses, regardless of their assigned course list. This is typically used for writing centers.
- Utilize Students/Consultant Link for this Center (if Defined in Profile)
- If enabled in your profile options (see previous article), students can be linked with advisors/consultants based on a field in their profile. When that student logs in, they will only see advisors that match their linked field. Checking this box enables this feature in this center. For example, students would only see advisors assigned to their major, etc.
- Hide on Log / KIOSK Listing Menu
- Enabling this option will remove this Center as a choice in the KIOSK and Log Listing menu, as well as from the available Center choices when logging into a Profile-wide Kiosk.
- Course List for this Center
- This setting determines which courses are assigned and available in this center. For more information on Course Lists in general, please refer to the dedicated Creating Course Lists article.
- Explicitly allow or block students on a specific list from logging into or booking appointments in this center.
- Active Reasons Allowed for This Center
- The reasons assigned to this center. This controls which reasons are displayed when searching for and booking appointments, as well as the options available during Kiosk logins.
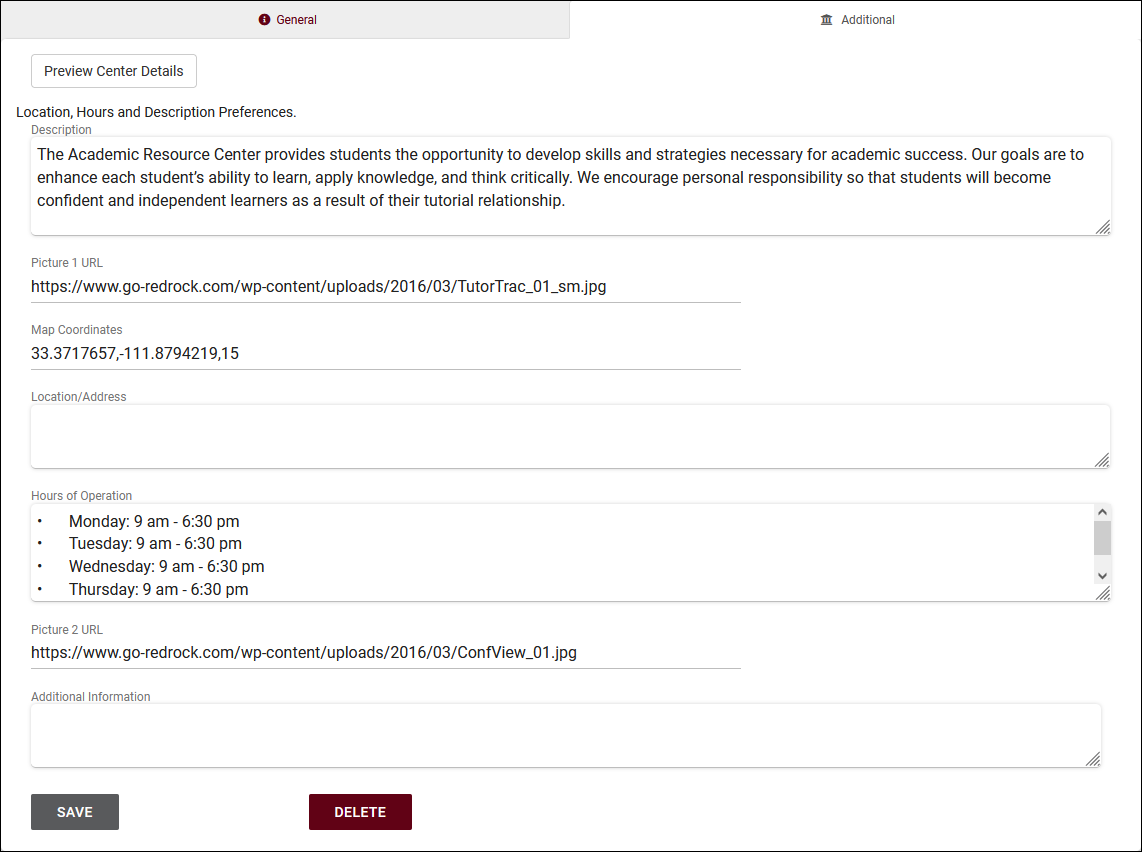
Additional tabThe Additional tab contains information about the center that can be accessed from the Searching for Appointments screen.

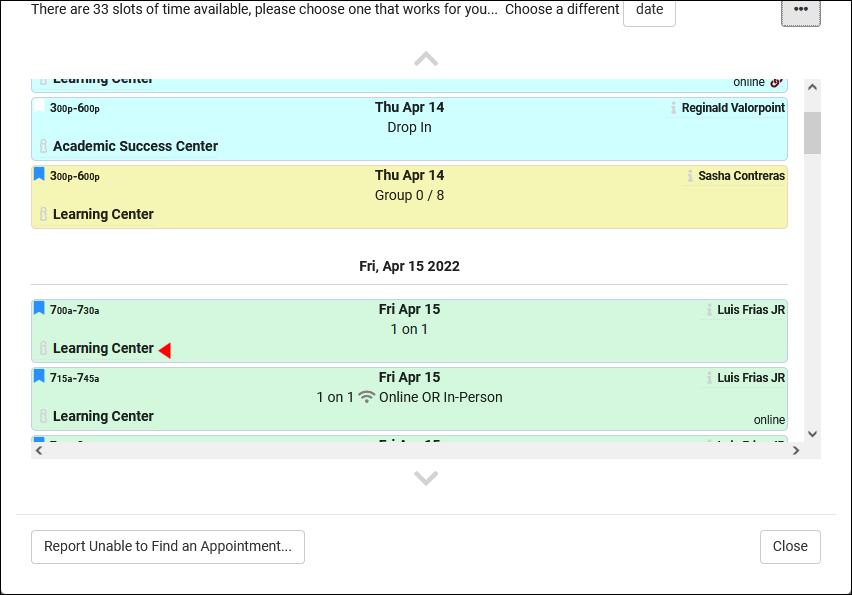
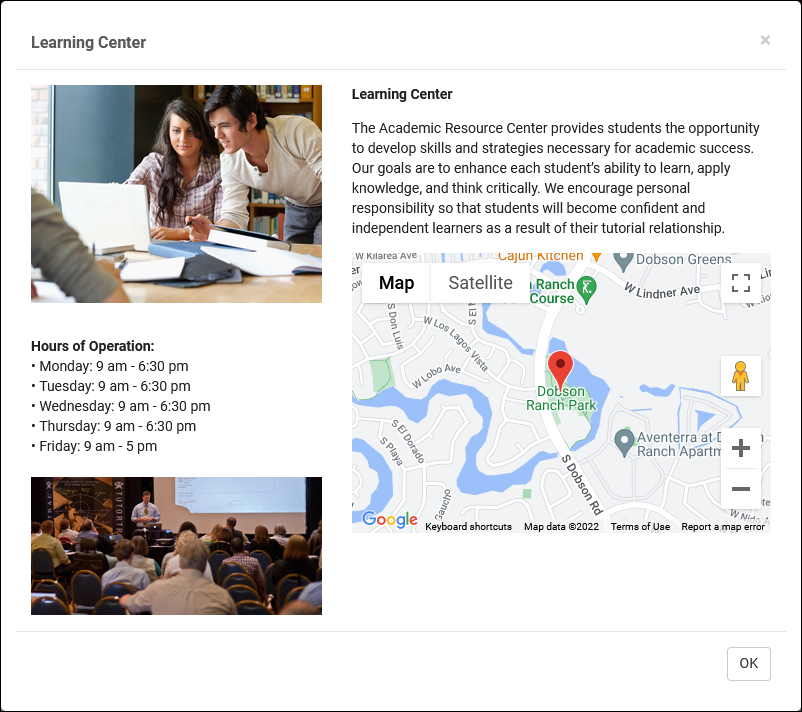
When searching for an appointment, you can click the info icon/center name, and the additional information will be displayed.

This information can contain a center description, map location, written location, additional info, hours of operation, and even photos. More information on configuring this screen can be found in our dedicated Locations, Hours, and Descriptions article.

|


