TracCloudNews04: Difference between revisions
From Redrock Wiki
TracCloudNews04
No edit summary |
No edit summary |
||
| Line 7: | Line 7: | ||
{{NewsletterContactInfo}} | {{NewsletterContactInfo}} | ||
|} | |} | ||
[[Category:TracCloud]] | |||
Revision as of 23:10, 24 April 2023
| Template:TracCloudNewslettersTOC |
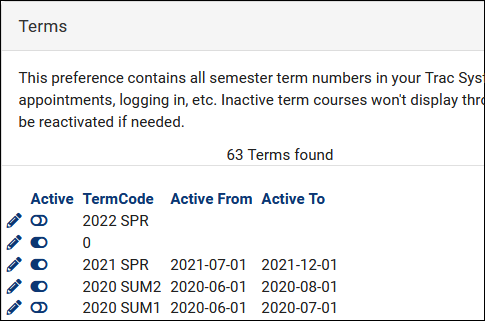
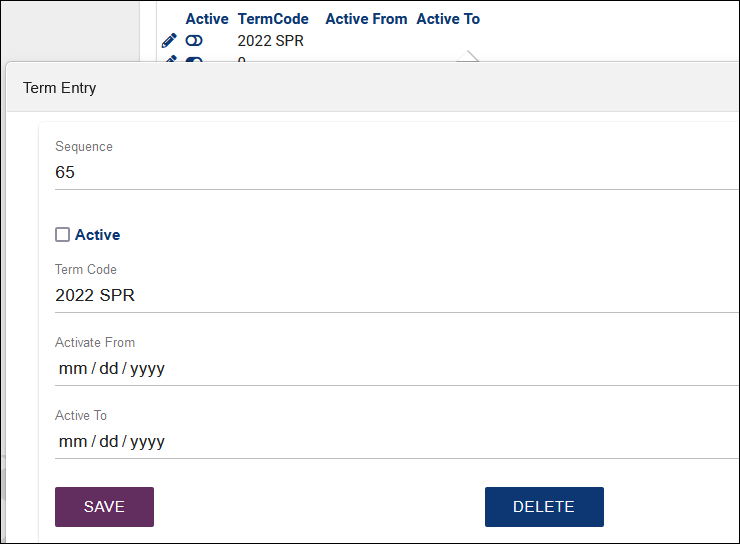
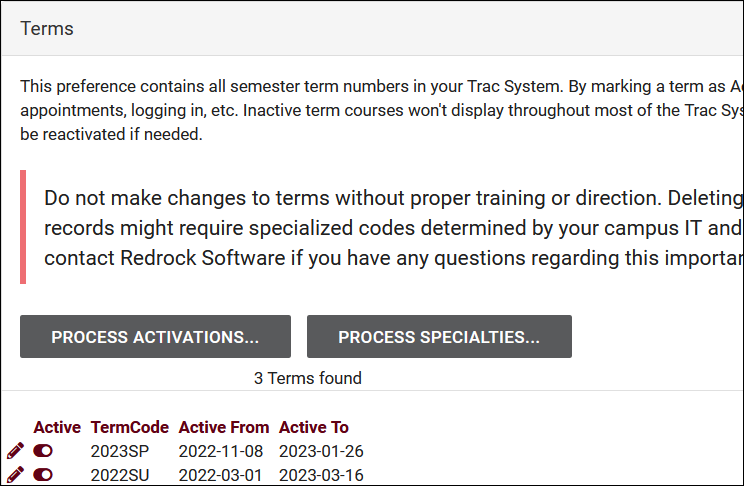
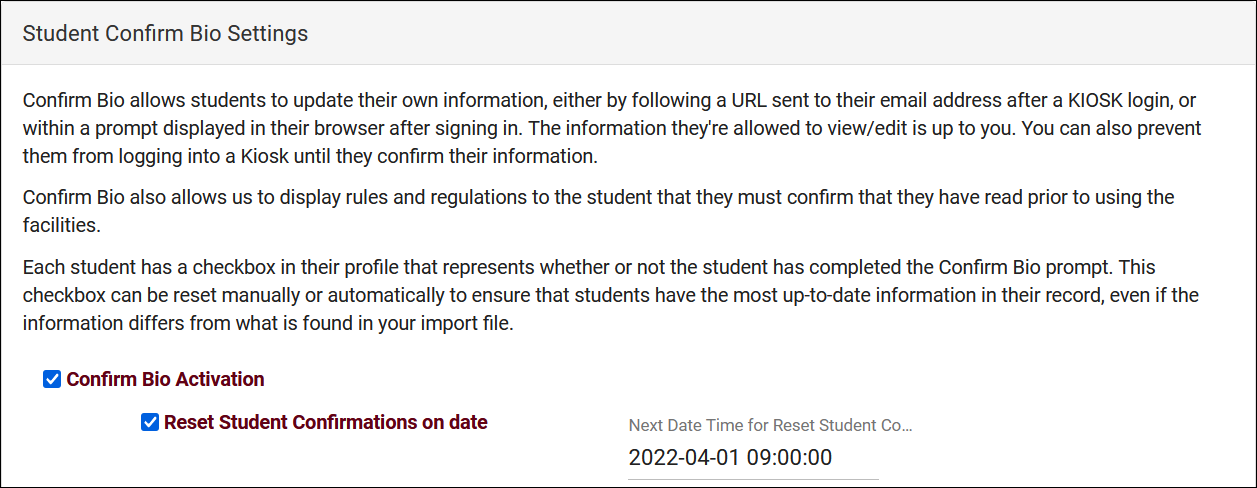
Changing Semesters in TracCloud The process of activating new terms for your upcoming semester in TracCloud is designed to be as straightforward as possible. The steps below outline the process and everything you have to do to prepare and execute a semester changeover. As always, if you run into any trouble, feel free to reach out to us at helpdesk@go-redrock.com. 0. Import New Term Data 1. Activate Your New Term Make sure Active is checked, and add the Active From and To dates to the relevant fields as well (these are utilized for "This Term" date ranges in reports and scheduling rules). You may also want to deactivate your prior term at this time as well, or you can deactivate it later if preferred. Multiple terms can be active at once. 2. Process Activations & Process Specialties After activating your new term (and deactivating the old, if applicable), click the button in the Terms settings labelled Process Activations. This button will activate registrations for this term and deactivate registrations that are no longer relevant. Click this, then click Process Specialties to update your Course Lists. Specialties can also be updated from the Course List Listing, which has the same effect as the option here. 3. Additional Date Fields (Optional) And that's it! You're all set for the new semester. More Questions? |
