TracCloud: Reasons: Difference between revisions
From Redrock Wiki
No edit summary |
No edit summary |
||
| Line 26: | Line 26: | ||
::[[File:4u36j4336khj35.png|400px]] | ::[[File:4u36j4336khj35.png|400px]] | ||
<hr> | |||
==Creating Reasons== | ==Creating Reasons== | ||
Click on the hamburger button, then select “New Reason” to be brought to the Reason creation menu. | Click on the hamburger button, then select “New Reason” to be brought to the Reason creation menu. | ||
| Line 45: | Line 46: | ||
::* <b>Auto Logout After Time</b>, which will automatically log the student out of the center when the time specified in Visit Time is reached. | ::* <b>Auto Logout After Time</b>, which will automatically log the student out of the center when the time specified in Visit Time is reached. | ||
::* <b>Auto Logout Immediately</b> will log the student out immediately after they’re logged in and create a visit record of the length specified in Visit Time. | ::* <b>Auto Logout Immediately</b> will log the student out immediately after they’re logged in and create a visit record of the length specified in Visit Time. | ||
::* <b>Notify Time Expired</b>, which will send out an email based on the checkboxes used when the time limit is reached. | ::* <b>Notify Time Expired</b>, which will send out an email based on the checkboxes used when the time limit is reached. The contents of this email will be determined by your [[TracCloudGuideProfilePrefsEmails|'Visit Duration Notification' email in your Profile Prefs.]] | ||
::[[File:4556u5rn5uh5r.png|600px]] | ::[[File:4556u5rn5uh5r.png|600px]] | ||
| Line 59: | Line 60: | ||
::Don’t show this reason under these specific circumstances. | ::Don’t show this reason under these specific circumstances. | ||
<hr> | |||
==Assigning Reasons to Centers== | ==Assigning Reasons to Centers== | ||
The checkbox button on the right side allows you to activate/deactivate reasons for the center selected in the top-left corner, or display all activated reasons for the selected center. This can also be used with “All centers” selected, allowing you to quickly add or remove a reason from all of your centers. | There are two ways to assign Reasons to your Centers, first is directly from this tab of your Profile. The checkbox button on the right side allows you to activate/deactivate reasons for the center selected in the top-left corner, or display all activated reasons for the selected center. This can also be used with “All centers” selected, allowing you to quickly add or remove a reason from all of your centers. | ||
[[File:785kj4hg3jk75.png|800px]] | [[File:785kj4hg3jk75.png|800px]] | ||
<br><br> | <br><br> | ||
Reasons can also be assigned from your Center directly. From your Profile, click on the Centers tab followed by the Center you want to update. The very last option on this page is 'Active Reasons,' allowing you to add or Remove reasons for this specific Center. | |||
[[File:6009469.png|800px]] | |||
<hr> | |||
==Reason Categories== | ==Reason Categories== | ||
Revision as of 23:39, 24 May 2022
Profile Preferences
Prefs
|
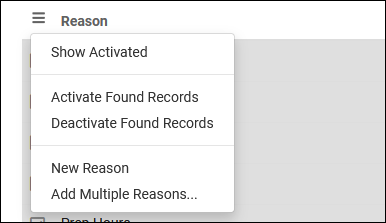
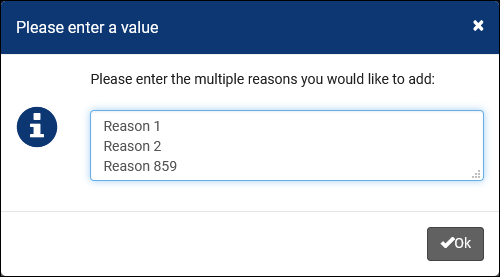
Reasons Reasons/Services allow your staff and students to provide additional information and reasons for booking an appointment. For example, reasons such as “Counseling,” “Study Plan Help,” or “Exam.” This would let the consultants know what the student needs help with, provide preparation and information as needed, and gives your staff additional information for reports. File:5rh446k4k4kk46k4.png The hamburger button contains several management options, detailed below. 
Creating ReasonsClick on the hamburger button, then select “New Reason” to be brought to the Reason creation menu.
Assigning Reasons to CentersThere are two ways to assign Reasons to your Centers, first is directly from this tab of your Profile. The checkbox button on the right side allows you to activate/deactivate reasons for the center selected in the top-left corner, or display all activated reasons for the selected center. This can also be used with “All centers” selected, allowing you to quickly add or remove a reason from all of your centers.
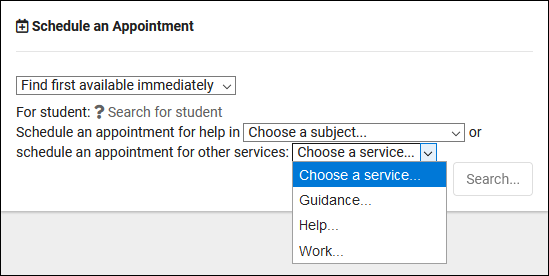
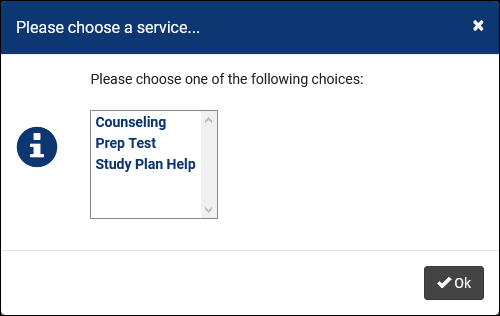
Reason CategoriesCategories allow you to group different reasons together. If you have several reasons available, it can be beneficial to group them into categories that staff and students can select when booking appointments. These Categories will appear followed by “…”, which when clicked will prompt you to choose a Reason within the category.
|


