TracCloud: Assessments: Difference between revisions
From Redrock Wiki
Created page with "{{TracCloudGuideTabs}} <div class="tcWidgetPage"> {{AdvancementTier}} <div class="category"> {{TracCloudModulesTOC}} </div> <div class="pageTitle">Assessments</div> Description 750px <hr> For information on purchasing the Assessments Module, reach out to [mailto:[email protected] [email protected]]<br> For Assessment functionality questions, reach out to [mailto:[email protected] [email protected]] Category:TracCloud Manual </div>" |
No edit summary |
||
| (14 intermediate revisions by the same user not shown) | |||
| Line 1: | Line 1: | ||
{{AdvancementTier}} | |||
<div class="categoryDynamic"> | |||
{{TracCloudGuideTabs}} | {{TracCloudGuideTabs}} | ||
{{TracCloudModulesTOC}} | {{TracCloudModulesTOC}} | ||
</div> | </div> | ||
<div class="pageTitle">Assessments</div> | <div class="pageTitle">Assessments</div> | ||
Assessments allow you to create customizable questionnaires that can be used for a variety of purposes, from evaluating learning styles and study habits to exploring cognitive abilities. After completing the questionnaire, students receive personalized feedback and targeted support in areas where they may need improvement. | |||
Students and staff can generate a self-assessment from their dashboard with the <b>Assessments</b> widget, or a link/QR code can be shared with them to initiate an assessment. The dashboard widget additionally allows the recipient to view their past results or edit their responses (if allowed by the assessment type). | |||
[[File:774436423.png|400px]] [[File:23734634.png|400px]]<br><br> | |||
Once a new assessment form is opened, the student or staff member will be taken to a page like the following. Redrock Software will work with you to build your assessment type in TracCloud to ensure it collects the information & answers you need and provide insightful results based on the responses given. | |||
<div style="text-align: center">{{#fas:arrow-left}} <b>Scroll for Examples</b> {{#fas:arrow-right}}</div> | |||
<div style="overflow-x: scroll; white-space: nowrap; border: 1px solid black;"> | |||
[[File:373727725 1.png|805px]] [[File:373727725 2.png|800px]] [[File:373727725 3.png|800px]] [[File:373727725 4.png|840px]] [[File:373727725 5.png|803px]] | |||
</div> | |||
<hr> | |||
<!--------------------------------------- Configuration ---------------------------------------> | |||
<div class='collapsible'>Configuration</div><div class="mw-collapsible mw-collapsed"> | |||
<br><br> | |||
Assessment types can be managed in Other ➜ Listings ➜ Assessment Types. From this listing you can review every type of assessment that has been created on your system, along with the ability to quickly view results for each type or make limited edits to the assessment form. | |||
Redrock Software will assist with building each assessment behind the scenes. This includes how scores/answers are tallied and how the results page is displayed. These internal scripts are not available to edit by regular system administrators. | |||
[[File:237382086.png|800px]]<br><br> | |||
* <b>Name / Title of the Assessment</b> | |||
::This is the main name of the assessment, and will be visible to students and staff when they go to submit a self assessment.<br><br> | |||
* <b>Profile</b> and <b>Created</b> date | |||
::Choose which profile this assessment is linked to and when the type was created. This does not affect functionality.<br><br> | |||
* <b>Short Name</b> | |||
::This shorter name is used in the results page of an assessment. This is typically an acronym or otherwise a shorter version of the type name for brevity.<br><br> | |||
* <b>QR Code/Link Button</b> | |||
::These options can be used to provide a quick way for students/staff to fill out the assessment rather than starting from their dashboard.<br><br> | |||
* <b>Dashboard Instructions</b> | |||
::The text filled in here appears when a student or staff member clicks on an assessment on their dashboard.<br> | |||
::[[File:2743873473.png|400px]]<br><br> | |||
* <b>Allow Multiple Assessments</b> | |||
::Choose whether or not the staff or student can create multiple assessments for themselves of this type.<br><br> | |||
* <b>Expires in</b> | |||
::When an completed assessment expires, it's hidden from the student/staff dashboard. Additionally, if you restrict an assessment type to only allow one assessment per person, once their assessment expires they will be allowed to submit another.<br><br> | |||
* <b>Allow Edits to Existing</b> | |||
::Choose whether or not students/staff can edit their assessment responses after completing the form. If you do allow editing, you can block edits after a period of time using the <b>No Edits after</b> option.<br><br> | |||
* <b>Students/Staff</b> | |||
::Choose which type of user this assessment is available to. For students, you can further filter the recipients based on [[TracCloud:_Student_Lists|Student List]].<br><br> | |||
[[File:2362.png|600px]]<BR><BR> | |||
* <b>Assessment Definition</b> | |||
::This tab contains the questions asked in the assessment form. We recommend only changing the wording of questions in this menu at most. If you need to make larger changes, or add/remove questions, please reach out to our support first (our contact info can be found under the 'Support' tab at the top of the screen). Depending on the change being made, we may need to make additional adjustments on our end to accommodate.<br><br> | |||
* <b>Results</b> | |||
::See next section of this article. | |||
</div> | |||
<hr> | |||
<!--------------------------------------- Results ---------------------------------------> | |||
<div class='collapsible'>Results & Assessments Listing</div><div class="mw-collapsible mw-collapsed"> | |||
<br><br> | |||
There are multiple routes to view assessment response data. from listings to reports. If you're already within the Assessment Type (continuing from the section above), then you will have a dedicated tab in that type to view assessments. This shows who filled out the assessment, when, etc. | |||
[[File:62727374.png|700px]]<br><br> | |||
Clicking on the assessment opens the full results page for that person. As with the assessment questionnaire itself, the results page is customizable with Redrock Software's assistance. Some examples are shown below. | |||
<div style="text-align: center">{{#fas:arrow-left}} <b>Scroll for Examples</b> {{#fas:arrow-right}}</div> | |||
<div style="overflow-x: scroll; white-space: nowrap; border: 1px solid black;"> | |||
[[File:2385465.png|700px]] [[File:6236236.png|621px]] [[File:234873843.png|796px]] | |||
</div><br><br> | |||
In addition to reviewing assessment results for one type at a time, you can also view <i>all</i> assessments by going to Other ➜ Assessments ➜ Assessments. Clicking into the assessment from this list opens the results page just like the above examples. | |||
[[File:1261623.png|700px]] | |||
</div> | |||
<hr> | |||
<!--------------------------------------- Permissions ---------------------------------------> | |||
<div class='collapsible'>Permissions</div><div class="mw-collapsible mw-collapsed"> | |||
<br><br> | |||
In order for a staff member to have access to assessments, you must update their [[TracCloud:_Permission_Groups|Permission Group]]. Go to Other ➜ Other Options ➜ Groups ➜ [The group you wish to update] ➜ Admin / Modules. Assign access to Assessments and/or Assessment Types under Table Access to allow them to access the assessment templates and assessment responses respectively. | |||
[[File:5485474554.png|800px]]<br><br> | |||
To provide access to existing assessment types, scroll down under the same tab and add the types to "Assessment Group Types." | |||
[[File:55485475446.png|600px]] | |||
</div> | |||
<hr> | <hr> | ||
For information on purchasing the Assessments Module, reach out to [mailto:[email protected] [email protected]]<br> | For information on purchasing the Assessments Module, reach out to [mailto:[email protected] [email protected]]<br> | ||
For Assessment functionality questions, reach out to [mailto:[email protected] [email protected]] | For Assessment functionality questions, reach out to [mailto:[email protected] [email protected]] | ||
<hr> | |||
<i>See Also:</i> | |||
[[TracCloud_Report:_Assessments_Summary|Report: Assessments Summary]] | |||
[[Category:TracCloud Manual]] | [[Category:TracCloud Manual]] | ||
Latest revision as of 17:51, 17 June 2026
Additional Features
Assessments allow you to create customizable questionnaires that can be used for a variety of purposes, from evaluating learning styles and study habits to exploring cognitive abilities. After completing the questionnaire, students receive personalized feedback and targeted support in areas where they may need improvement.
Students and staff can generate a self-assessment from their dashboard with the Assessments widget, or a link/QR code can be shared with them to initiate an assessment. The dashboard widget additionally allows the recipient to view their past results or edit their responses (if allowed by the assessment type).


Once a new assessment form is opened, the student or staff member will be taken to a page like the following. Redrock Software will work with you to build your assessment type in TracCloud to ensure it collects the information & answers you need and provide insightful results based on the responses given.


Assessment types can be managed in Other ➜ Listings ➜ Assessment Types. From this listing you can review every type of assessment that has been created on your system, along with the ability to quickly view results for each type or make limited edits to the assessment form.
Redrock Software will assist with building each assessment behind the scenes. This includes how scores/answers are tallied and how the results page is displayed. These internal scripts are not available to edit by regular system administrators.

- Name / Title of the Assessment
- This is the main name of the assessment, and will be visible to students and staff when they go to submit a self assessment.
- This is the main name of the assessment, and will be visible to students and staff when they go to submit a self assessment.
- Profile and Created date
- Choose which profile this assessment is linked to and when the type was created. This does not affect functionality.
- Choose which profile this assessment is linked to and when the type was created. This does not affect functionality.
- Short Name
- This shorter name is used in the results page of an assessment. This is typically an acronym or otherwise a shorter version of the type name for brevity.
- This shorter name is used in the results page of an assessment. This is typically an acronym or otherwise a shorter version of the type name for brevity.
- QR Code/Link Button
- These options can be used to provide a quick way for students/staff to fill out the assessment rather than starting from their dashboard.
- These options can be used to provide a quick way for students/staff to fill out the assessment rather than starting from their dashboard.
- Dashboard Instructions
- The text filled in here appears when a student or staff member clicks on an assessment on their dashboard.
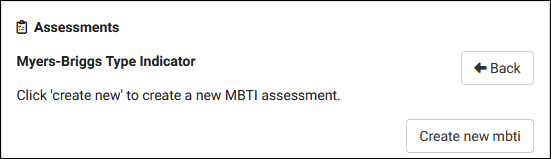
- The text filled in here appears when a student or staff member clicks on an assessment on their dashboard.

- Allow Multiple Assessments
- Choose whether or not the staff or student can create multiple assessments for themselves of this type.
- Choose whether or not the staff or student can create multiple assessments for themselves of this type.
- Expires in
- When an completed assessment expires, it's hidden from the student/staff dashboard. Additionally, if you restrict an assessment type to only allow one assessment per person, once their assessment expires they will be allowed to submit another.
- When an completed assessment expires, it's hidden from the student/staff dashboard. Additionally, if you restrict an assessment type to only allow one assessment per person, once their assessment expires they will be allowed to submit another.
- Allow Edits to Existing
- Choose whether or not students/staff can edit their assessment responses after completing the form. If you do allow editing, you can block edits after a period of time using the No Edits after option.
- Choose whether or not students/staff can edit their assessment responses after completing the form. If you do allow editing, you can block edits after a period of time using the No Edits after option.
- Students/Staff
- Choose which type of user this assessment is available to. For students, you can further filter the recipients based on Student List.
- Choose which type of user this assessment is available to. For students, you can further filter the recipients based on Student List.

- Assessment Definition
- This tab contains the questions asked in the assessment form. We recommend only changing the wording of questions in this menu at most. If you need to make larger changes, or add/remove questions, please reach out to our support first (our contact info can be found under the 'Support' tab at the top of the screen). Depending on the change being made, we may need to make additional adjustments on our end to accommodate.
- This tab contains the questions asked in the assessment form. We recommend only changing the wording of questions in this menu at most. If you need to make larger changes, or add/remove questions, please reach out to our support first (our contact info can be found under the 'Support' tab at the top of the screen). Depending on the change being made, we may need to make additional adjustments on our end to accommodate.
- Results
- See next section of this article.
There are multiple routes to view assessment response data. from listings to reports. If you're already within the Assessment Type (continuing from the section above), then you will have a dedicated tab in that type to view assessments. This shows who filled out the assessment, when, etc.

Clicking on the assessment opens the full results page for that person. As with the assessment questionnaire itself, the results page is customizable with Redrock Software's assistance. Some examples are shown below.


In addition to reviewing assessment results for one type at a time, you can also view all assessments by going to Other ➜ Assessments ➜ Assessments. Clicking into the assessment from this list opens the results page just like the above examples.

In order for a staff member to have access to assessments, you must update their Permission Group. Go to Other ➜ Other Options ➜ Groups ➜ [The group you wish to update] ➜ Admin / Modules. Assign access to Assessments and/or Assessment Types under Table Access to allow them to access the assessment templates and assessment responses respectively.

To provide access to existing assessment types, scroll down under the same tab and add the types to "Assessment Group Types."

For information on purchasing the Assessments Module, reach out to [email protected]
For Assessment functionality questions, reach out to [email protected]
See Also: