TracCloudNews37
From Redrock Wiki
TracCloudNews37
TracCloudNews37
Creating Reasons
Using "reasons" allows your students to provide an overall purpose for their visit/appointment. For example, a student might select a subject, MATH100, but what do they specifically need help with for that subject? Homework Help, Essay Assistance, General Tutoring, etc. Reasons allow you to track the purpose of the visit beyond just the subject.
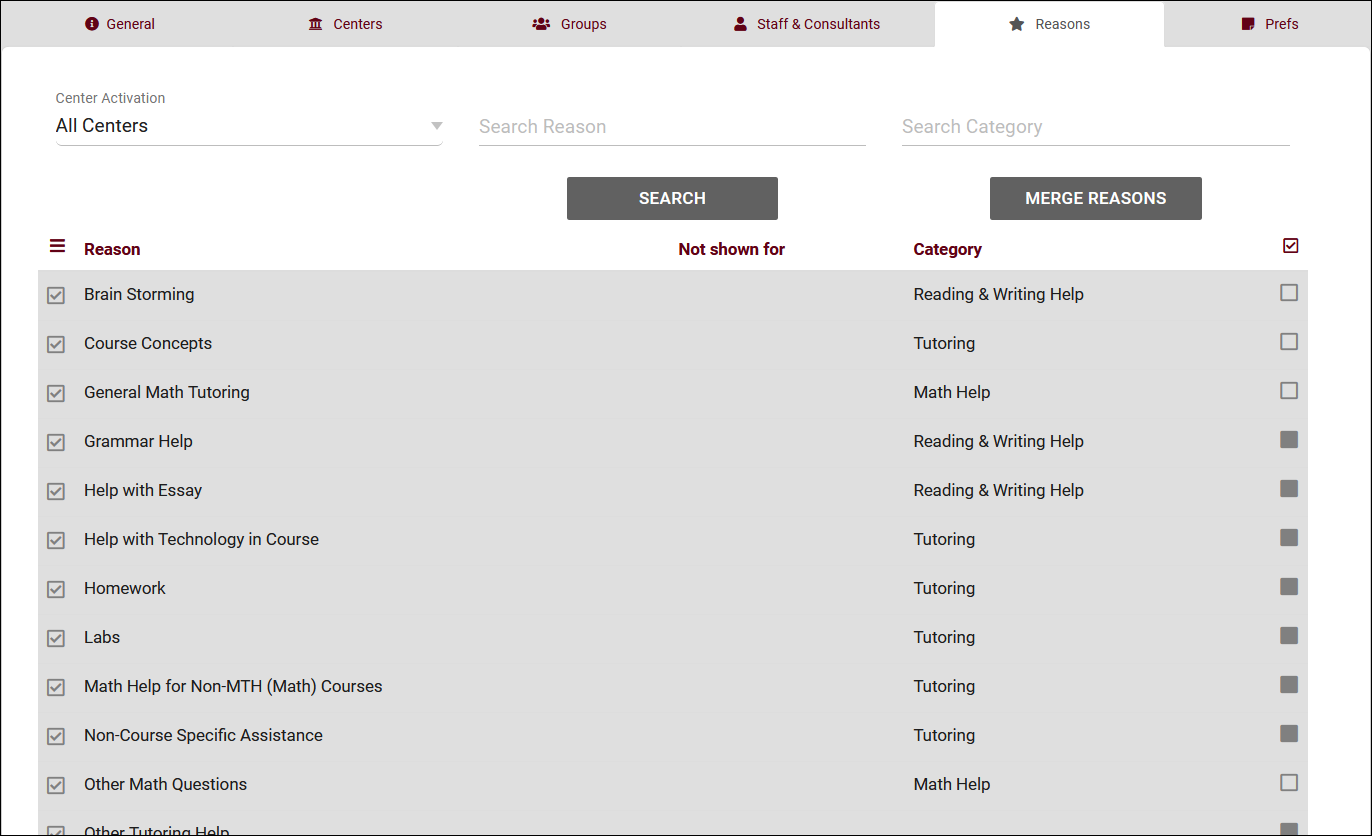
To manage or create a new reason for students to select. Go to Other > Other Options > Profiles > [Your profile] > Reasons.
If you're creating a new reason, click on the hamburger icon and choose "New Reason." There are a variety of options that you can use to modify where the reason is displayed and other internal settings (more information on those can be found here). Unless one of these stands out as something you may need, you can give your reason a name and leave the other fields at their default values.
Now that the Reason has been created and is listed as active, you would need to assign it to your centers. This can be accomplished by checking the right-most checkbox for the reason after selecting a center in the top-left corner, or you can assign all reasons to the selected center at once using the icon as seen in the screenshot below.
For more information about reasons, take a look at our full wiki article here.
More Questions?
We hope that you found this article helpful, and as always if you have any questions about this or any other features, please feel free to let us know by emailing Helpdesk@go-redrock.com or by submitting a ticket.
Thank you for your continued support!


