TracCloud: Attendance Listing: Difference between revisions
From Redrock Wiki
No edit summary |
No edit summary |
||
| Line 6: | Line 6: | ||
<big><b>Visits Listing</b></big><br> | <big><b>Visits Listing</b></big><br> | ||
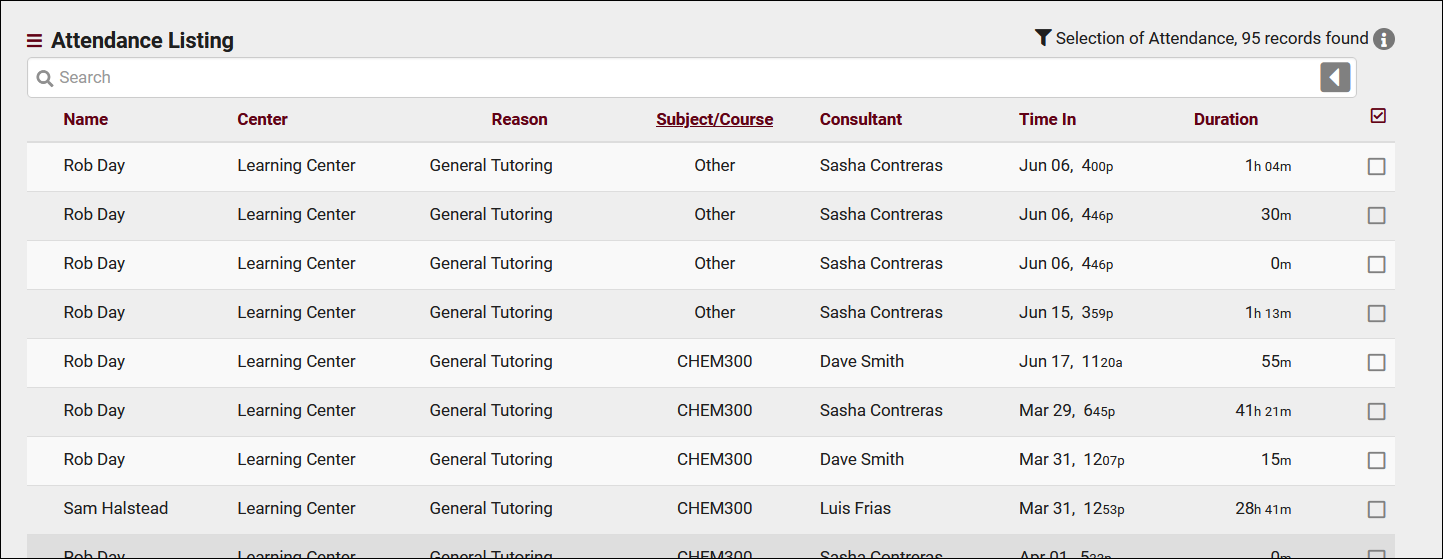
A Visit represents the log that the student was present at your center at X time, for Y subject, Z reason, etc. This is different from an Appointment, which is represents the reservation. If a student doesn't follow through with an Appointment, a Visit is never created. Every Visit in the Trac System can be viewed on this listing, found under the <b>Attendance</b> tab > <b>Visits Listing</b>. | A Visit represents the log that the student was present at your center at X time, for Y subject, Z reason, etc. This is different from an Appointment, which is represents the reservation. If a student doesn't follow through with an Appointment, a Visit is never created. Every Visit in the Trac System can be viewed on this listing, found under the <b>Attendance</b> tab > <b>Visits Listing</b>. | ||
< | <hr> | ||
The Visit Listing contains all recorded Visits in your Trac System that you have permission to view. Visits can be created, searched, modified, and viewed all from this listing. | The Visit Listing contains all recorded Visits in your Trac System that you have permission to view. Visits can be created, searched, modified, and viewed all from this listing. | ||
[[File:5380015.png|800px]] | [[File:5380015.png|800px]] | ||
| Line 50: | Line 48: | ||
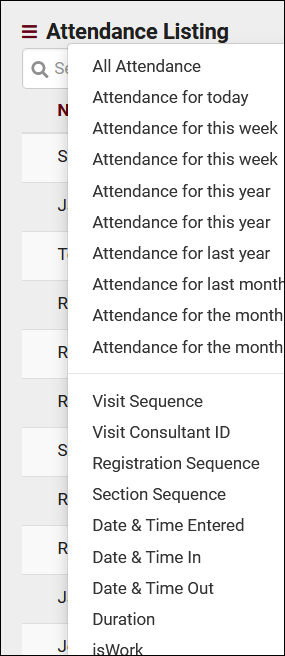
The Visits Listing also includes the Power Search tool, as well as many other Listing Utilities accessed via the hamburger icon [[File:Hamburger.png|17px]] directly above your search bar. Information on those can be found by [[TracCloudGuideListingsOptions|clicking here.]] | The Visits Listing also includes the Power Search tool, as well as many other Listing Utilities accessed via the hamburger icon [[File:Hamburger.png|17px]] directly above your search bar. Information on those can be found by [[TracCloudGuideListingsOptions|clicking here.]] | ||
<hr> | |||
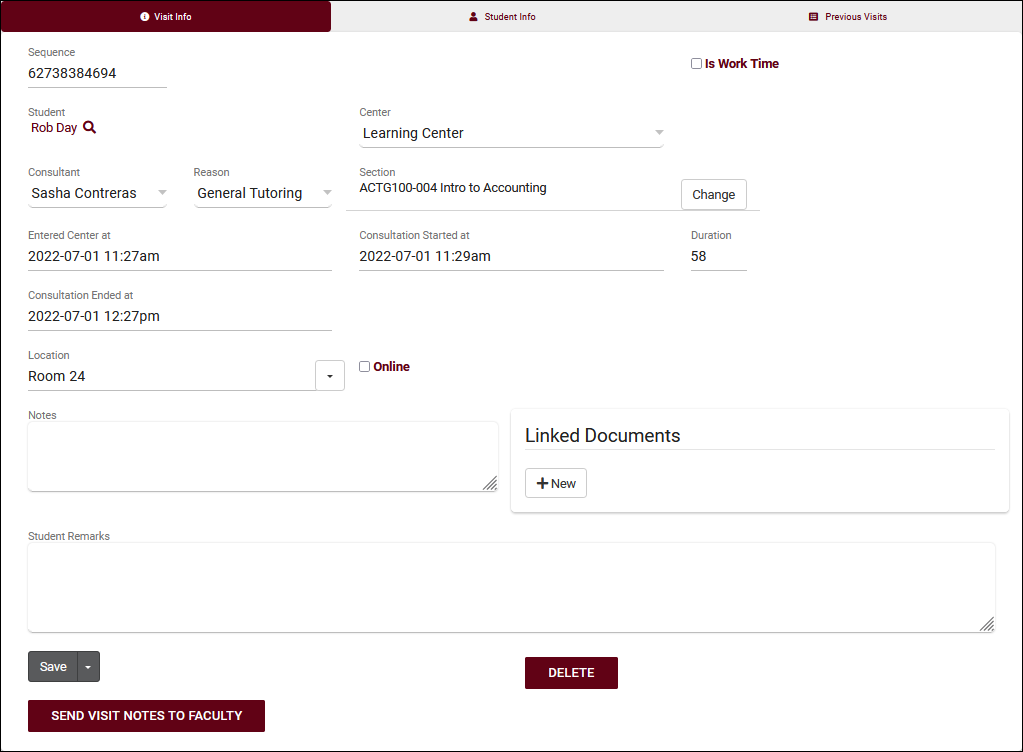
Clicking on an individual visit record opens the Visit Entry page, seen in the screenshot below. This allows you to review and manually update visits as needed.<br> | |||
[[File:9492324.png|800px]]<br><br> | |||
Most fields visible here are self-explanatory, with the few that may require some additional clarification listed below.<br><br> | |||
* <b>Entered Center at</b> vs <b>Consultation Started at</b> | |||
::If your campus tracks student wait time, these options display the different start times of this visit. For example, if a student logged in for their 9am appointment at 8:55, then met with their consultant at 8:59 onward, the visit record will reflect those times in <i>Entered Center at</i> and <i>Consultation Started at</i> respectively. If your campus does not track wait time, the <i>Entered Center</i> time can be ignored. | |||
Revision as of 23:59, 12 July 2022
|
Visits Listing A Visit represents the log that the student was present at your center at X time, for Y subject, Z reason, etc. This is different from an Appointment, which is represents the reservation. If a student doesn't follow through with an Appointment, a Visit is never created. Every Visit in the Trac System can be viewed on this listing, found under the Attendance tab > Visits Listing. The Visit Listing contains all recorded Visits in your Trac System that you have permission to view. Visits can be created, searched, modified, and viewed all from this listing.
Example Searches:
The Visits Listing also includes the Power Search tool, as well as many other Listing Utilities accessed via the hamburger icon File:Hamburger.png directly above your search bar. Information on those can be found by clicking here. Clicking on an individual visit record opens the Visit Entry page, seen in the screenshot below. This allows you to review and manually update visits as needed.
|


