TracCloudReportsStudents04: Difference between revisions
From Redrock Wiki
No edit summary |
No edit summary |
||
| Line 3: | Line 3: | ||
{{TracCloudReportsStudentsTOC}} | {{TracCloudReportsStudentsTOC}} | ||
</div> | </div> | ||
<big><b>Students and Appointment Status Crosstab</big></b | <big><b>Students and Appointment Status Crosstab</big></b> | ||
This report shows a list of students and their total appointments separated by status. This report can be filtered by appointment status and sorted by student name, ID, or appointment totals. | This report shows a list of students and their total appointments separated by status. This report can be filtered by appointment status and sorted by student name, ID, or appointment totals. | ||
Revision as of 14:45, 6 November 2023
Students
• Student Search Availabilities
• Students Visits/Appointments by ??
• Students and Appointment Status Crosstab
• Students by Appointment Status
Students and Appointment Status Crosstab
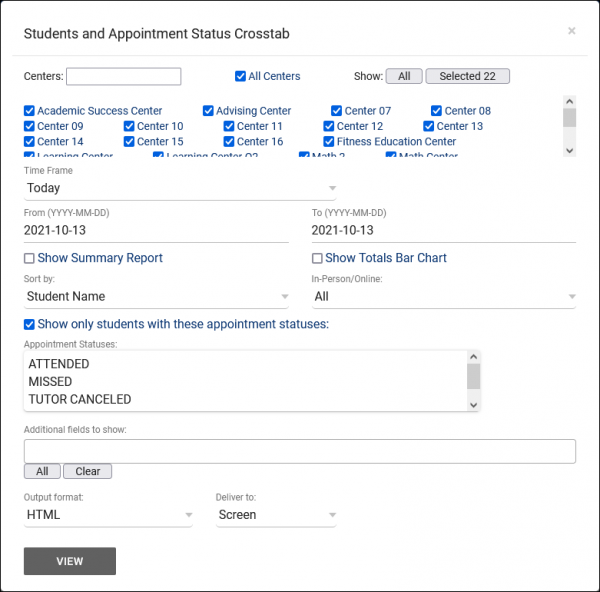
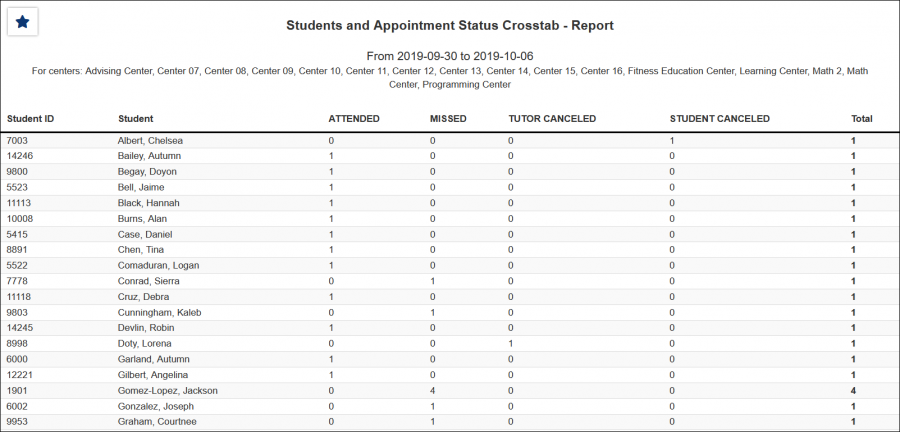
This report shows a list of students and their total appointments separated by status. This report can be filtered by appointment status and sorted by student name, ID, or appointment totals.
- Centers
- Filter report data by center. You can select all centers or only a specific few to narrow down your results. At least one center must be selected.
- Time Frame
- The date range for the data in this report. Beyond entering a date range manually, you can also choose a preset date range (Today, This Month, This Semester, etc) from the dropdown list above.
- Show Summary
- Only show data totals, excluding details of individual records.
- Show Totals Bar Chart
- Adds a visual bar chart of totals to your report data.
- Sort by
- Choose how the selected data is sorted.
- In-Person/Online
- Filter the data in this report to only include In-Person or Online records. Defaults to All.
- Special Needs / Skills / Accommodations
- Only show results for a specific Need/Skill/Accommodation.
- Show only students with these appointment statuses
- This will filter the list of students to only those with appointments that match the statuses you specify in the box beneath.
- Additional fields to show
- This can be used to add additional data fields to the report results. For example, you could use this to add a student's email address in a visit report.
- Output format
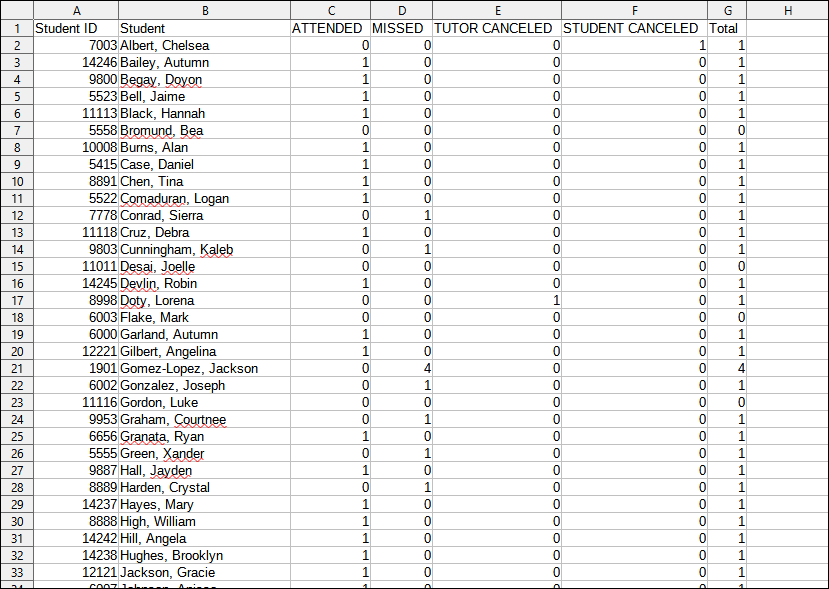
- Use HTML to view report data in your browser, or export this report to a CSV file (available for most reports). Some reports offer additional CSV options depending on if you want to include totals and/or data grouping in your export.
- Deliver to
- Display this report immediately in your browser ("Screen"), or send the report to a specified email address ("Email"). Multiple email addresses can be specified, use ; to separate them (example@example.edu;sample@example.edu).


