| Once your section/course information has been entered (either manually or via the import process), your will need to activate Sections for your Subcenters. Or in other words, we will need to indicate which courses will be available in which Subcenters. For this example, we will be activating courses for our Writing Center. First, let’s navigate to our Center Profile – Sections Tab. Here we will click on the SubCenter Options dropdown menu, and select the Writing Center.
Trac Navigation > Search Glass > Center Profiles > [Your Profile] > Sections
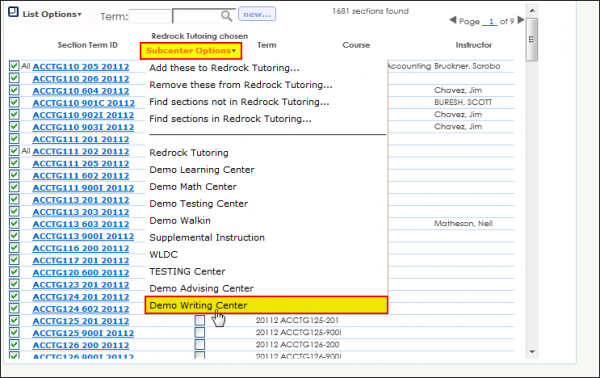
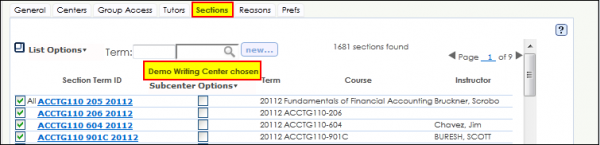
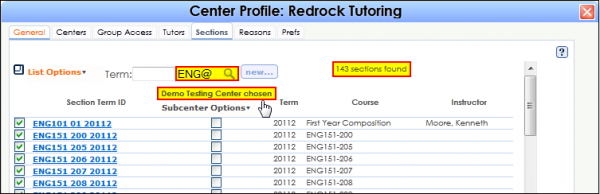
The system will then notify the User that the Writing Center has been chosen.
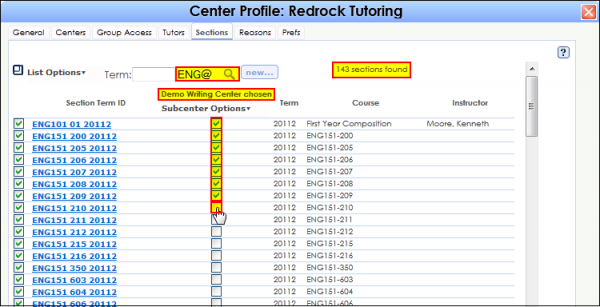
Now that we’ve selected our Subcenter, we need to perform a search to find the courses we want to activate for the Subcenter in selection. For this example, we will be looking for English courses that we want to activate for our Writing Center. Type “ENG@” in the Search Field to the left of the New button. The wildcard “@” symbol will modify the search to include any courses that BEGIN with “ENG”, i.e. ENG101, ENG 202 etc…

The system then locates 143 sections that begin with “ENG” out of 1681 total sections. In order to activate these courses for the Writing Center, we have the option of checking each Center checkbox (underneath the Subcenter Options column) individually.
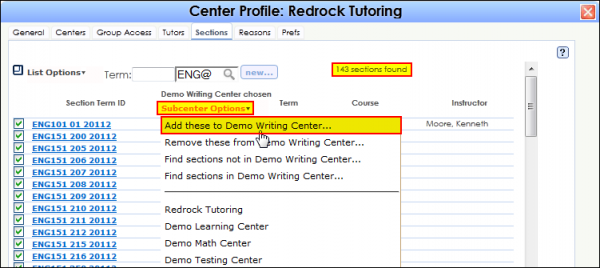
On the other hand, if we would like to activate ALL courses found in our Search, we can click Subcenter options > Add these to Writing Center. This will proceed to add ALL courses located through our Search (143 sections found) to the Subcenter in selection – the Writing Center.
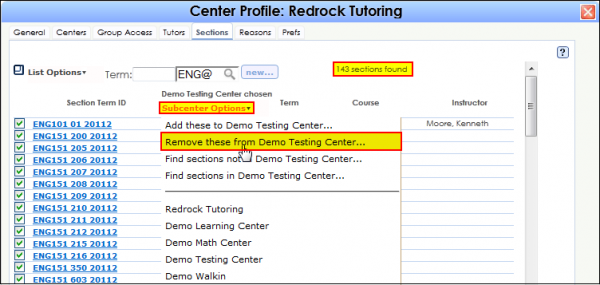
Let’s say, for example, we would like to activate ALL courses EXCEPT English courses for our Testing Center. In this situation, we would follow the same procedure. We would first select the Testing Center from Subcenter Options. Make sure that the total numbers of sections are listed (for this example, 1681 sections found). If this is not the case, you may need to click List Options > List All, and repeat your Subcenter selection through Subcenter Options.
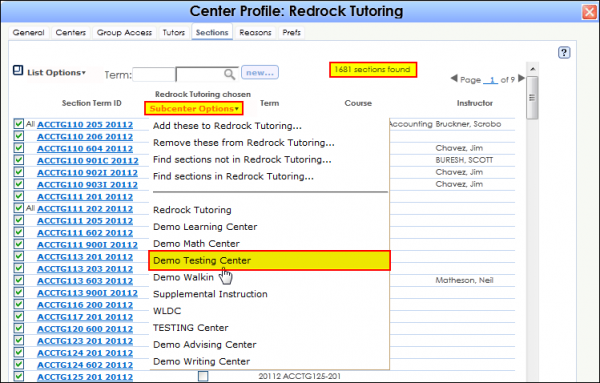
The system will then notify us of our Subcenter Selection. Now, because we want to activate ALL courses (except English), click on Subcenter Options and select Add These to Testing Center. This will add ALL courses to our Testing Center.

Now, since we’ve activated ALL courses, we need to remove ALL English courses from our Subcenter Assignment (Testing Center). We at this point repeat the exact same search for “ENG@” courses and find the 143 English sections found in our previous example.
To do this, click on Subcenter Options and select Remove these from Writing Center.
| 


