TracCloudGuideProfilePrefsLogEtc: Difference between revisions
From Redrock Wiki
No edit summary |
No edit summary |
||
| (31 intermediate revisions by the same user not shown) | |||
| Line 1: | Line 1: | ||
{{TracCloudGuideTabs}} | {{TracCloudGuideTabs}} | ||
<div class="tcWidgetPage" style="min-height:38em"> | |||
<div class="categoryWide"> | |||
{{TracCloudGuideProfileTOC}} | |||
</div> | |||
<big><b>Log Listing Message, KIOSK Notices, and Custom KIOSKs</b></big><br> | <big><b>Log Listing Message, KIOSK Notices, and Custom KIOSKs</b></big><br> | ||
This | |||
This section of your profile preferences contains additional options relating to the Log Listing, KIOSKs, and more.<br> | |||
<i>Other > Other Options > Profiles > [Your Profile] > Prefs > Log Listing Message, KIOSKS Notices, and Custom KIOSKs</i><br> | |||
<div class="line"></div> | |||
<!-------------------------------------------- Notice/Welcome/Goodbye --------------------------------------------> | |||
<div style="float: left; margin-top: 0em; margin-bottom: 1em"><big><b>Notices, Welcome, Goodbye messages</b></big></div><div class="mw-collapsible mw-collapsed"><br><br> | |||
A notice can be configured to display on KIOSKs and the Log Listing page. This message can display information that may be useful to staff and students who are trying to login. This message also supports HTML, so you can use bold or italics tags to adjust the visibility of your message. | A notice can be configured to display on KIOSKs and the Log Listing page. This message can display information that may be useful to staff and students who are trying to login. This message also supports HTML, so you can use bold or italics tags to adjust the visibility of your message. | ||
| Line 17: | Line 23: | ||
<br> | <br> | ||
[[File:4h5346j46hg4j46.png|800px]] | [[File:4h5346j46hg4j46.png|800px]] | ||
< | |||
<hr> | |||
==Kiosk Login Welcome / Goodbye Messages== | ==Kiosk Login Welcome / Goodbye Messages== | ||
These are custom, Twig & HTML-supported messages that can be displayed during the login/logout process on the KIOSK or Log Listing. This allows you to display information to the student while they’re logging in, maybe their upcoming appointment information or contact info for the consultant, this is up to you. For more information on Twig, take a look at our dedicated Twig article. | These are custom, [[TracCloudGuideProfilePrefsTwig|Twig]] & HTML-supported messages that can be displayed during the login/logout process on the [[TracCloudGuideBasicsVisits|KIOSK or Log Listing]]. This allows you to display information to the student while they’re logging in, maybe their upcoming appointment information or contact info for the consultant, this is up to you. For more information on Twig, take a look at our dedicated [[TracCloudGuideProfilePrefsTwig|Twig article]]. | ||
<br> | <br> | ||
[[File:G35h35jh634j3j34.png|800px]] | [[File:G35h35jh634j3j34.png|800px]] | ||
| Line 31: | Line 38: | ||
[[File:7k5k75k5h44g4.png|500px]]<br> | [[File:7k5k75k5h44g4.png|500px]]<br> | ||
[[File:64kj46k4k54j45.png|500px]] | [[File:64kj46k4k54j45.png|500px]] | ||
<br><br> | |||
= | </div> | ||
<br><br><div class="line"></div> | |||
<!-------------------------------------------- AUTO TERMINATE--------------------------------------------> | |||
<div style="float: left; margin-top: 0em; margin-bottom: 1em"><big><b>Auto Terminate</b></big></div><div class="mw-collapsible mw-collapsed"><br><br> | |||
The Auto Termination process can automatically conclude ongoing visits at the end of the night and/or correct visits that have a longer-than-intended duration. There are two parts of this process. The first, <b>Terminate all still logged in</b>, will only conclude visits that are still in-progress by your Time for Nightly Termination. The second, <b>Auto terminate visits longer than</b>, also applies to on-going visits that meet this criteria, however, this additionally applies to concluded visits that same day. For example, if a user created a 10-hour visit for one of your students, this process will change it back to your defined time. | |||
<br> | <br> | ||
[[File: | [[File:7458071.png|800px]] | ||
<br><br> | <br><br> | ||
* <b>Terminate all still logged in</b> | |||
::If enabled, any on-going visits by <b>Time for Nightly Termination</b> will be concluded and set to your defined duration.<br><br> | |||
* <b>Auto set these visits time to (minutes)</b> | |||
::If an on-going visit is terminated, this is the duration it will be set to in minutes. If this is set to 0 minutes, a terminated visit will be deleted instead.<br><br> | |||
* <b>Open visit terminations applies to Work Visits</b> | |||
::Also apply the above logic to consultant [[TracCloudGuideBasicsPayroll|Work Visits]] as well.<br><br> | |||
* <b>Auto terminate visits longer than (minutes)</b> | * <b>Auto terminate visits longer than (minutes)</b> | ||
::This process will | ::This part of the process will also affect concluded visits as described earlier. This should be set to your maximum possible visit duration to prevent accurate visits from being adjusted. Leave this and <b>Auto set visits time to</b> blank to disable this part of Auto Termination.<br><br> | ||
* <b>Auto set visits time to (minutes)</b> | * <b>Auto set visits time to (minutes)</b> | ||
::This is the duration | ::This is the duration visits will be changed to in the above scenario. Leave this and <b>Auto terminate visits longer than</b> blank to disable this part of Auto Termination. If this is set to 0 minutes, a terminated visit will be deleted instead.<br><br> | ||
* <b>Time for Nightly Termination</b> | * <b>Time for Nightly Termination</b> | ||
::This is the specific time the process runs each day | ::This is the specific time the Auto Termination process runs each day. This should be set to a later time in the day (e.g., 11:30pm) to prevent actual in-progress visits from being affected.<br><br> | ||
* <b>Send Email Notification to Student / Center Admin</b> | * <b>Send Email Notification to Student / Center Admin</b> | ||
::Toggling these options will send an email to the student and/or center admin letting them know that the student wasn’t logged out. | ::Toggling these options will send an email to the student and/or center admin letting them know that the student wasn’t logged out. If <i>Center Admin</i> is chosen, additional email addresses can be CC'd in the box below. "Center Admin" refers to the email address entered in <i>[Your Profile] > Prefs > Emails > Profile Email Address</i>.<br><br> | ||
==Other Log In/Out Preferences= | * <b>Delete visits waiting (not started)</b> | ||
[[File: | ::If a '[[TracCloudGuideProfilePrefsLogInOut|Waiting]]' status visit reaches the auto-termination window, you can choose if it's terminated normally (unchecked) or deleted (checked).<br><br> | ||
* <b>Terminations apply to Work Visits</b> | |||
::If you would like to also terminate work visits, you can check this box and define a different threshold and adjusted time.<br><br> | |||
* <b>Termination deletion email & Termination modification email</b> | |||
::These allow you to override the default email that sends to students when their visit is automatically terminated. You can modify the deletion and the modification email independently of each other, leaving these blank is also safe as the system will use a default template in that case. | |||
</div> | |||
<br><br><div class="line"></div> | |||
<!-------------------------------------------- Other Log In/Out --------------------------------------------> | |||
<div style="float: left; margin-top: 0em; margin-bottom: 1em"><big><b>Other Log In/Out Preferences</b></big></div><div class="mw-collapsible mw-collapsed"><br><br> | |||
[[File:2062491.png|800px]] | |||
<br><br> | <br><br> | ||
* <b>KIOSK Enter ID label</b> | * <b>KIOSK Enter ID label</b> | ||
::Changes the text shown | ::Changes the text shown in the [[TracCloudGuideBasicsVisits|Log Listing/Kiosk]] “Enter ID” box. | ||
::[[File:H3j4j4j4h45g45.png|500px]] | ::[[File:H3j4j4j4h45g45.png|500px]]<br><br> | ||
* <b>Batch KIOSK Enter ID label (IDs only)</b> | |||
::Changes the text shown in the [[TracCloudGuideBasicsVisits|Batch Visit QR Code]] "Enter ID" box. | |||
::[[File:8569671.png|500px]]<br><br> | |||
* <b>Log out of this profile when student logs in to another profile</b> | * <b>Log out of this profile when student logs in to another profile</b> | ||
:: | ::If enabled, when a student logs into Center 1, then logs into Center 2, their visit in Center 1 will be automatically concluded.<br><br> | ||
* <b>Show total visit minutes when logging out</b> | |||
::This will show the visit duration in the relevant center during logout. | |||
::[[File:7559462.png|400px]]<br><br> | |||
* <b>Show Other Choice when logging in to single center even with appointment</b> | |||
::If enabled, students will be able to login to the center for a purpose other than their appointment during the login process. Otherwise, TracCloud will assume they are logging in for their appointment (i.e. selecting the first option in the screenshot below automatically). | |||
::[[File:8873308.png|500px]]<br><br> | |||
* <b>Warn user if visit time is less than (minutes) & Warning message to display</b> | * <b>Warn user if visit time is less than (minutes) & Warning message to display</b> | ||
::If enabled, the staff member logging a student out of a visit that hasn’t lasted the specified amount of time will receive a notice as seen in the screenshot below. This message also supports Twig tags for displaying student data (see our dedicated Twig article), and can be previewed with the “Preview” button so you know what your changes will look like. | ::If enabled, the staff member logging a student out of a visit that hasn’t lasted the specified amount of time will receive a notice as seen in the screenshot below. This message also supports Twig tags for displaying student data (see our dedicated [[TracCloudGuideProfilePrefsTwig|Twig article]]), and can be previewed with the “Preview” button so you know what your changes will look like. | ||
::[[File:Jt5kj5k56j6h4.png|500px]] | ::[[File:Jt5kj5k56j6h4.png|500px]]<br><br> | ||
* <b>Allow user to cancel logout</b> | |||
::Provides the ability to cancel during the student logout process, to keep the student logged in. This only applies when trying to logout within the time limit set for <b>Warn user if visit timeless than (minutes) when logging out</b>.<br><br> | |||
* <b>Obscure student ID (***) on login</b> | * <b>Obscure student ID (***) on login</b> | ||
::If enabled, IDs entered on the log listing will be obscured. | ::If enabled, IDs entered on the log listing will be obscured. | ||
::[[File:354j6h4g4g5.png|250px]] | ::[[File:354j6h4g4g5.png|250px]]<br><br> | ||
* <b>Auto lock visits older than (days)</b> | * <b>Auto lock visits older than (days)</b> | ||
::This preference allows you to prevent visit records from being | ::This preference allows you to prevent visit records from being modified after a specified period of time. This applies to all user groups modifying visits in this profile, with the exception of [[TracCloudNewsUserLevel|SysAdmin users]]. | ||
==Custom | </div> | ||
Custom kiosks can be configured for specific visit scenarios. | <br><br><div class="line"></div> | ||
<!-------------------------------------------- KIOSKS --------------------------------------------> | |||
<div style="float: left; margin-top: 0em; margin-bottom: 1em"><big><b>Custom Kiosks</b></big></div><div class="mw-collapsible mw-collapsed"><br><br> | |||
Custom kiosks can be configured for specific [[TracCloudGuideBasicsVisits|visit]] scenarios. For example, if one of your kiosks is only going to be used for a specific Center/Reason combination, you can use a Custom Kiosks to make sure students are logging in with those fields predetermined. You can also select a Location, Consultant, Section, and even IP address zone. | |||
<br> | <br> | ||
[[File: | [[File:9708188.png|800px]] | ||
<br><br> | <br><br> | ||
These custom kiosks can be accessed from the same menu as your standard center kiosks. They will appear in the bottom half of the list, separated by a horizontal line. The only visual difference within the kiosk is that any fields preselected in the custom kiosk menu won’t show up during student logins, as the visits will already be assigned to that Center/Reason/Consultant/Location. | These custom kiosks can be accessed from the same menu as your standard center kiosks. They will appear in the bottom half of the list, separated by a horizontal line. The only visual difference within the kiosk is that any fields preselected in the custom kiosk menu won’t show up during student logins, as the visits will already be assigned to that Center/Reason/Consultant/Location. | ||
<br> | <br> | ||
[[File:46j46j4h3g3h53j3.png|500px]] | <b>Allow Only Custom KIOSKs for Logging</b> disables the preset center kiosk options that you would see by default, only allowing you to open custom kiosks. | ||
| | <br> | ||
[[File:46j46j4h3g3h53j3.png|500px]]<br><br> | |||
In addition to standard kiosk functionality, custom kiosks also allow you to create static QR codes that your staff can reuse with a rotating confirmation code. | |||
* <b>Static QR Codes expire</b> | |||
::Choose how frequently the QR code expires, daily or weekly.<br><br> | |||
* <b>Previous Codes Overlap Time</b> | |||
::Add a buffer allowing "expired" QR codes to be used after a new code is generated.<br><br> | |||
* <b>Round Signin to Nearest</b> | |||
::Allows TracCloud to automatically round logins to the nearest 15, 30, or 60 minutes. The purpose of this is to emulate [[TracCloudGuideBasicsVisits|batch visits]], where the time would be static.<br><br> | |||
Within each custom kiosk, you will then find a <b>Static QR Code</b> button. Clicking this opens the following form. | |||
[[File:6902688.png|600px]]<br><br> | |||
* <b>Activate Static QR Code</b> | |||
::Enable or disable this QR code.<br><br> | |||
* <b>Confirmation Code</b> | |||
::This is the current confirmation code for this QR code. Students will need to enter this value after scanning, and this value will expire based on your preference in <b>Static QR Codes expire</b>. If you're creating a QR code for the first time, this code (and expiration date) will need to be set manually. Going forward, it will be updated daily/weekly automatically. If a consultant is linked to the custom kiosk, they will automatically receive new confirmation codes in an email.<br><br> | |||
* <b>Expiration Date</b> | |||
::The expiration date of the related code. This code will not be automatically updated until this date is reached (or if the code will expire within the next date period), a manual expiration date can be set further into the future than 1 day/week.<br><br> | |||
After a student scans the QR code, they will be prompted to enter the confirmation code followed by their ID. The login process is the [[TracCloudGuideBasicsVisits|same as a normal kiosk]] from this point onward. | |||
[[File:7275997.png|800px]] | |||
</div> | |||
<br><br><div class="line"></div> | |||
<!-------------------------------------------- Time check --------------------------------------------> | |||
<div style="float: left; margin-top: 0em; margin-bottom: 1em"><big><b>Time Check Preferences</b></big></div><div class="mw-collapsible mw-collapsed"><br><br> | |||
When students log in or out of a center, Time Check will allow them to view how many [[TracCloudGuideBasicsVisits|visit]] hours they have accumulated within a given time frame. This feature is typically utilized in athletic centers, where students may have a required hours per week or semester. Within these settings, you will be able to manage and adjust the date range of the required hours as well as what totals are displayed to the student, and even a custom message. | |||
[[File:2963531.png|800px]]<br><br> | |||
* <b>Time check Available</b> | |||
::If checked, will enable the time check option for the profile. This adds an additional “Time Check” button to the Kiosk login page, which allows users to quickly check their past visit time from a Kiosk. | |||
::[[File:75o86l67l6877l.png|400px]] | |||
::[[File:75k57k65j56j5k5k.png|400px]]<br><br> | |||
* <b>Show Semester totals</b> | |||
::Will display the students total time based on the current terms active date range.<br><br> | |||
* <b>Show Week Totals</b> | |||
::Will display the students total time based on a week date range. If checked, an additional drop down will appear to the right titled <b>Week Starts On</b>. This option will allow you to adjust the day of week that the Time Check utility will calculate the hours for. As an example, selecting Tuesday from the drop down will calculate hours from Tuesday to Monday.<br><br> | |||
* <b>Show Required Time Per</b> | |||
::There are three options available:<br>None – Will not display Required Hours or difference<br>Weekly – Will show Required Hours and difference based on a one-week time frame.<br>Semester - Will show Required Hours and difference based on the active semesters term date range.<br><br> | |||
* <b>Required Time Field</b> | |||
::The Required Hours utility will point to a [[TracCloudGuideGlobalCustom|custom field]] in the student’s profile. In order to use Required Hours, you will need to point to the custom field designated on the student's profile where their required hours are stored. Required hours can be added to a list of students, or manually added to each individual student’s account. If needed, required time can also be included in your [[TracCloudTechImport|data import]].<br><br> | |||
* <b>Required Time in</b> | |||
::Select the format of the Required Hours field selected, hours or minutes.<br><br> | |||
[[File:7230105.png|800px]]<br><br> | |||
* <b>Show On Login</b>, <b>Show On LogOut</b>, <b>Show On Student Dashboard</b> | |||
::Determines where the Time Check utility will appear for students. | |||
* <b>Compute totals for all profiles</b> | |||
::By default, Time Check will only compute the total time in centers related to the linked profile. If this option is checked, that search will be expanded to all profiles. | |||
* <b>Timecheck Message Footer</b> | |||
::This will allow the profile to customize the message that displays across the bottom of the Time Check screen. This footer can utilize [https://wiki.go-redrock.com/index.php/TracCloudGuideProfilePrefsTwig Twig] to personalize the message and add in important information as seen below. | |||
[[File:6184132.png|500px]] | |||
</div> | |||
<br><br><div class="line"></div> | |||
[[Category:TracCloud]] | |||
</div> | |||
Latest revision as of 16:53, 15 March 2024
Profile Preferences
Prefs
Log Listing Message, KIOSK Notices, and Custom KIOSKs
This section of your profile preferences contains additional options relating to the Log Listing, KIOSKs, and more.
Other > Other Options > Profiles > [Your Profile] > Prefs > Log Listing Message, KIOSKS Notices, and Custom KIOSKs
A notice can be configured to display on KIOSKs and the Log Listing page. This message can display information that may be useful to staff and students who are trying to login. This message also supports HTML, so you can use bold or italics tags to adjust the visibility of your message.
Here’s an example of a message we can include.

Which displays as:

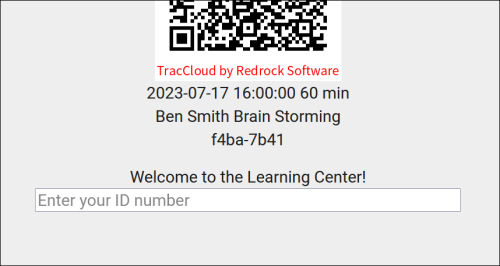
Kiosk Login Welcome / Goodbye Messages
These are custom, Twig & HTML-supported messages that can be displayed during the login/logout process on the KIOSK or Log Listing. This allows you to display information to the student while they’re logging in, maybe their upcoming appointment information or contact info for the consultant, this is up to you. For more information on Twig, take a look at our dedicated Twig article.

Before these messages can be saved, you will need to select the “Preview” button. This will show you how your message will be displayed using a recent appointment/visit as an example. If there are any errors, you will be notified so you can correct them before saving.

Here’s an example of how the Welcome/Goodbye messages can display:


The Auto Termination process can automatically conclude ongoing visits at the end of the night and/or correct visits that have a longer-than-intended duration. There are two parts of this process. The first, Terminate all still logged in, will only conclude visits that are still in-progress by your Time for Nightly Termination. The second, Auto terminate visits longer than, also applies to on-going visits that meet this criteria, however, this additionally applies to concluded visits that same day. For example, if a user created a 10-hour visit for one of your students, this process will change it back to your defined time.

- Terminate all still logged in
- If enabled, any on-going visits by Time for Nightly Termination will be concluded and set to your defined duration.
- If enabled, any on-going visits by Time for Nightly Termination will be concluded and set to your defined duration.
- Auto set these visits time to (minutes)
- If an on-going visit is terminated, this is the duration it will be set to in minutes. If this is set to 0 minutes, a terminated visit will be deleted instead.
- If an on-going visit is terminated, this is the duration it will be set to in minutes. If this is set to 0 minutes, a terminated visit will be deleted instead.
- Open visit terminations applies to Work Visits
- Also apply the above logic to consultant Work Visits as well.
- Also apply the above logic to consultant Work Visits as well.
- Auto terminate visits longer than (minutes)
- This part of the process will also affect concluded visits as described earlier. This should be set to your maximum possible visit duration to prevent accurate visits from being adjusted. Leave this and Auto set visits time to blank to disable this part of Auto Termination.
- This part of the process will also affect concluded visits as described earlier. This should be set to your maximum possible visit duration to prevent accurate visits from being adjusted. Leave this and Auto set visits time to blank to disable this part of Auto Termination.
- Auto set visits time to (minutes)
- This is the duration visits will be changed to in the above scenario. Leave this and Auto terminate visits longer than blank to disable this part of Auto Termination. If this is set to 0 minutes, a terminated visit will be deleted instead.
- This is the duration visits will be changed to in the above scenario. Leave this and Auto terminate visits longer than blank to disable this part of Auto Termination. If this is set to 0 minutes, a terminated visit will be deleted instead.
- Time for Nightly Termination
- This is the specific time the Auto Termination process runs each day. This should be set to a later time in the day (e.g., 11:30pm) to prevent actual in-progress visits from being affected.
- This is the specific time the Auto Termination process runs each day. This should be set to a later time in the day (e.g., 11:30pm) to prevent actual in-progress visits from being affected.
- Send Email Notification to Student / Center Admin
- Toggling these options will send an email to the student and/or center admin letting them know that the student wasn’t logged out. If Center Admin is chosen, additional email addresses can be CC'd in the box below. "Center Admin" refers to the email address entered in [Your Profile] > Prefs > Emails > Profile Email Address.
- Toggling these options will send an email to the student and/or center admin letting them know that the student wasn’t logged out. If Center Admin is chosen, additional email addresses can be CC'd in the box below. "Center Admin" refers to the email address entered in [Your Profile] > Prefs > Emails > Profile Email Address.
- Delete visits waiting (not started)
- If a 'Waiting' status visit reaches the auto-termination window, you can choose if it's terminated normally (unchecked) or deleted (checked).
- If a 'Waiting' status visit reaches the auto-termination window, you can choose if it's terminated normally (unchecked) or deleted (checked).
- Terminations apply to Work Visits
- If you would like to also terminate work visits, you can check this box and define a different threshold and adjusted time.
- If you would like to also terminate work visits, you can check this box and define a different threshold and adjusted time.
- Termination deletion email & Termination modification email
- These allow you to override the default email that sends to students when their visit is automatically terminated. You can modify the deletion and the modification email independently of each other, leaving these blank is also safe as the system will use a default template in that case.

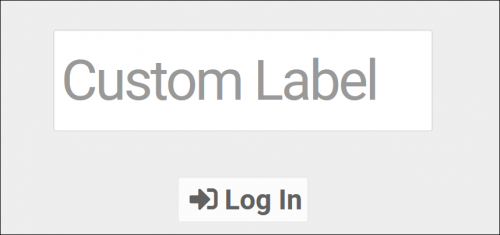
- KIOSK Enter ID label
- Changes the text shown in the Log Listing/Kiosk “Enter ID” box.

- Batch KIOSK Enter ID label (IDs only)
- Changes the text shown in the Batch Visit QR Code "Enter ID" box.

- Log out of this profile when student logs in to another profile
- If enabled, when a student logs into Center 1, then logs into Center 2, their visit in Center 1 will be automatically concluded.
- If enabled, when a student logs into Center 1, then logs into Center 2, their visit in Center 1 will be automatically concluded.
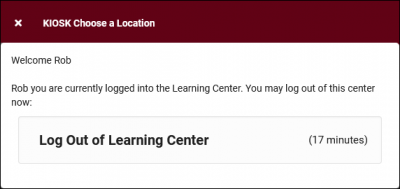
- Show total visit minutes when logging out
- This will show the visit duration in the relevant center during logout.

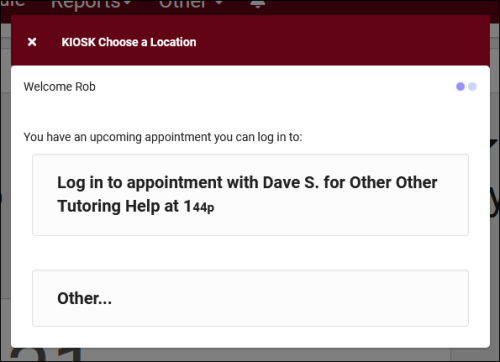
- Show Other Choice when logging in to single center even with appointment
- If enabled, students will be able to login to the center for a purpose other than their appointment during the login process. Otherwise, TracCloud will assume they are logging in for their appointment (i.e. selecting the first option in the screenshot below automatically).

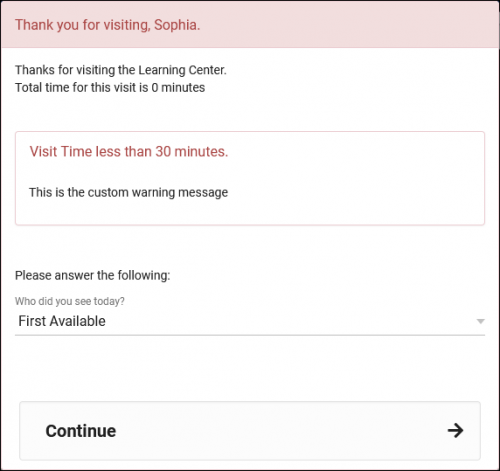
- Warn user if visit time is less than (minutes) & Warning message to display
- If enabled, the staff member logging a student out of a visit that hasn’t lasted the specified amount of time will receive a notice as seen in the screenshot below. This message also supports Twig tags for displaying student data (see our dedicated Twig article), and can be previewed with the “Preview” button so you know what your changes will look like.

- Allow user to cancel logout
- Provides the ability to cancel during the student logout process, to keep the student logged in. This only applies when trying to logout within the time limit set for Warn user if visit timeless than (minutes) when logging out.
- Provides the ability to cancel during the student logout process, to keep the student logged in. This only applies when trying to logout within the time limit set for Warn user if visit timeless than (minutes) when logging out.
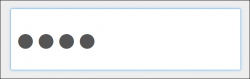
- Obscure student ID (***) on login
- If enabled, IDs entered on the log listing will be obscured.

- Auto lock visits older than (days)
- This preference allows you to prevent visit records from being modified after a specified period of time. This applies to all user groups modifying visits in this profile, with the exception of SysAdmin users.
Custom kiosks can be configured for specific visit scenarios. For example, if one of your kiosks is only going to be used for a specific Center/Reason combination, you can use a Custom Kiosks to make sure students are logging in with those fields predetermined. You can also select a Location, Consultant, Section, and even IP address zone.

These custom kiosks can be accessed from the same menu as your standard center kiosks. They will appear in the bottom half of the list, separated by a horizontal line. The only visual difference within the kiosk is that any fields preselected in the custom kiosk menu won’t show up during student logins, as the visits will already be assigned to that Center/Reason/Consultant/Location.
Allow Only Custom KIOSKs for Logging disables the preset center kiosk options that you would see by default, only allowing you to open custom kiosks.

In addition to standard kiosk functionality, custom kiosks also allow you to create static QR codes that your staff can reuse with a rotating confirmation code.
- Static QR Codes expire
- Choose how frequently the QR code expires, daily or weekly.
- Choose how frequently the QR code expires, daily or weekly.
- Previous Codes Overlap Time
- Add a buffer allowing "expired" QR codes to be used after a new code is generated.
- Add a buffer allowing "expired" QR codes to be used after a new code is generated.
- Round Signin to Nearest
- Allows TracCloud to automatically round logins to the nearest 15, 30, or 60 minutes. The purpose of this is to emulate batch visits, where the time would be static.
- Allows TracCloud to automatically round logins to the nearest 15, 30, or 60 minutes. The purpose of this is to emulate batch visits, where the time would be static.
Within each custom kiosk, you will then find a Static QR Code button. Clicking this opens the following form.

- Activate Static QR Code
- Enable or disable this QR code.
- Enable or disable this QR code.
- Confirmation Code
- This is the current confirmation code for this QR code. Students will need to enter this value after scanning, and this value will expire based on your preference in Static QR Codes expire. If you're creating a QR code for the first time, this code (and expiration date) will need to be set manually. Going forward, it will be updated daily/weekly automatically. If a consultant is linked to the custom kiosk, they will automatically receive new confirmation codes in an email.
- This is the current confirmation code for this QR code. Students will need to enter this value after scanning, and this value will expire based on your preference in Static QR Codes expire. If you're creating a QR code for the first time, this code (and expiration date) will need to be set manually. Going forward, it will be updated daily/weekly automatically. If a consultant is linked to the custom kiosk, they will automatically receive new confirmation codes in an email.
- Expiration Date
- The expiration date of the related code. This code will not be automatically updated until this date is reached (or if the code will expire within the next date period), a manual expiration date can be set further into the future than 1 day/week.
- The expiration date of the related code. This code will not be automatically updated until this date is reached (or if the code will expire within the next date period), a manual expiration date can be set further into the future than 1 day/week.
After a student scans the QR code, they will be prompted to enter the confirmation code followed by their ID. The login process is the same as a normal kiosk from this point onward.

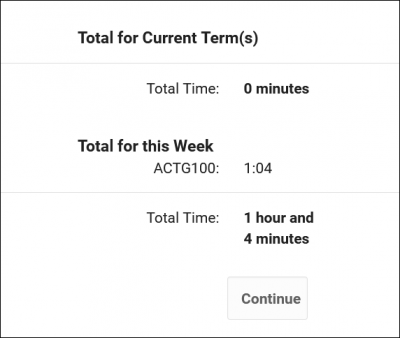
When students log in or out of a center, Time Check will allow them to view how many visit hours they have accumulated within a given time frame. This feature is typically utilized in athletic centers, where students may have a required hours per week or semester. Within these settings, you will be able to manage and adjust the date range of the required hours as well as what totals are displayed to the student, and even a custom message.

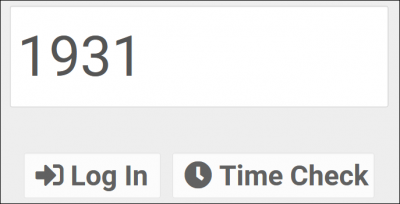
- Time check Available
- If checked, will enable the time check option for the profile. This adds an additional “Time Check” button to the Kiosk login page, which allows users to quickly check their past visit time from a Kiosk.


- Show Semester totals
- Will display the students total time based on the current terms active date range.
- Will display the students total time based on the current terms active date range.
- Show Week Totals
- Will display the students total time based on a week date range. If checked, an additional drop down will appear to the right titled Week Starts On. This option will allow you to adjust the day of week that the Time Check utility will calculate the hours for. As an example, selecting Tuesday from the drop down will calculate hours from Tuesday to Monday.
- Will display the students total time based on a week date range. If checked, an additional drop down will appear to the right titled Week Starts On. This option will allow you to adjust the day of week that the Time Check utility will calculate the hours for. As an example, selecting Tuesday from the drop down will calculate hours from Tuesday to Monday.
- Show Required Time Per
- There are three options available:
None – Will not display Required Hours or difference
Weekly – Will show Required Hours and difference based on a one-week time frame.
Semester - Will show Required Hours and difference based on the active semesters term date range.
- There are three options available:
- Required Time Field
- The Required Hours utility will point to a custom field in the student’s profile. In order to use Required Hours, you will need to point to the custom field designated on the student's profile where their required hours are stored. Required hours can be added to a list of students, or manually added to each individual student’s account. If needed, required time can also be included in your data import.
- The Required Hours utility will point to a custom field in the student’s profile. In order to use Required Hours, you will need to point to the custom field designated on the student's profile where their required hours are stored. Required hours can be added to a list of students, or manually added to each individual student’s account. If needed, required time can also be included in your data import.
- Required Time in
- Select the format of the Required Hours field selected, hours or minutes.
- Select the format of the Required Hours field selected, hours or minutes.

- Show On Login, Show On LogOut, Show On Student Dashboard
- Determines where the Time Check utility will appear for students.
- Compute totals for all profiles
- By default, Time Check will only compute the total time in centers related to the linked profile. If this option is checked, that search will be expanded to all profiles.
- Timecheck Message Footer
- This will allow the profile to customize the message that displays across the bottom of the Time Check screen. This footer can utilize Twig to personalize the message and add in important information as seen below.
