Changing Semesters in TracCloud
The process of activating new terms for your upcoming semester in TracCloud is designed to be as straightforward as possible. The steps below outline the process and everything you have to do to prepare and execute a semester changeover. As always, if you run into any trouble, feel free to reach out to us at helpdesk@go-redrock.com.
Step 0. Import New Term Data
Before you can move forward in TracCloud, your IT will need to first send the new semester data to TracCloud via your import process. Once this has been completed, you can move forward to Step 1. More information.
Step 1. Activate Your New Term
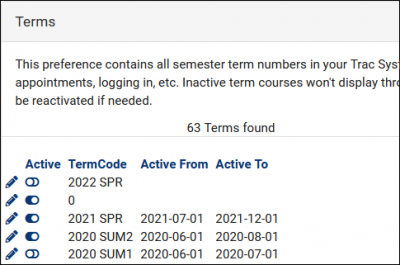
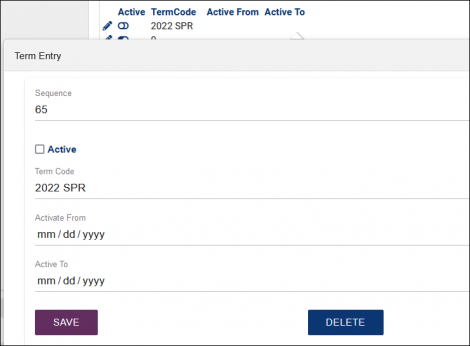
Now that your new term data exists in TracCloud, we have to tell the system which terms are active. Go to Other > Other Options > Preferences > Terms. You should see your new term here in a deactivated state (first/left screenshot). Click the pencil icon for your new term, this will open a Term Entry window where you can begin to make changes (second/right screenshot).
Make sure Active is checked, and add the Active From and To dates to the relevant fields as well (these are utilized for "This Term" date ranges in reports and scheduling rules). You may also want to deactivate your prior term at this time as well, or you can deactivate it later if preferred. Multiple terms can be active at once.
2. Process Activations & Process Specialties
After activating your new term (and deactivating the old, if applicable), click the button in the Terms settings labelled Process Activations. This button will activate registrations for this term and deactivate registrations that are no longer relevant. Click this, then click Process Specialties to update your Course Lists. Specialties can also be updated from the Course List Listing, which has the same effect as the option here.

3. Additional Date Fields (Optional)
There are a few locations where semester-relevant date fields may exist. Your system may or may not be utilizing these, but here's a list just in case.
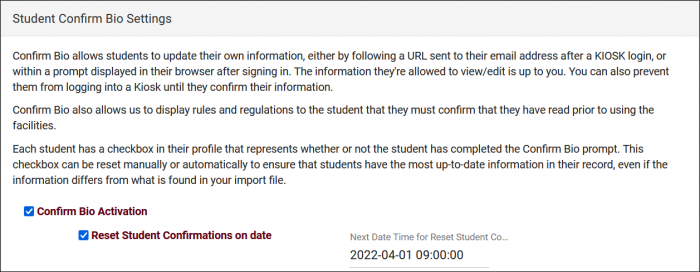
- Student Confirm Bio: Other > Other Options > Preferences > Student Confirm Bio Settings > Reset Student Confirmations on date
- Staff Confirm Bio: Other > Other Options > Preferences > Staff Confirm Bio Settings > Reset Staff Confirmations on date
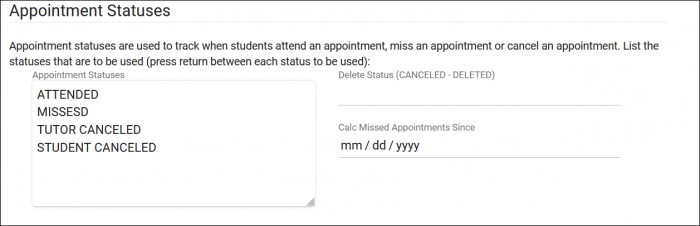
- Global setting: Other > Other Options > Preferences > System Preferences > Calc Missed Appointments Since
- Profile-specific setting: Other > Other Options > Profiles > [Your Profile] > Prefs > Scheduling > Appointment Status and Management > Calc Missed Appointments Since
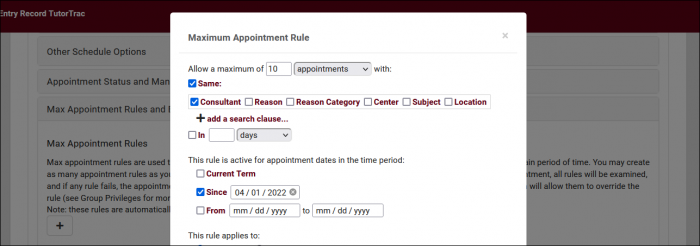
- Other > Other Options > Profiles > [Your Profile] > Prefs > Scheduling > Max Appointment Rules and Blocks > [Your rule] > Since/From date
- Other > Other Options > Announcements > [Your Announcement]

And that's it! You're all set for the new semester.
More Questions?
We hope that you found this article helpful, and as always if you have any questions about this or any other features, please feel free to let us know by emailing Helpdesk@go-redrock.com or by submitting a ticket.
Thank you for your continued support!
|


