|
|
WhiteBoard
|
|
Whiteboard is an optional AdvisorTrac / TutorTrac module that allows your consultants and students to have live online tutoring sessions. This module can be utilized in two ways. The first is a virtual classroom environment, where any number of students and tutors can be in the same Whiteboard room utilizing a text chat and document upload feature.
The second option is LiveDoc, this replaces the Document upload feature in Appointment Entry. So instead of students and consultants manually uploading and downloading documents, both will have access to a LiveDoc room where the document can be edited and shared back-and-forth between the student and consultant.
|
Access to Whiteboard
|
|
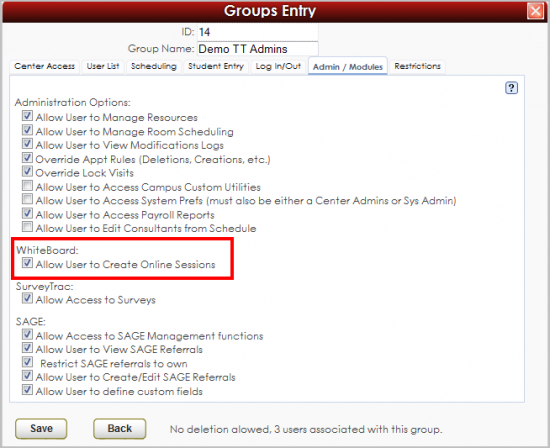
Whiteboard is activated by support once it has been purchased. To have the ability to administer and create these sessions, the user account must have the Allow User to Create Online Sessions option checked in their preferences.
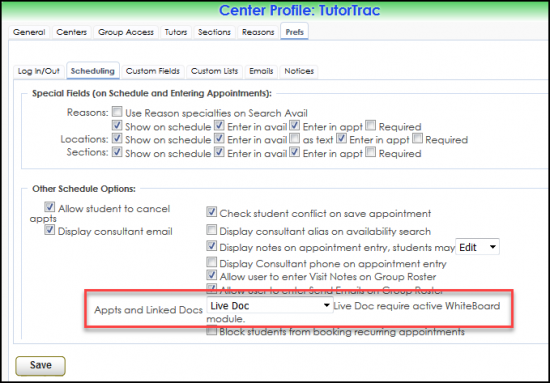
Then you'll need to enable it in your center profile settings. Go to Trac Navigation > Search Glass > Center Profiles > [Your Center] > Prefs > Scheduling > Other Schedule Options. Change "Appt and Linked Docs" to "Live Doc", then save.
|
As the Administrators
|
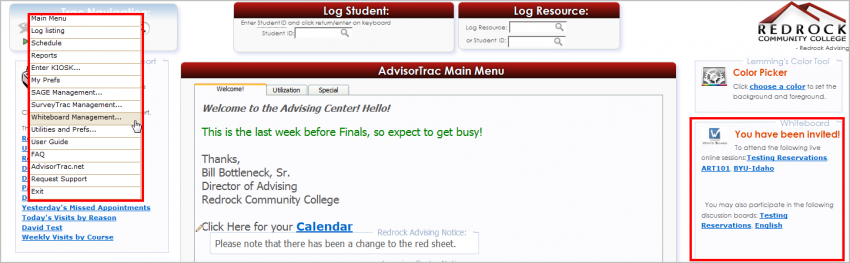
When the Allow User to Create Online Sessions preference has been added the Administrator will have the access to Whiteboard Management from the Trac Navigation.
|
Other Users
|
Other users who are attending the sessions or discussions, including students, tutors, advisors, and administrators, will access Whiteboard through invitation links on their main pages.
|
Listing Page
|
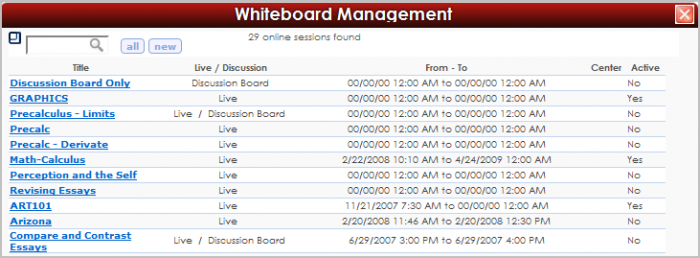
| When the Whiteboard Management is selected from the administrator main menu, the Whiteboard Listing page is displayed. Sessions shown on the listing page are sorted by title. Information on whether the session is an Live Online Session or Discussion Board or both, the from and to dates and times for the session, the center the session is limited to (if any), and whether the session is active or not is also displayed.
|
Session Screen
|
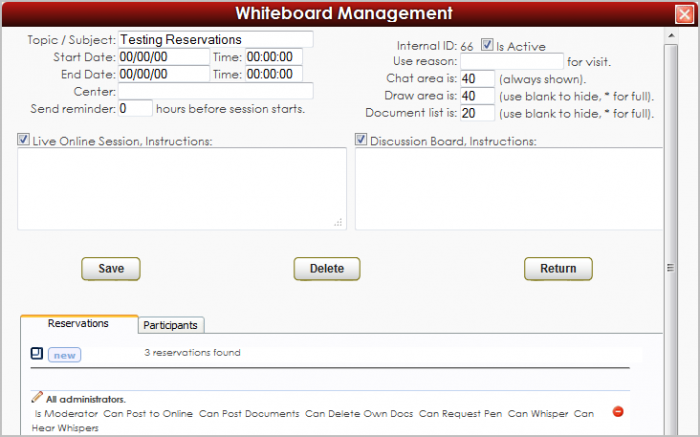
| To create a new session, select New and this will open a new Session Listing page. The session screen is made up of three sections: the top half is the session setup, then the Reservation Tab, and Participant Tab. The first option on the setup screen is the Active check-box near the top left. Only active sessions can be accessed by users.
|
|
Session Setup
- Topic / Subject
- Each Session may be titled for quick and easy identification. The title is a searchable field from the Whiteboard Listing page and this Topic/Subject will appear on the students, tutors, advisors, and administrators, Whiteboard invitation links on their main page.
- Start/End Date and Time
- The session can be controlled by any start and end dates and times entered. These fields are optional.
- Center
- Each center may have individualized Whiteboard Sessions. This field assigns the session to a particular center. If it is assigned to Center A, then Center A users may access session.
- Send Reminder
- If you enter a number in the box invitees will receive a reminder email at the time specified.
- Use Reason___ for visit
- This allow you...
- Chat Area is, Draw Area is, and Document listing is
- The blank boxes can be used to set the width of the three different areas of the live online session screen. The values can be entered in pixels (such as ‘200’) or percent (20%), or use an ‘*’ for full. Setting the three boxes to '20, 0, 20' will split the screen into half text chat and half document upload.
- Live Online Session, Instructions
- Is a real-time meeting through the internet with chat, diagrams, documents, and participant editable workspace. Check the box if you want the session to be available in this manner, you can include instructions in the field below.
|
Reservation Tab
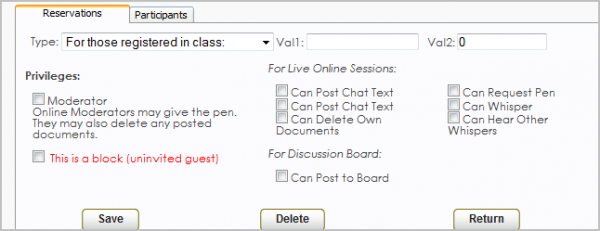
Only users with reservations will have access to the session / discussion board.
- Type:
- This allows you to choose ...
- For Those Registered in Class – Input Course name
- A Specific Student (ID) – Input a specific student's ID
- Consultant (Name) – Input the consultant's login ID
- An Admin (User Name) – Input the admin's username.
Privileges:
- Moderator
- Allows the user to delete documents.
- This is a block (uninvited guest)
- Will prevent the specified user from accessing the online session.
For Live Online Session:
- Can Post Chat Text
- Allows a user to participate in the real-time chat that is part of a live online session.
- Can Delete Own Documents
- Allows a user to delete their uploaded documents.
- Can Whisper
- Allows the user to send private chat messages.
- Can Hear Other Whispers
- Will allow the user to see all private chat messages being sent.
|
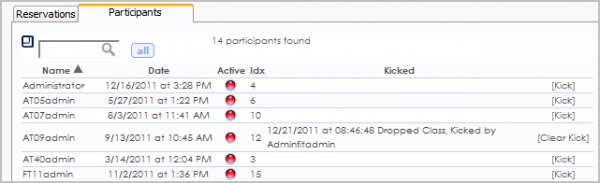
Participant Tab
The bottom section lists current participants, you can boot participants with the Kick link, (you will need to specify a reason) or allow someone access to the section who was previously removed with the Clear Kick option. This list is sorted alphabetically and notes when the user joined, whether they are currently active in the session, and the order they joined in (index column)
|
Live Online Sessions
|
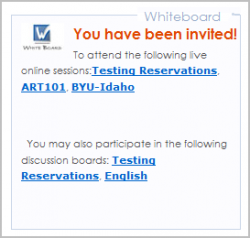
Sessions are accessed through the links under the section titled You have been invited on the main page of their accounts.
|
Session Layout
|
Clicking on the blue session title link next to To attend the following live online sessions: will open a new window with the online session application in the browser.
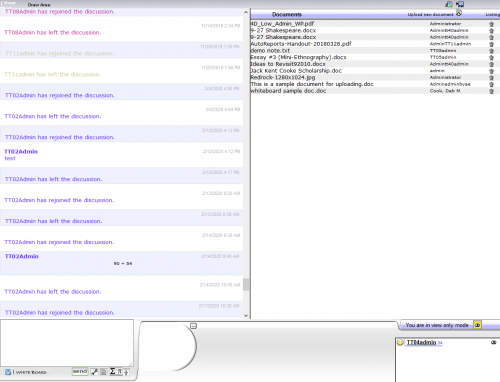
If all sections were included in the session setup, the screen will be divided into four sections: chat window, chat entry, document listing, and emoticons.
- Chat
- Chat is a live text conversation between session participants. The chat window displays the most recent messages, the chat entry box is below.
- The chat entry box has a blank entry field for entering your message, the send message button is used to post the message when complete.
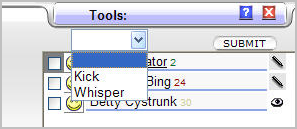
- The wrench button, only accessible by the moderator, will change the center bottom of the screen to a tools section you can use to kick or whisper participants by putting a check next to their name and pressing submit.
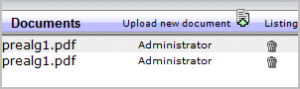
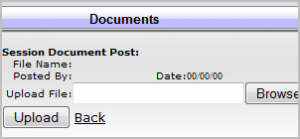
- The paper icon with the bent corner will allow users to post and delete documents if they are permitted to do so, this screen will appear in the bottom center and provides the same functionality as the document list in the top right of the screen. Documents can be uploaded with the Upload new document link. Users must browse to the document on their local machine and then click upload. Documents can be deleted with the trash can icon next to the document and username.
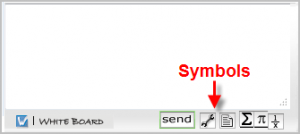
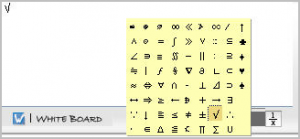
- The next two icons provide symbols to insert into the chat window when the mouse cursor is brought over the icon. Clicking a symbol places it in the chat window.
- The ‘1’ over ‘x’ icon allows the use of mathematical symbols in chat. It will open a new window where formulas can be entered.
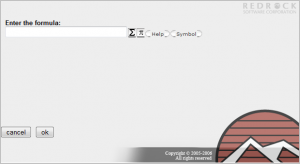
- The symbols to the right of the formula entry box provide some common symbols. The help button provides basic instructions for common formulas and the symbol button provides a list of word commands to create other symbols.
- When the formula is entered it will display as a preview, hit OK to send it to the chat entry screen.
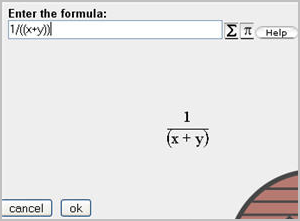
- Hitting send in the chat window will cause the code necessary for the formula to display flash briefly in the chat entry field, then the formula will be posted to the chat window.
- The chat window is color coded to distinguish messages from different users. Time and date stamps as well as instructions entered during session setup will appear at the top. The most recent messages appear at the bottom, a scroll bar along the right allows users to scroll up and see older messages.
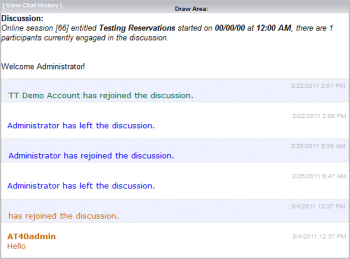
- The View Chat History option at the top of the chat window will display the chat messages that have transpired during the course of the session in text form in a new window.
Advanced commands for moderators
These commands are entered in the text chat window. Once sent, Whiteboard will perform the command. The message will not be shown to other users.
CMD:SEQUENCE SHOW
CMD:SEQUENCE HIDE
- Hide or show the message sequence numbers in the chat history area. This is used to process deleting message items by using the message sequences.
CMD:COLORcolorName
- ColorName might be RED, BLUE, GREY, etc. This causes the text of the message to appear as a specific color (overriding what would normally be your color)
Emug=’emugName’
- Change your eMug (emoticon) to the named eMug. Values are: e300 thru e312.
CMD:DELETE messageID
CMD:DELETE fromMsgID-toMsgID
- Deletes the one message or the range of messages (from/to) identified by the message sequence numbers (see CMD:SEQUENCE command)
- The messages will not show but can be reviewed.
CMD:UNDELETE messageID
CMD:UNDELETE fromMsgID-toMsgID
- Opposite of DELETE, the messages identified will be restored to visibility.
CMD:CLEAR
- Similar to DELETE, but will hide all messages from everyone (not based on the message ID).
CMD:UNCLEAR
- Opposite of CLEAR, will show all messages from everyone (not based on the message ID).
KICK[people]:Reason
- people can be a single person’s ID or it can be multiple people separated by “,” (commas). This will kick the person or persons and disallow that person from returning to the discussion.
UNKICK[people]
- This unkicks a previously kicked person or persons.
MODERATOR:message
- Only moderators will see the message entered.
WHISPERTO[people]:message
- people can be a single person’s ID or it can be multiple people separated by “,” (commas). This will generate a message that only the listed people would see or any people that can hear other whispers. The person whispering may also see their whispered message appear in the chat area.
|
Scheduled LiveDoc Online
|
|
LiveDoc replaces the Document upload feature in Appointment Entry. So instead of students and consultants manually uploading and downloading documents, both will have access to a LiveDoc room where the document can be edited and shared back-and-forth between the student and consultant. The consultant will always be able to revisit this room and view the latest version of the document, while the student only has access until the appointment ends.
|
Accessing a LiveDoc Session as a Consultant
|
|
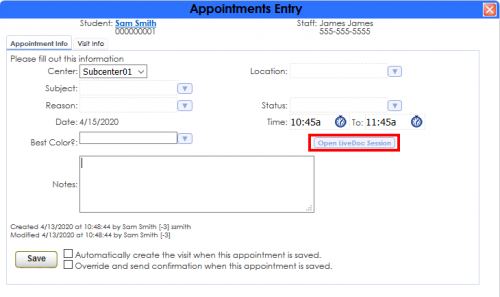
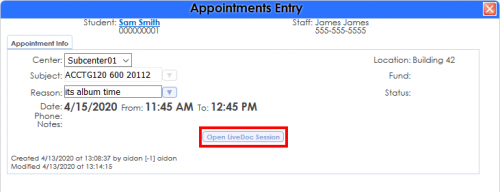
As a consultant, you would access your LiveDoc Session by going to your schedule, clicking on the appointment, then clicking on the "Open LiveDoc Session" button.
|
Accessing a LiveDoc Session as a Student
|
|
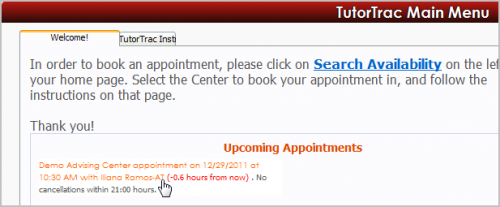
As a student, you would access the LiveDoc session by logging into the Trac System, clicking on the appointment within "Upcoming Appointments" on the main menu, and clicking "Join LiveDoc Session".
|
Utilizing the LiveDoc Editor
|
|
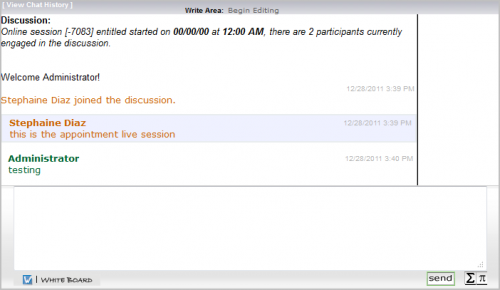
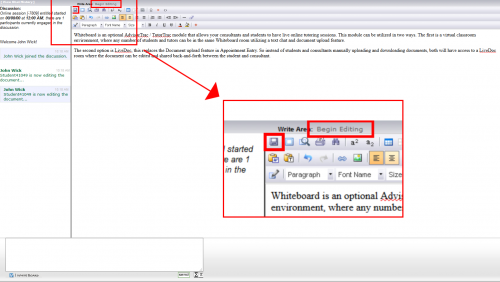
Once the LiveDoc session is joined, the student and consultant will see a text chat on the left side, and an empty space on the right. If the student has a document ready to share, they would click the “Begin Editing” button along the top of the window, copy/paste the document contents into the LiveDoc editor, then click the save icon to share it with the consultant. At this point, the consultant will see the document on the right side of the screen. To begin editing, they would click the same “Begin Editing” button, then save when they’re done.
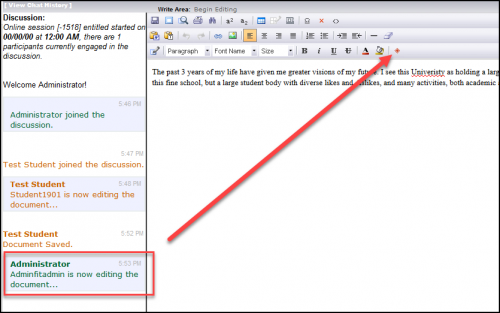
The consultant can also make changes to the document such as highlighting words, or –if they click on red diamond– adding proofreading symbols to the document.

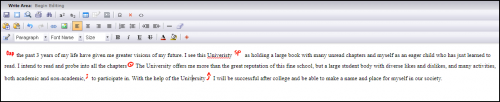
This is what the result would look like. The consultant would then click on the save icon to hand it back to the student.
|
|


