TracCloudProspectStudents
From Redrock Wiki
Prospective Students
TracCloud offers multiple ways for prospective student accounts to be created, giving new students the opportunity to visit and book appointments prior to being included in your student information system. This requires some configuration in your global preferences before this feature can be used.
Other > Other Options > Preferences > Prospective Student Settings

- Prospective Student Activation
- This enables the "Prospective Student Request" option on the students listing for staff with the appropriate permissions. See the next section for information on managing group permissions.
- This enables the "Prospective Student Request" option on the students listing for staff with the appropriate permissions. See the next section for information on managing group permissions.
- Prospect Email
- Configure the email/text message that students receive after signing up as a prospective student. The link they receive in this email will also allow them to login to TracCloud later. If left blank, the subject will be "New Student Email" and the body will be "Welcome to the Campus, click the link below to begin setting up your profile record."
- Configure the email/text message that students receive after signing up as a prospective student. The link they receive in this email will also allow them to login to TracCloud later. If left blank, the subject will be "New Student Email" and the body will be "Welcome to the Campus, click the link below to begin setting up your profile record."
- Name of Link on Email
- Override the hyperlink name that students click on to complete sign-up. Defaults to "Click here to fill out a profile" if left blank.
- Override the hyperlink name that students click on to complete sign-up. Defaults to "Click here to fill out a profile" if left blank.
- Instructions to Student on Entry Form
- The student will see this text above the fields to fill out on the prospect student entry form.
- The student will see this text above the fields to fill out on the prospect student entry form.
- Chosen Fields to Display to Student
- These are the fields that your students will be allowed to set for themselves from the link they receive during sign-up. Fields can be left blank by the student unless 'Required' is checked.
- These are the fields that your students will be allowed to set for themselves from the link they receive during sign-up. Fields can be left blank by the student unless 'Required' is checked.
- Chosen Fields to Display to Staff when creating a Prospect Request
- These are the fields that staff can fill out while creating a prospective student request from the students listing.
- These are the fields that staff can fill out while creating a prospective student request from the students listing.
- Title of Submit Button
- The name of the save button on the prospect student entry form.
Staff can begin the process of creating prospective student accounts from the students listing if they have the appropriate permissions. To provide this access to a group, go to Other > Other Options > Groups > [The group you want to update] > Student / Visit tab > Check 'Allow user to create prospective student requests' > Save.

Once enabled, users in this group can navigate to the Students Listing, click on the hamburger menu, and choose "Prospective Student Request." This will open a pop-up menu where the contact method and address can be chosen. The student will receive a link at this address to complete their profile. Additionally, the staff can fill in extra student fields based on what was chosen in "Chosen Fields to Display to Staff when creating a Prospect Request" above.

For more information on what happens next, take a look at the "Completing Sign-up as a Student" section below.
Enabling TracCloud's prospective student functionality on the kiosk gives your students an easy way to sign themselves up for an account. The log listing equivalent option is just as easy for your staff to do the same on behalf of the student.
This feature can be enabled by going to Other > Other Options > Profiles > [Your Profile] > Log In/Out > Check "Allow User to Generate a Prospect" > Save. Once enabled, the following button will be available on the kiosk and log listing pages for this profile's centers.

Clicking this option will display a prompt to either log in (having already signed up as a prospective student) or create a new prospect (signing up for the first time).

From the perspective of a new prospective student, they'll click the Create Prospect button and choose to either sign up via email or text. Following through with this, they will receive a link in their inbox with instructions on what to do next. See the next section for more information on this.

After completing their profile, they can return to the kiosk and choose Prospect Log In. The student must use the same phone number/email address that was originally used to sign up.

The following page is the same as what an imported student would see during login. If your center profile requires subject, make sure that you have non-enrolled courses available as prospective students will not have any enrollments.

After a student signs up or is signed up by a staff member, they'll receive a link to finish setting up their prospective student profile in their inbox. Following this link will require that they enter a security code sent to the same address/phone number.


After validating their login, the student will see a form where they can fill in the fields you've specified in your global Prospective Student settings above. After completing the form and saving, the student is taken to the dashboard just like any other student. This includes being prompted to complete the confirm bio form if enabled. After this step is complete, the prospective student will be able to login on kiosks/log listings.

Prospective students have the same permissions as imported students by default, including the ability to search for and book appointments. If you want to restrict or give special access to prospective students, take a look at the next section in this article.

Any student records created through the prospective students process are identified with a unique "Other Status" of "Prospect". Unlike other students who aren't in your import files or don't have registrations, any students with this other status will be kept active (even for student accounts where the other status was manually set to "Prospect").

On top of keeping their profiles active, this also allows you to easily search for these students to send batch emails, run reports, or create dynamic lists. Keep in mind that lists can be used to exclusively show or hide certain records, such as:
- Can be shown to specific students based on list.
- Can be shown to specific students based on list.
You can even personalize the Welcome Messages for prospect students with Twig ({% if Student.OtherStatus == "Prospect" %})

The Prospect Requests Listing allows you to view all prospect requests that have been submitted in your TracCloud instance, including those that have not yet been completed. To give a permission group access to this listing (including the SysAdmin group), go to Other > Other Options > Groups > [The group you want to update] > Admin / Modules > Add 'Prospect Requests' under 'Table Access' > Save.
Other > Listings > Prospect Requests.

Within each request, you can view when it was sent, what contact method was chosen, and the link/validation code if you need to help a student complete their profile. These requests can also be manually resent from this page if needed.

Hamburger Menu
Every listing page in the Trac System features a hamburger menu with utilities to search for or interact with your list of records. Some of these options are specific to a certain listing/record-type, others are shared. The following list includes definitions for the hamburger menu options available on this listing, and how they can be utilized.

- List All
- This option will show all records on the current listing. Some listings have an additional toggle for only showing "Active" records, such as Students and Registrations, which will still override a "List All" search if checked.
- This option will show all records on the current listing. Some listings have an additional toggle for only showing "Active" records, such as Students and Registrations, which will still override a "List All" search if checked.
- Search
- This utility will open a pop-up window unique to each Listing it's present on, allowing you to search your records by a number of different fields.
- This utility will open a pop-up window unique to each Listing it's present on, allowing you to search your records by a number of different fields.
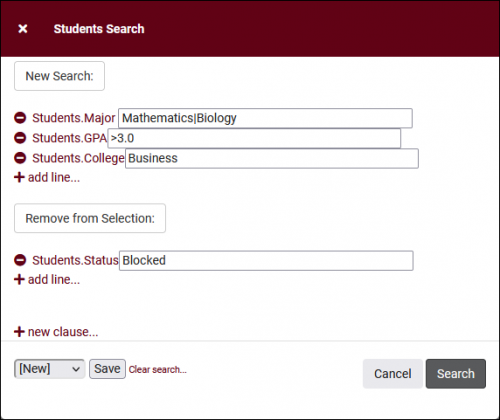
- Power Search
- This option provides a simple but powerful search utility to find the records you need. String together multiple searches, adding or removing results for each. Use Search Symbols to include ranges of data, and Save Searches for later use if needed. The search term 'blankornull' can be used to find all records with a value of nothing ("") or null ().

- Selected...
- The Selection Tool offers several options to filter and manage your records. More information on this feature can be found in its own dedicated article here.
- The Selection Tool offers several options to filter and manage your records. More information on this feature can be found in its own dedicated article here.
- New <Record>
- Allows you to create a new record based on your selected listing.
- Allows you to create a new record based on your selected listing.